Ingredients and steps on one page. Print it, or choose “Save as PDF” in the print dialog.
Sekai Gohan
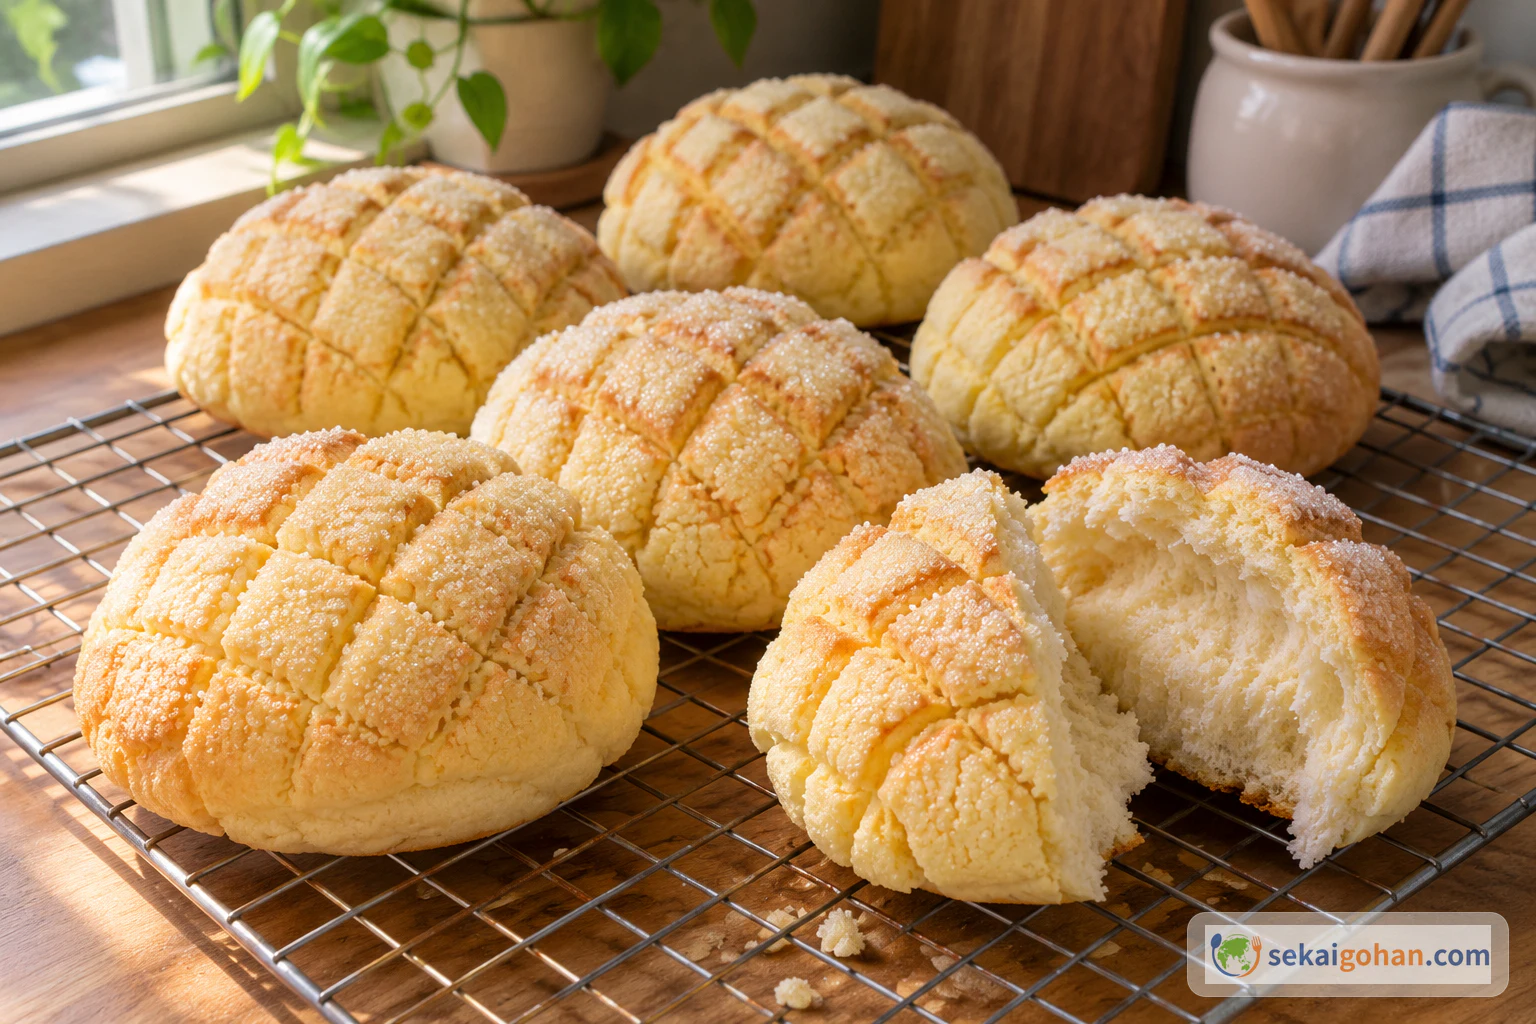
Melon Pan: Japanese Sweet Bun with Crisp Biscuit Crust
Ingredients
Bread dough
| Ingredient | Amount | Role |
|---|---|---|
| Bread flour, plus extra for dusting | 8 oz (225 g) | Structure and spring |
| Cake flour | scant 1 oz (25 g) | A lighter, softer bite |
| Kosher salt (Diamond Crystal) | 1 tsp (½ tsp if using table salt) | Seasoning and steadies the rise |
| Granulated sugar | 3 tbsp | Sweetness and color |
| Instant yeast | 1¼ tsp | Rise |
| Large egg, beaten | 1 (1¾ oz / 50 g out of the shell) | Richness and color |
| Whole milk, at 86°F (30°C) | 3 tbsp + 1 tsp (50 ml) | Moist, tender crumb |
| Water, at 86°F (30°C) | 3 tbsp + 1 tsp (50 ml) | Hydration |
| Unsalted butter, cubed, room temperature | 1¼ oz (35 g) | Soft, fluffy texture |
Biscuit crust
| Ingredient | Amount | Role |
|---|---|---|
| Unsalted butter, cubed, room temperature | 2 oz (60 g) | Crisp, short crust |
| Granulated sugar | 3½ oz (100 g) | Sweetness and the crackled surface |
| Large egg, beaten | 1 (1¾ oz / 50 g out of the shell) | Binds the crust |
| Cake flour, sifted | 7 oz (200 g) | Body of the crust |
| Baking powder | ½ tsp | Lightness |
Topping
| Ingredient | Amount | Role |
|---|---|---|
| Granulated sugar | 2 tbsp | Sparkle and crunch on top; you will have some left over |
Steps
1Mix the bread dough
In a large bowl, combine the bread flour, cake flour, salt and sugar. Add the yeast, beaten egg, milk and water. Stir for about 2 minutes until there is no loose flour and the dough looks shaggy and sticky. Turn it out onto the counter and knead for about 5 minutes, until it starts to pull together into one smoother mass.
2Knead in the butter until a windowpane forms
Press the cubed butter into the dough and knead it in. The dough will turn slippery and messy at first. Keep kneading by hand for about 10 more minutes, until the butter disappears and the surface is smooth and glossy. Pinch off a small piece and stretch it between your fingers. It is ready when it stretches thin enough for light to show through. If it tears, knead 2 minutes more and test again.
Trust the windowpaneThe windowpane test decides how soft the bread will be. Keep testing until the dough stretches thin without tearing.
3Let it rise until doubled
Shape the dough into a smooth ball and set it seam side down in a bowl. Cover it and leave it in a warm place for 1 to 2 hours, until it has roughly doubled. If your oven has a proof setting, 100°F (38°C) works well. To test it, press a floured finger deep into the center. The dough is ready when the hole stays open and does not spring back.
4Make and portion the biscuit crust
While the dough rises, beat the soft butter in a bowl until smooth, then mix in the sugar. Add the beaten egg a little at a time, mixing well after each addition so the mixture stays smooth. Sift in the cake flour and baking powder and mix just until no dry flour remains, then gather it into a ball. It weighs about 14 oz (400–410 g). Divide it into 10 equal pieces of 40–41 g each, set them on a tray and chill for about 10 minutes.
5Divide the bread dough and rest it
Punch down the risen dough to release the gas and weigh it, about 1 lb (460–470 g). Cut it into 10 equal pieces of 46–47 g each and roll each one into a tight ball. Cover the balls with a cloth and leave them at room temperature for 15 minutes.
6Roll out the crusts
Take the biscuit portions from the fridge one at a time. Flatten one, set it between two sheets of plastic wrap and roll it into a round 4 to 4¾ inches (10–12 cm) across. The wrap stops it from sticking to the pin and makes it easy to lift. The round is done when it is even in thickness all the way to the edge, with no cracks around the rim.
7Wrap the bread in the crust
Flatten a ball of bread dough, fold it over on itself and roll it back into a taut round with a firm seam. Lay it seam side up on a crust round, then flip the pair over and ease the crust over the top and down the sides. Leave the bottom of the bread uncovered. The bun is wrapped when the crust hugs the dome smoothly with no gaps at the shoulders.
8Sugar the tops and score the grid
Press the crust side of each bun into the granulated sugar so the whole top is coated. With a bench scraper or a grid stamp, score a crisscross grid about ⅛ inch (3 mm) deep. Space the lines evenly in both directions. Set each bun on the lined baking sheet. The scoring is right when the lines are clear and even but have not cut through to the bread.
Shallow, even linesThe grid is what makes the crust crack neatly. Shallow, evenly spaced cuts let the surface split evenly as the bun rises, so it bakes into a tidy round. Cuts that are too deep tear open in the oven. Cuts that are too faint fill in and vanish.
9Proof until 1½ times the size
Cover the buns loosely so the crust does not dry out, and leave them in a warm place, or in the oven at 100°F (38°C), for about 50 minutes. When they are about halfway there, take them out of the oven if they are proofing inside it, and preheat it to 350°F (180°C). They are ready when they have grown to about 1½ times their size and fine cracks are starting to open between the grid lines.
10Bake to pale gold and cool
Bake on the middle rack at 350°F (180°C) for 13 to 15 minutes, until the crust is a pale golden color. If one side colors faster, turn the tray halfway through. Do not let them go darker, because an overbaked crust turns hard rather than crisp. Move the buns to a wire rack and let them cool for about 5 minutes.
Stop at pale goldThe color of the crust tells you when the buns are done. Ovens run differently, so watch from the 13-minute mark. A light golden crust stays crisp and short, while a deep brown one bakes hard and loses the contrast with the soft bread inside.