Ingredients and steps on one page. Print it, or choose “Save as PDF” in the print dialog.
Sekai Gohan
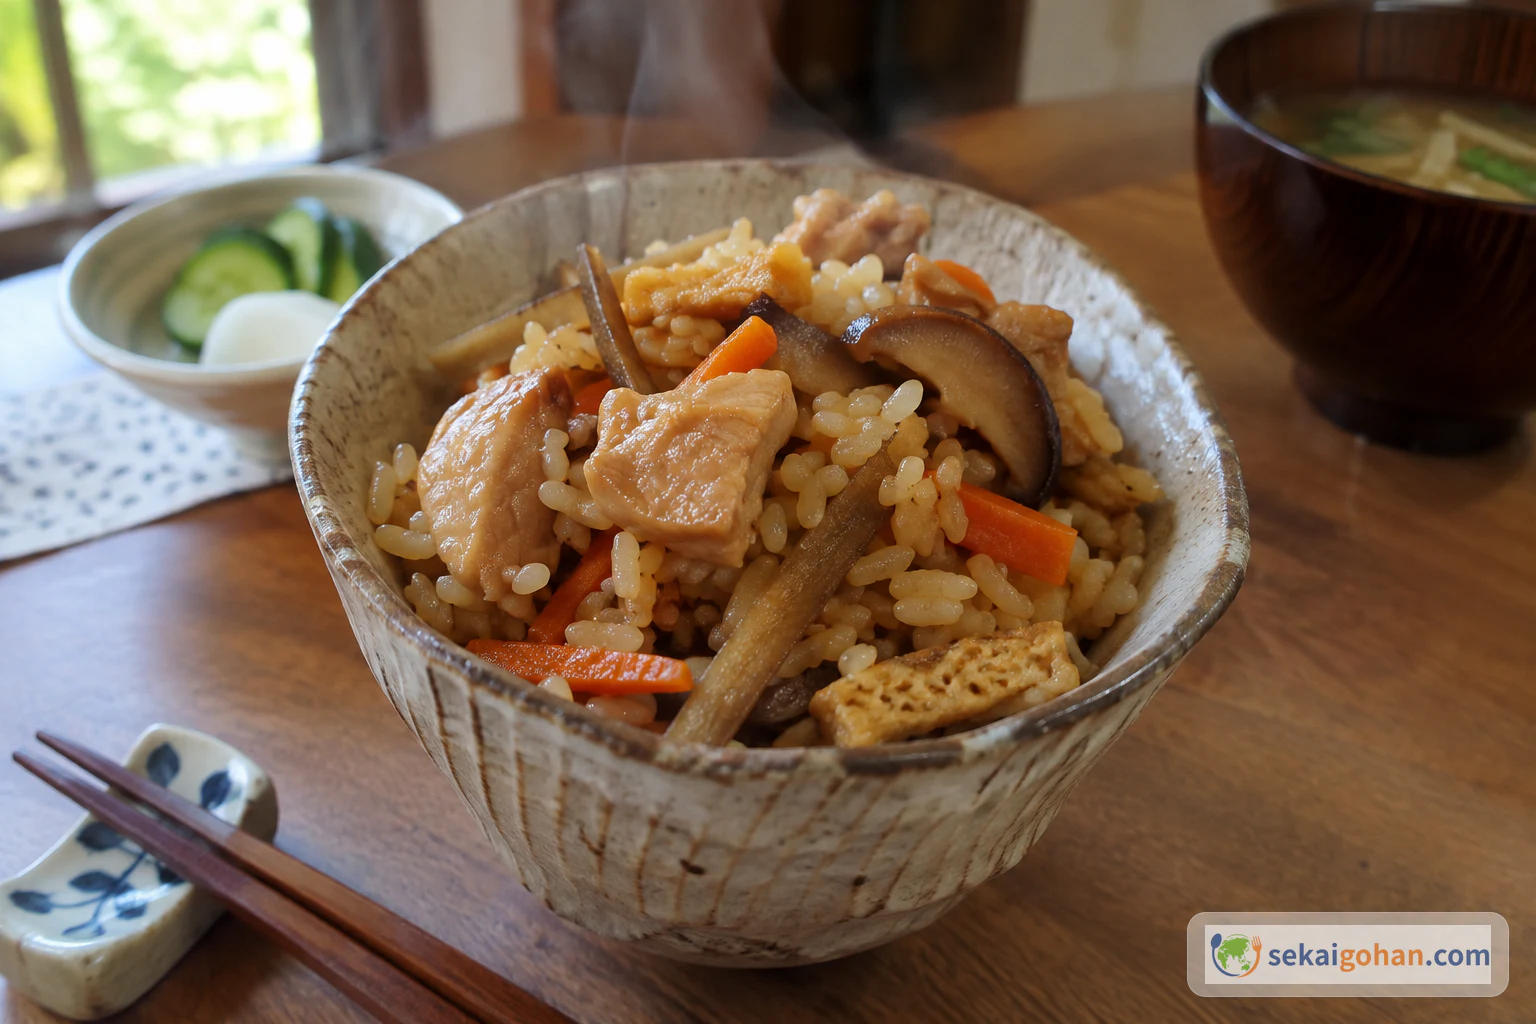
Takikomi Gohan: Japanese Dashi Rice Cooked with Chicken and Shiitake
Ingredients
| Ingredient | Amount | Role |
|---|---|---|
| Japanese short-grain white rice (uruchi-mai) | 1½ cups (360 ml / 300 g), or 2 rice-cooker cups | The base that absorbs the dashi |
| Boneless, skinless chicken thigh | 4¾ oz (135 g) | Savory depth and a little fat |
| Dried shiitake mushrooms | ½ oz (15 g), about 3 | The main aroma, plus the soaking liquid |
| Water for soaking the shiitake | ½ cup (120 ml) | Becomes shiitake dashi |
| Dashi (awase dashi, dashi pack, instant dashi or vegan dashi) | Enough to bring the strained shiitake liquid to 1½ cups (360 ml) | The cooking liquid |
| Mirin | 1½ tbsp | Sweetness and gloss |
| Soy sauce | 1½ tbsp | Salt and aroma |
| Konnyaku (konjac) | 3 oz (85 g), ⅓ of a pack | Springy, chewy bite |
| Aburaage (fried tofu pouch) | 1 sheet (¾ oz / 20 g) | Richness |
| Gobo (burdock root) | 1 oz (28 g), about a 4-inch (10 cm) piece | Earthy aroma and crunch |
| Carrot | 2 oz (57 g), about a 3-inch (7.5 cm) piece | Sweetness and color |
| Mitsuba or green onion, chopped | As needed | Fresh aroma at the end |
Steps
1Rinse, soak and drain the rice
Put the rice in a large bowl, cover it with water, swirl it with your hand and pour off the cloudy water. Repeat this a few times, then cover the rice with fresh water and soak it for 20 to 30 minutes. Tip it into a fine-mesh sieve and let it drain for at least 15 minutes. Use plain water only at this stage. The rice is ready when the sieve has stopped dripping and the grains look opaque white.
2Rehydrate the shiitake and build the dashi
Put the dried shiitake in a small bowl with ½ cup (120 ml) of water and set a smaller bowl on top to keep them submerged. Leave them for 15 minutes. Lift them out, cut off the stems and slice the caps thinly. Strain the soaking liquid through a fine strainer into a measuring cup, then add dashi until it reaches 1½ cups (360 ml). The caps should bend easily without cracking, and the liquid should be amber.
3Blanch the konnyaku and aburaage
Bring a small saucepan of water to a boil. Boil the konnyaku for 1 minute to take away its smell, then lift it out and boil the aburaage for 1 minute to rinse off the excess oil. Drain both and cut them into thin strips. The konnyaku should smell clean, and the aburaage should lose its oily sheen.
4Scrape and shave the burdock
Scrape the skin off the burdock with the back of your knife. Cut a cross into the thick end, then shave the root into thin slivers, turning it as you go, as if you were sharpening a pencil. Let the slivers fall straight into a bowl of cold water and leave them to soak. You want thin curls floating loosely in the water.
Scrape, never peelBurdock's flavor sits just under the skin. A vegetable peeler takes it all away, while the back of a knife removes only the dirt and the thin outer layer.
5Cut the carrot and chicken
Halve the carrot lengthwise, cut it into thin diagonal slices, then cut the slices into thin matchsticks. Hold your knife at a 45-degree angle to the board and slice the chicken thigh into pieces about ¾ inch (2 cm) wide. Slicing at an angle gives each piece more surface, so it cooks faster and takes in more flavor. The chicken should be thin, flat pieces with wide cut faces.
6Season the rice in the cooker pot
Put the drained rice in the inner pot of the rice cooker. Add the mirin and soy sauce, then pour in the 1½ cups (360 ml) of shiitake dashi. Stir once to mix the seasoning through, then smooth the rice into an even, flat layer. The surface should lie level under the liquid, with no mounds.
Season only at the last minuteSoy sauce and salt slow down how fast rice takes up water. Rice left sitting in seasoned liquid ends up with a hard core, so the cooker goes on as soon as the toppings are in place.
7Lay the toppings on top and start cooking
Drain the burdock. Spread the toppings over the rice in an even layer, firmer ones such as burdock, carrot and konnyaku first and softer ones on top. Do not stir them in: toppings mixed into the rice block the water moving through the pot and leave the rice unevenly cooked. Close the lid and start the cooker at once, on the Mixed Rice or takikomi setting if it has one, or on the regular setting. Every bit of the rice should be covered by a flat layer of toppings when the lid goes down.
8Fold, check and serve
When the cooker signals it is done, open the lid and slide the rice paddle down to the bottom. Fold the rice over with a cutting motion, bringing up the golden crust from the bottom (okoge) and spreading the toppings through. Check a few pieces of chicken to be sure they are cooked through. Serve in bowls with the chopped mitsuba or green onion scattered over. The finished rice should be evenly light brown, with the grains separate and glossy.
Check the chickenRaw chicken cooks in the rice here. Before serving, break open a thick piece. It should be opaque all the way through with no pink, and the juices should run clear. If not, cook it further and check again before serving.