Neapolitan Pizza at Home: Dough and Baking in a Home Oven
Make Neapolitan Margherita and Marinara with 00 or bread flour, a hand-shaped rim, crushed tomatoes and a home-oven baking plan. The 485°C, 60–90 second wood-oven standard, judging fermentation, fixes for problems and storage.
This recipe was translated from the Japanese original by the Sekai Gohan editorial team. Read the original (Japanese)
Prep35 min
Cook1 hr
Total9 hr 20 min
Serves4 servings
LevelIntermediate
Reading a Neapolitan pizza from its puffed rim
Neapolitan pizza goes straight from the oven to the table
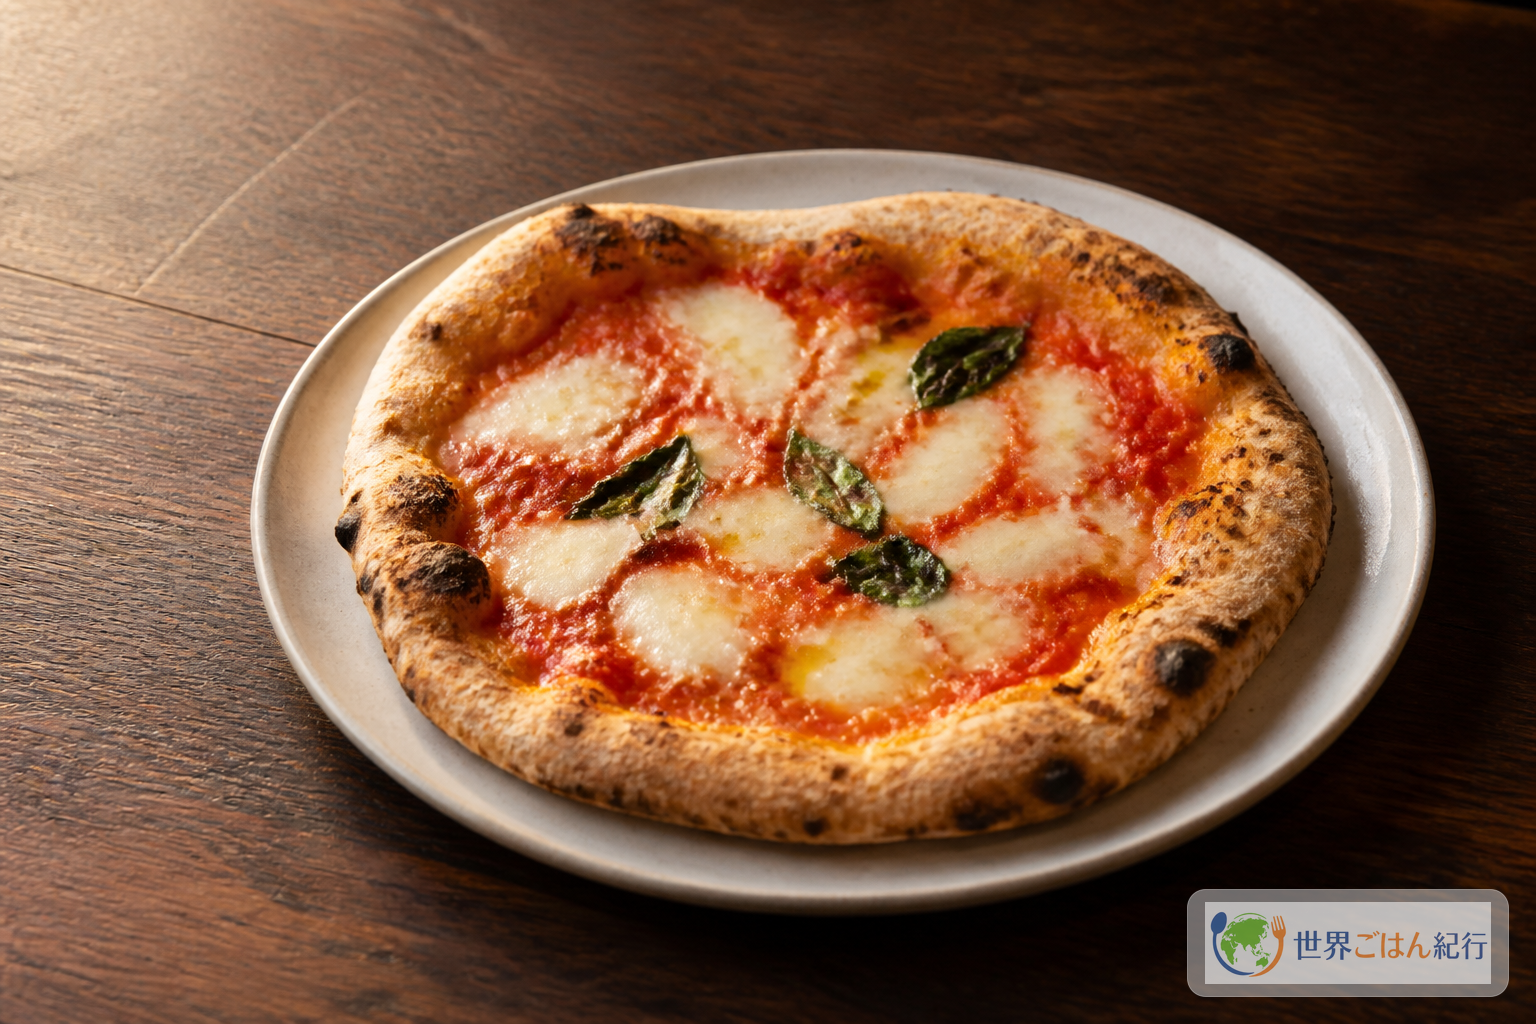
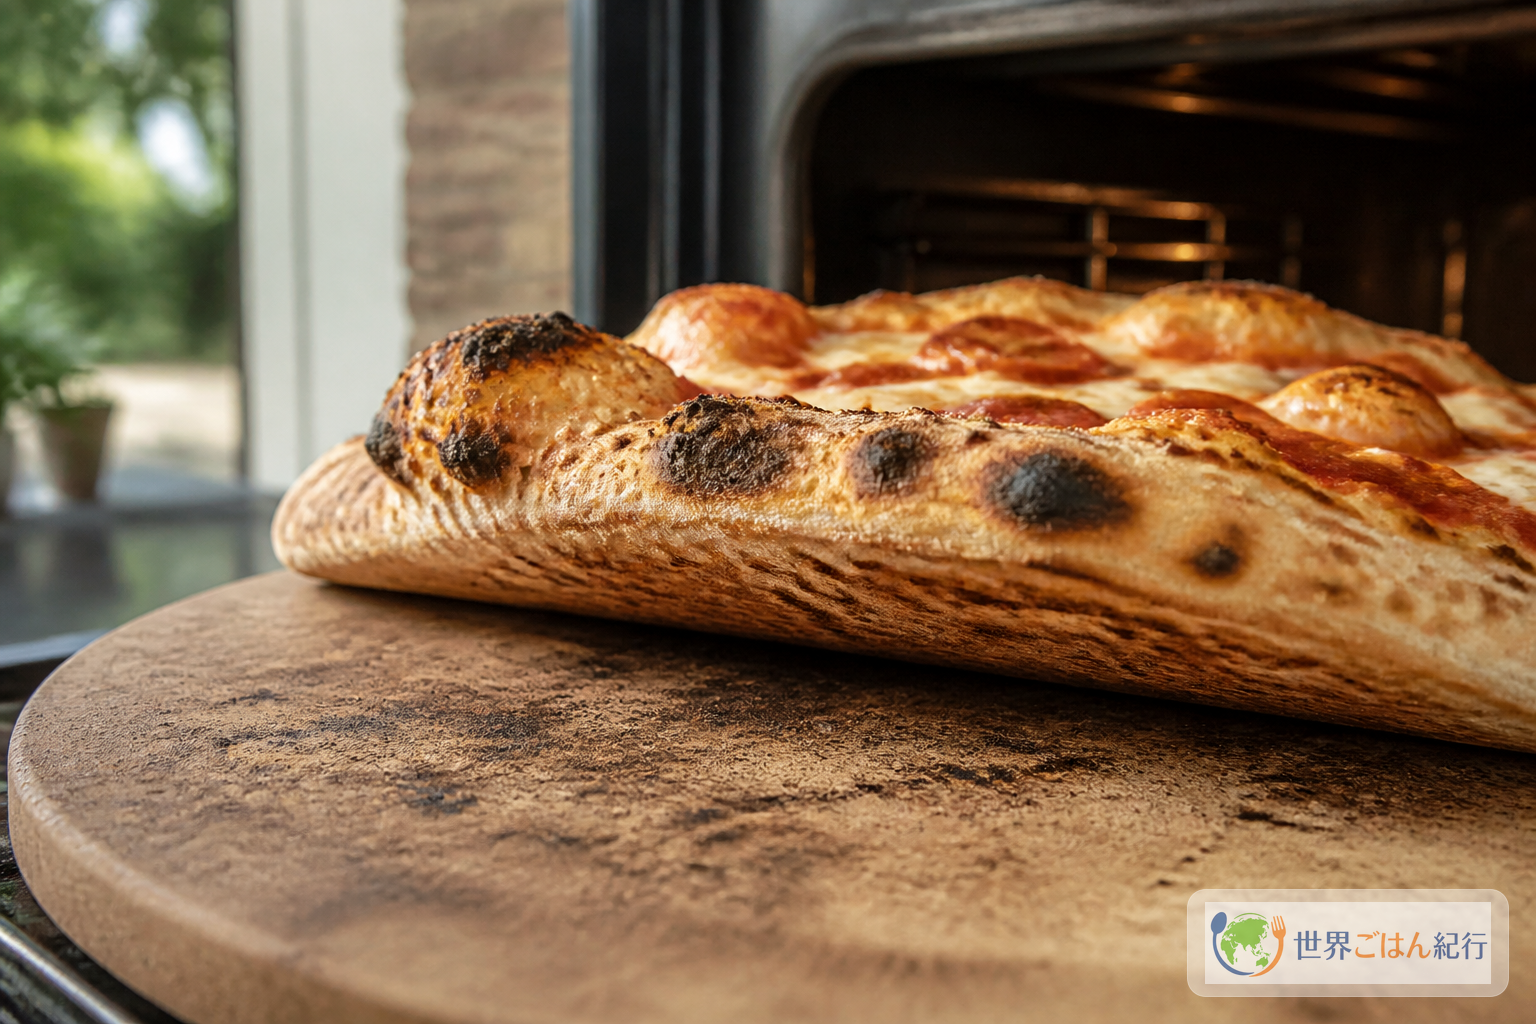
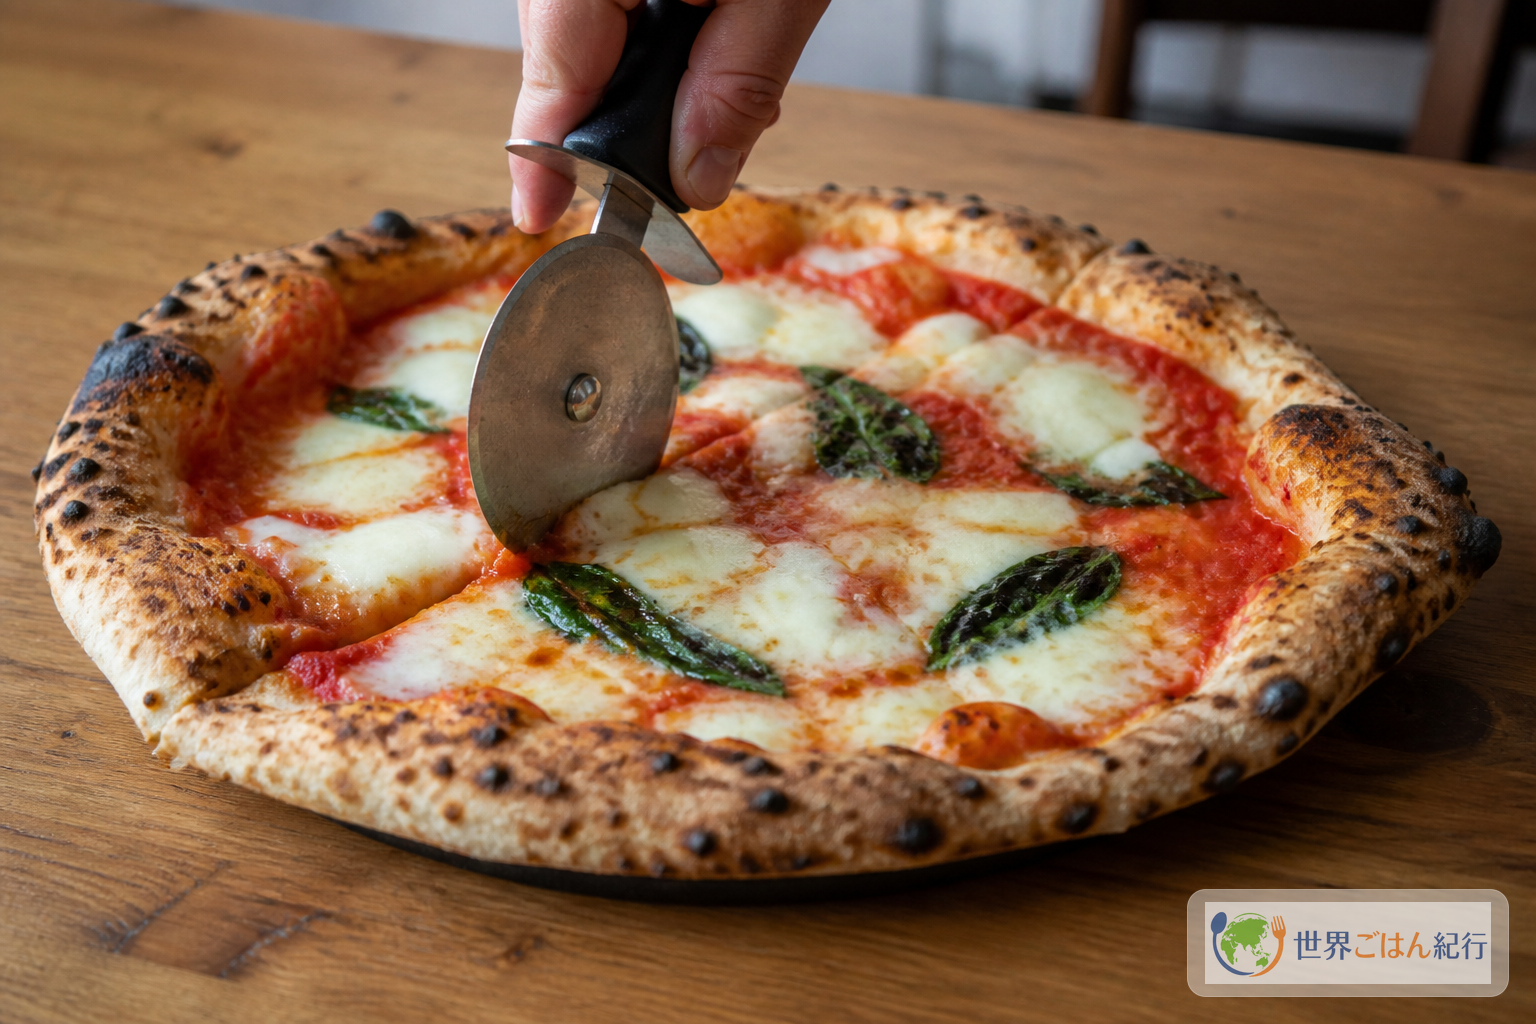
Lift a pizza just out of the oven and the center bends softly while only the rim is puffed with air. Moisture from the tomatoes remains on the surface, and the charred spots give off the aroma of wheat. Cut it right away and the thin center and thick rim create two different textures in one pizza.
Neapolitan pizza isn't simply dough stretched thin with toppings on it. Don't flatten the rim, don't overload it with tomato and cheese, and hit it with high heat for a short time. That sequence is what gives you both a tender center and a toasty cornicione (rim).
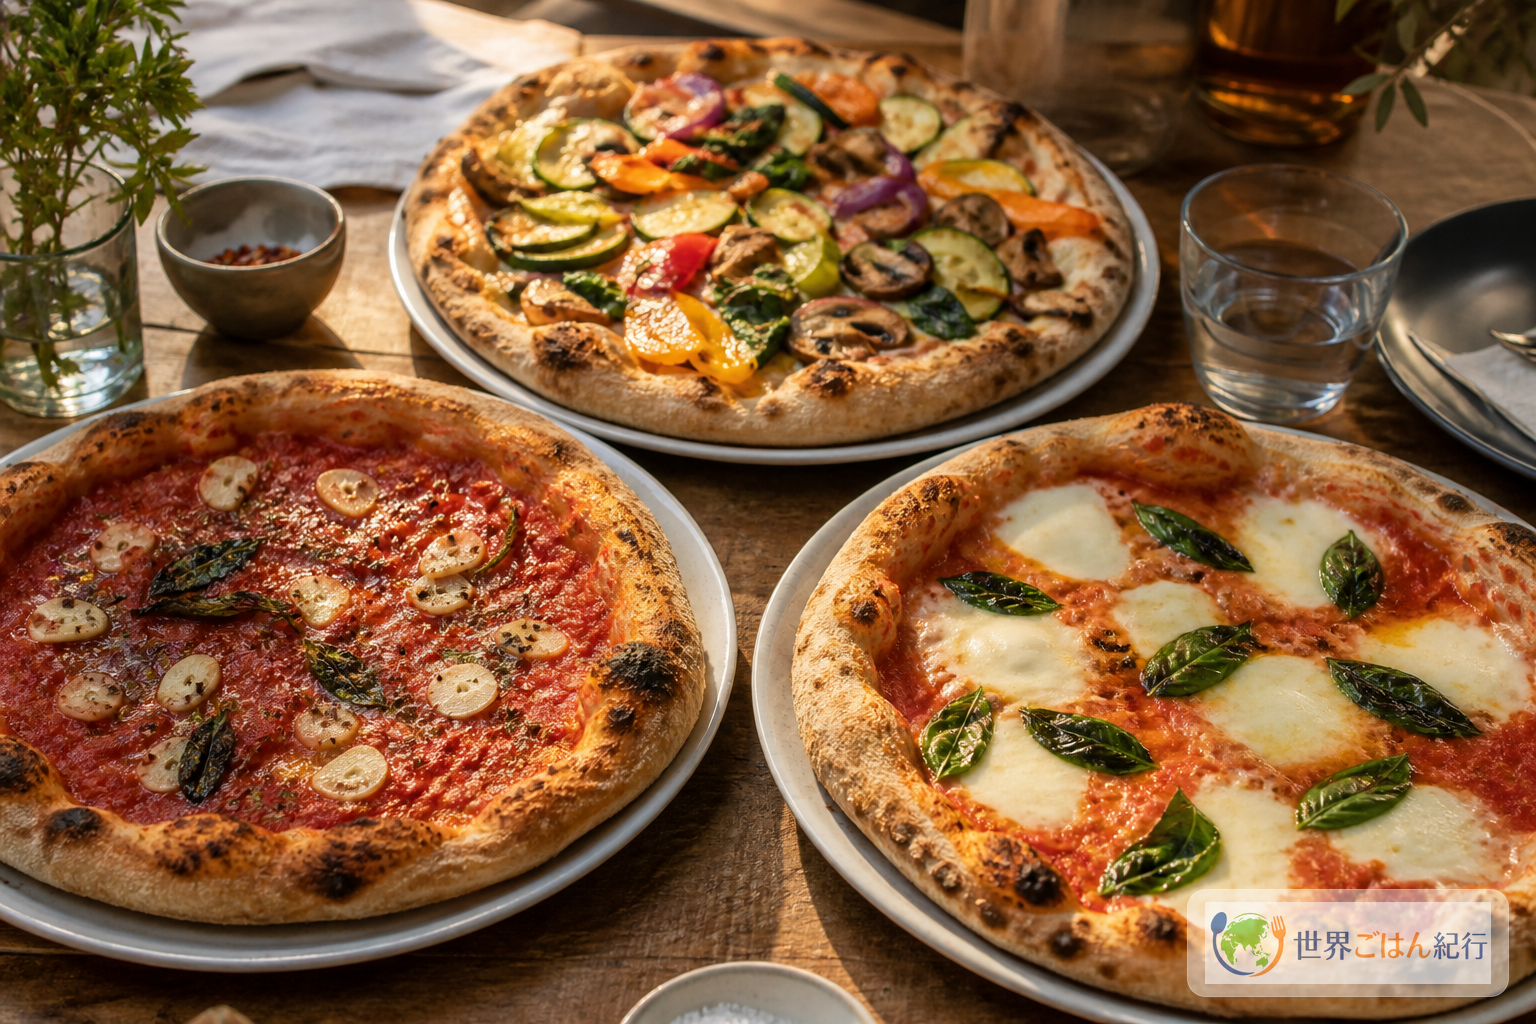
The standard for authentic "Verace Pizza Napoletana" is a wood-fired oven at about 485°C (905°F), with a bake of 60–90 seconds. If your home oven reaches 250–275°C (480–525°F), you won't get the same thing. So we separate the parts of the official standard to protect from the parts to let go of in a home kitchen, and bake four 25–28 cm pizzas. What to protect at home isn't the temperature number; it's the relationship between a thin center, an untouched rim and light toppings.
Fermentation takes time, but the hands-on time isn't long. Mix the dough at midday, and in the evening stretch the dough balls one at a time; each pizza can go to the table as soon as it's baked. Make two Marinara and two Margherita, and you can compare how the dough and tomato differ with and without cheese.
The Neapolitan table, and where a home oven draws the line
Neapolitan pizza is tied to the skill of stretching dough and baking it in a wood-fired oven
When Neapolitans talk about pizza, they talk not only about the dish but about the hands of the person making it. UNESCO inscribed the "Art of the Neapolitan Pizzaiuolo" as a culinary practice made up of four stages, from preparing the dough to baking it in a wood-fired oven. Its description of this culture also includes young pizza makers learning by watching the master's hands in the bottega, and the way it supports exchange across generations and places where people gather.
On the street corners of Naples there is also pizza a portafoglio: a baked pizza folded in four, wrapped in paper and eaten while walking. The Italian national tourism board describes it as folded and served to take away. The pizza eaten with a knife on a plate is not the only face of Naples; carrying a freshly baked pizza in your hand is part of the city's food culture too.
At home, though, you adapt the way you eat and bake to your own kitchen. A home oven or broiler can't fully reproduce the heat of a wood-fired oven, so preheat a stone or steel thoroughly on the upper rack and top only one pizza at a time, right before baking. The dough recipe, too, is not the official professional recipe transferred as is; we've converted it to a hydration and fermentation time that are easy to measure at home.
Marinara and Margherita are not about adding more toppings
Under the AVPN rules, the basics of "Verace Pizza Napoletana" are the Marinara, with garlic and oregano, and the Margherita, with mozzarella and basil. The EU's Traditional Speciality Guaranteed registration also describes a base of tomato, salt, olive oil and dough, combined with garlic and oregano for the Marinara and mozzarella and basil for the Margherita.
We choose these two for the first four pizzas because, with so few toppings, mistakes show. Cook down the tomatoes and the acidity turns heavy; skip draining the mozzarella and the center turns watery. Conversely, if you leave the rim alone, spread the sauce thinly and eat the pizza as soon as it's baked, the core of the dish comes through even with home-oven heat.
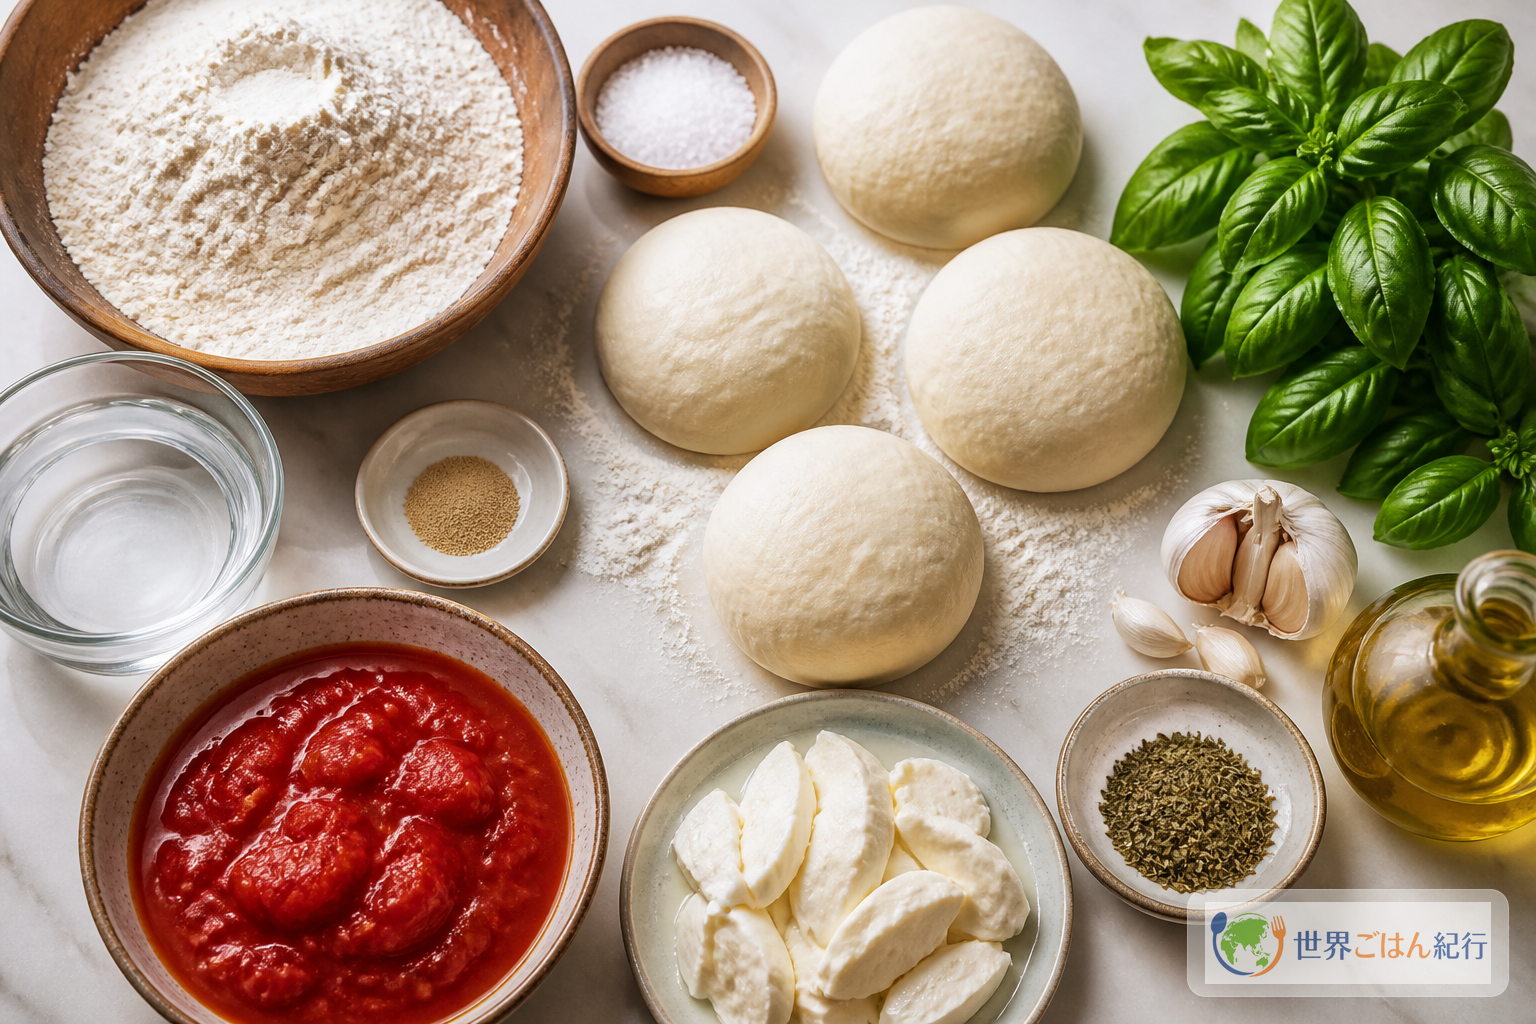
Ingredients (four 25–28 cm pizzas)
Divide the dough into four and split it between Marinara and Margherita
For the dough, you can use type 00 pizza flour if you have it, but easy-to-find bread flour also works. 00 doesn't mean "a magic flour that always makes a light dough"; it's a label for how finely the flour is milled. Protein content and fermentation tolerance vary by product, so it's perfectly fine to learn the process with bread flour first and compare 00 flours once you've baked a few times.
Dough
Ingredient
Amount
Substitutes & notes
Bread flour or type 00 pizza flour
600 g
Same amount if using 00 flour. Use one kind the first time
Water
375 g
20–25°C (68–77°F). On hot days use cold water to slow fermentation
Salt
20 g
Fine sea salt. Dissolve in the water before adding the flour
Instant dry yeast
1 g
Ideally weighed to 0.1 g. A scant 1/4 tsp as a guide
Flour for dusting
up to 20 g
Use bread flour thinly. Too much makes the bottom floury
Toppings
Ingredient
Amount
Substitutes & notes
Canned whole tomatoes
1 can (400 g)
Crush by hand, drain the excess liquid and use about 300 g
Mozzarella or fior di latte
160 g
Divide into 80 g portions and blot with paper towels
Basil
8 leaves
4 each for the 2 Margherita. You can split them between before and after baking
Garlic
1 clove
Thinly sliced, half for each of the 2 Marinara
Dried oregano
2 g
1 g each for the 2 Marinara. Rub whole oregano between your fingers to release its aroma
Extra-virgin olive oil
20 ml
About 1 tsp drizzled over each pizza
Salt (for the tomatoes)
5 g
Mix into the crushed tomatoes; taste and use it all
Allergies and measuring
This uses wheat, so it isn't suitable for anyone who needs to avoid gluten. Mozzarella is a dairy product. Ingredient labels on canned tomatoes, cheese and yeast vary by product, so check when buying if anyone has food allergies. The amount of dry yeast is small, and adding more by eye speeds fermentation. If you can't weigh to 0.1 g, it's safer to divide 1 g into portions.
Separate what to buy locally from what to seek out
Tomatoes, mozzarella, basil and bread flour are fine bought locally on the day, judging their condition. What's worth seeking out is dried oregano, which defines the aroma of the Marinara, and, if you like to grind whole spices in small amounts, a grinder. Neither is guaranteed to improve the flavor just by buying it.
Whole dried oregano is for people who will make Marinara several times, or who use dried herbs in tomato sauces and bean dishes too. Check the size and whether it's whole leaf. On days you only bake Margherita, or if you already have fragrant ground oregano, the dish works without buying more.
If you buy whole oregano and plan to grind black pepper or dried chiles too, a small grinder is an optional extra. A small tabletop size doesn't take up much space and lets you use freshly ground spices in small amounts. If you only use ground oregano, though, you don't need one. Check the capacity, blade material and the size of spices it can handle, and don't force hard spices like nutmeg into it.
Method: handle the dough lightly and bake one pizza at a time
A dough of 375 g water to 600 g flour is a little sticky at first. Rather than firming it up with extra dusting flour, resting it and then smoothing the surface leaves more air in the rim when it bakes. Once the dough is divided into four, keeping the balls you aren't using from drying out is the top priority.
Add the flour to the salt water and bring it together
10 min
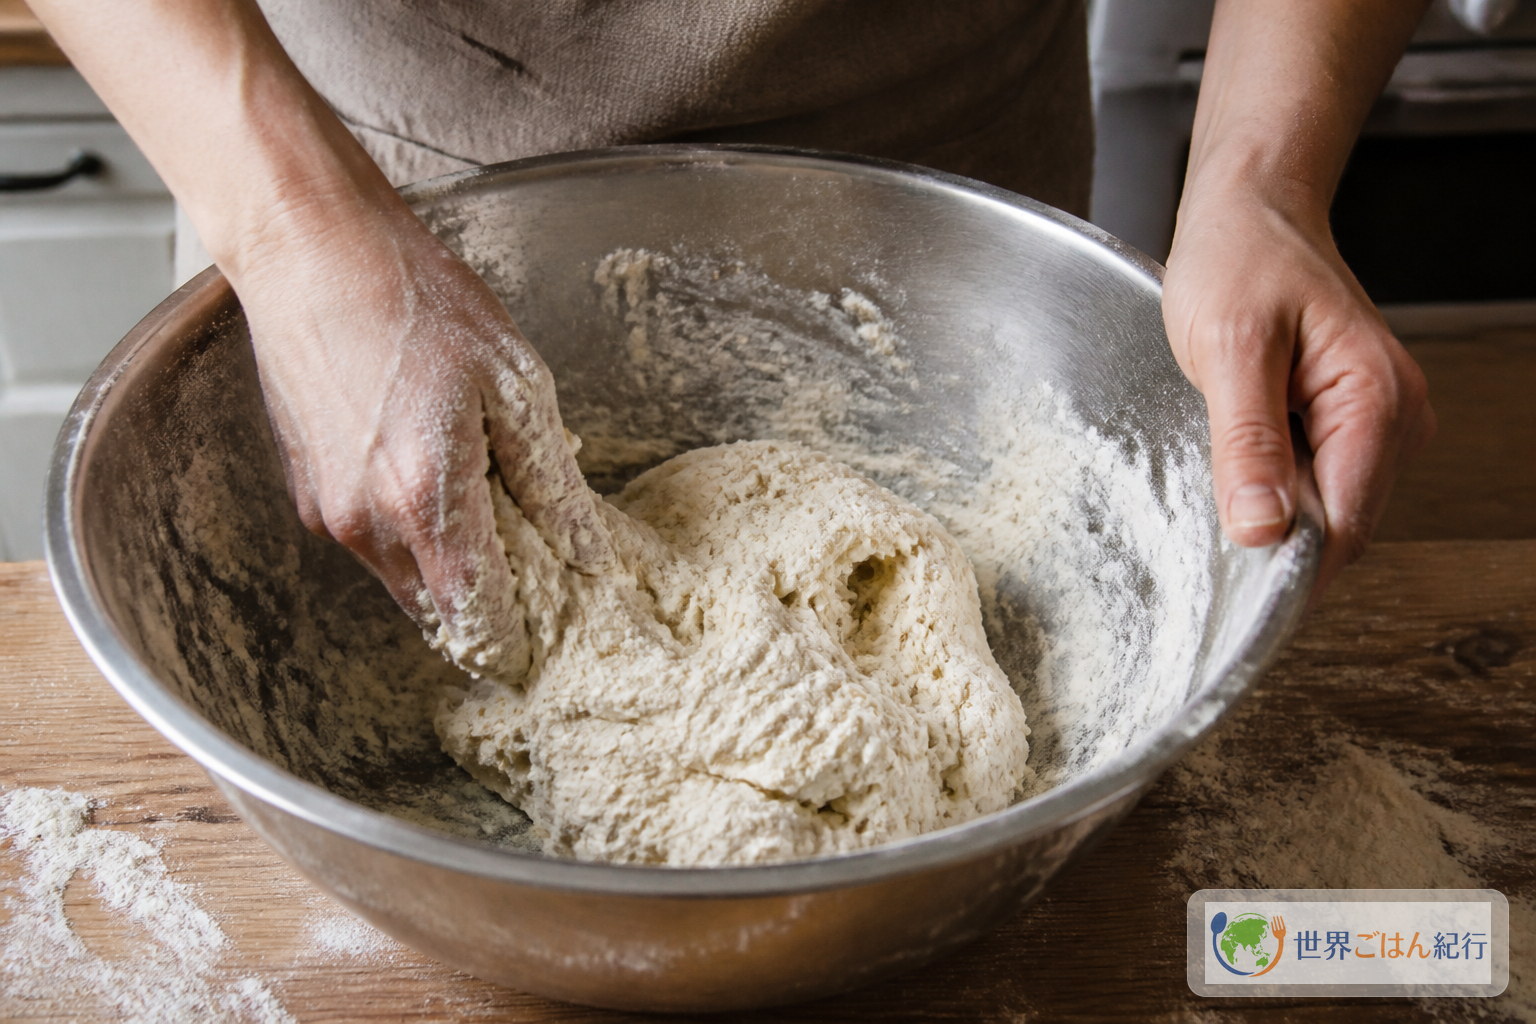
Dissolve 20 g salt in 375 g water, and put about 500 g of the 600 g bread flour or 00 flour into the bowl. Pour the water in while stirring with your fingertips or a wooden spoon, and add 1 g dry yeast while some dry flour still remains. Add the rest of the flour little by little and bring it together for 8–10 minutes, until no dry flour remains at the bottom of the bowl. No heat is needed. The dough's surface should be rough and slightly sticky on your fingers; the key is not to add more flour and stiffen it here.
Stop while a little dry flour remains at first, and don't add too much dusting flour
Knead to build elasticity
15 min
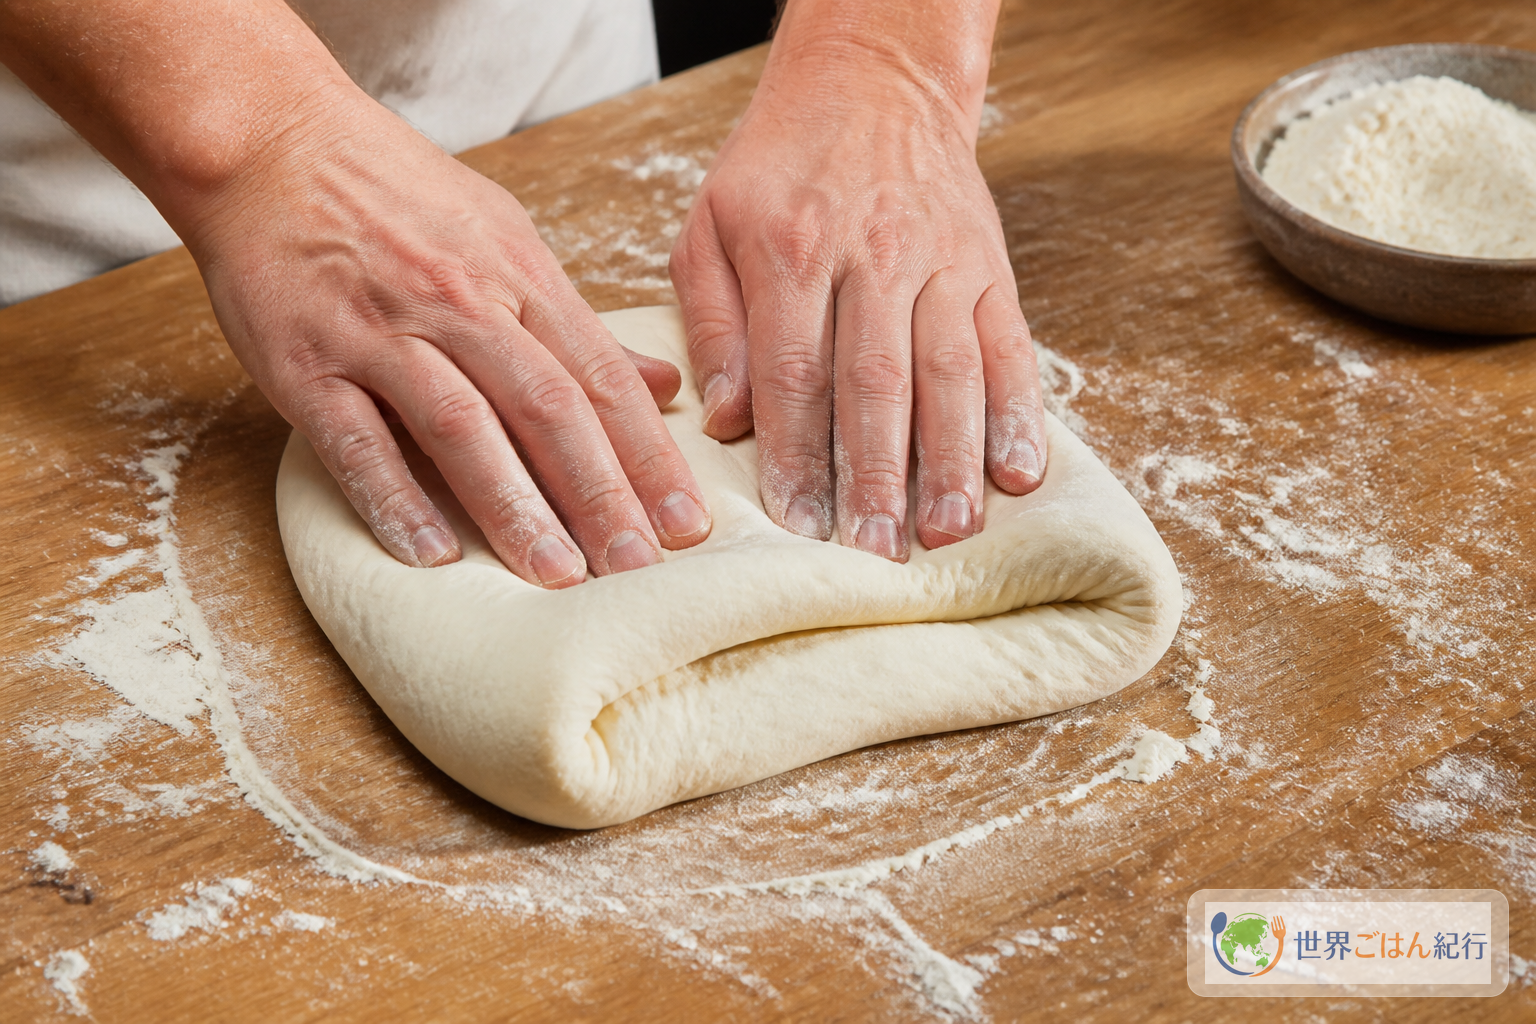
Turn it onto the work surface and, for 10–12 minutes, push it away with the heel of your hand and fold it back toward you. There's no need to slap it down. It's done when the surface is thin, taut and smooth, a fingerprint springs back slowly, and a piece stretched between your fingers doesn't tear right away. If the dough spreads out on the surface, rest it for 5 minutes and knead again for 2–3 minutes. If the dough warms up on a hot day, return it to the bowl to cool for 10 minutes so fermentation doesn't rush.
Repeat the folding and pushing motion until the surface is smooth
Grow small bubbles in the first rise
2 hours
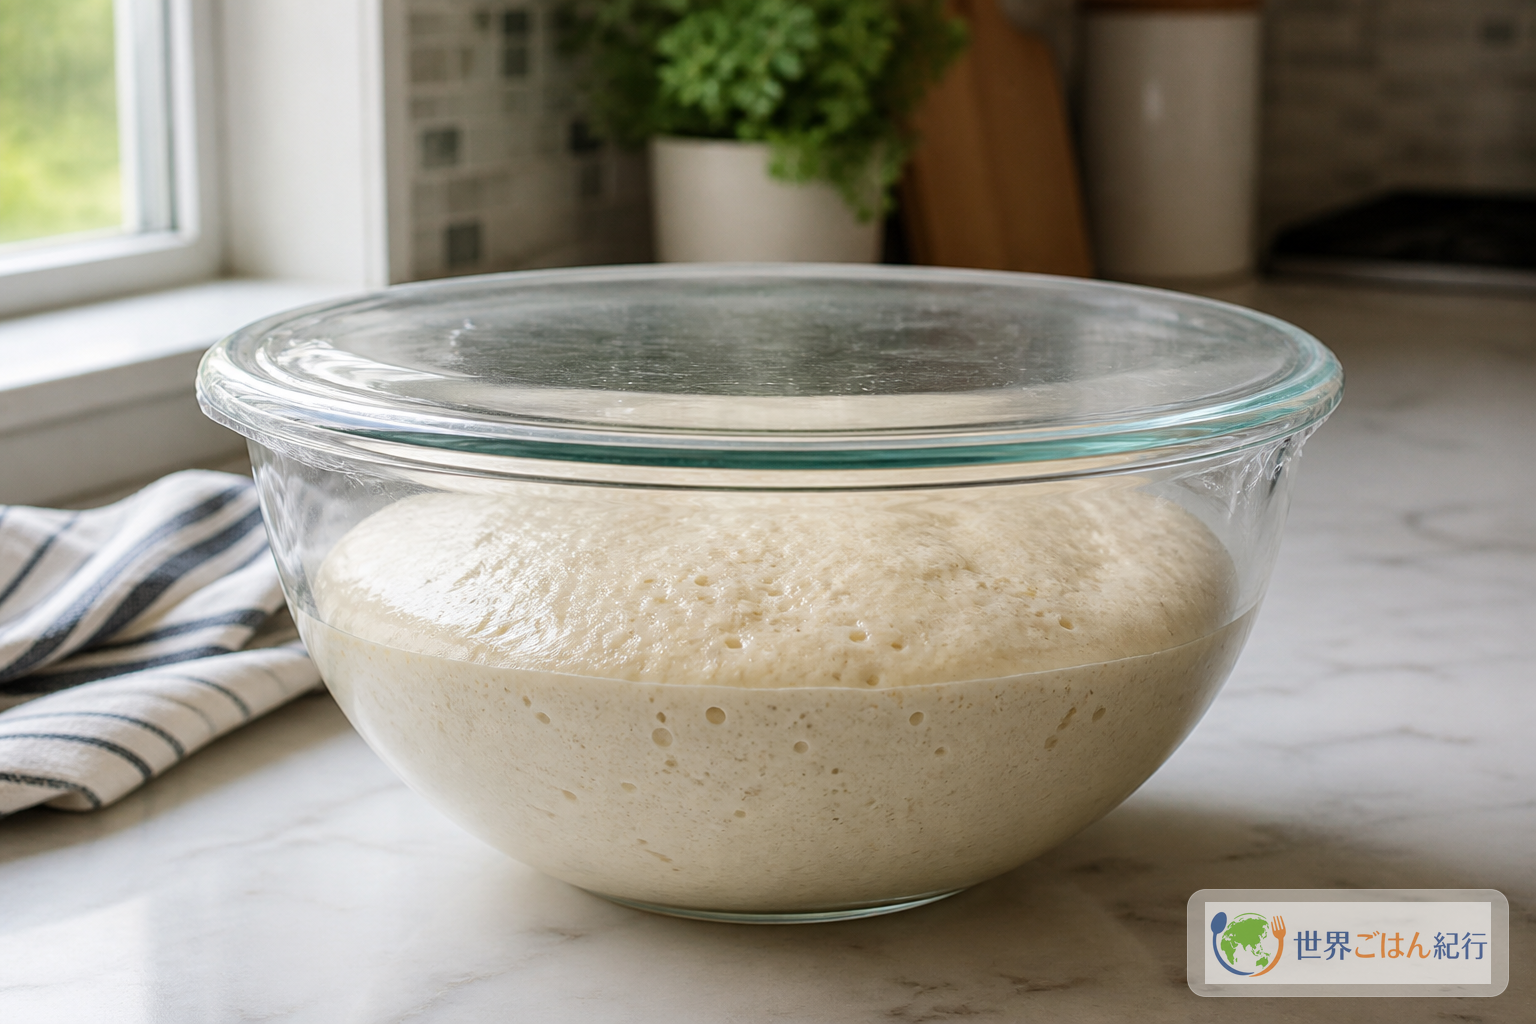
Shape it into a taut ball, place in a lightly oiled bowl and cover with a lid or plastic wrap. Leave at 20–25°C (68–77°F) for 2 hours, and move on when it has grown to 1.3–1.5 times its volume and small bubbles are visible on the surface. If you wait until it doubles, gas escapes when you divide it and the rims puff less. On days when the room is above 28°C (82°F), check once at 90 minutes, and if it's still stiff, extend 15 minutes at a time.
Allow about 2 hours for the first rise, and judge by the bubbles on the surface and how much it has grown
Divide into four and shape into balls
15 min
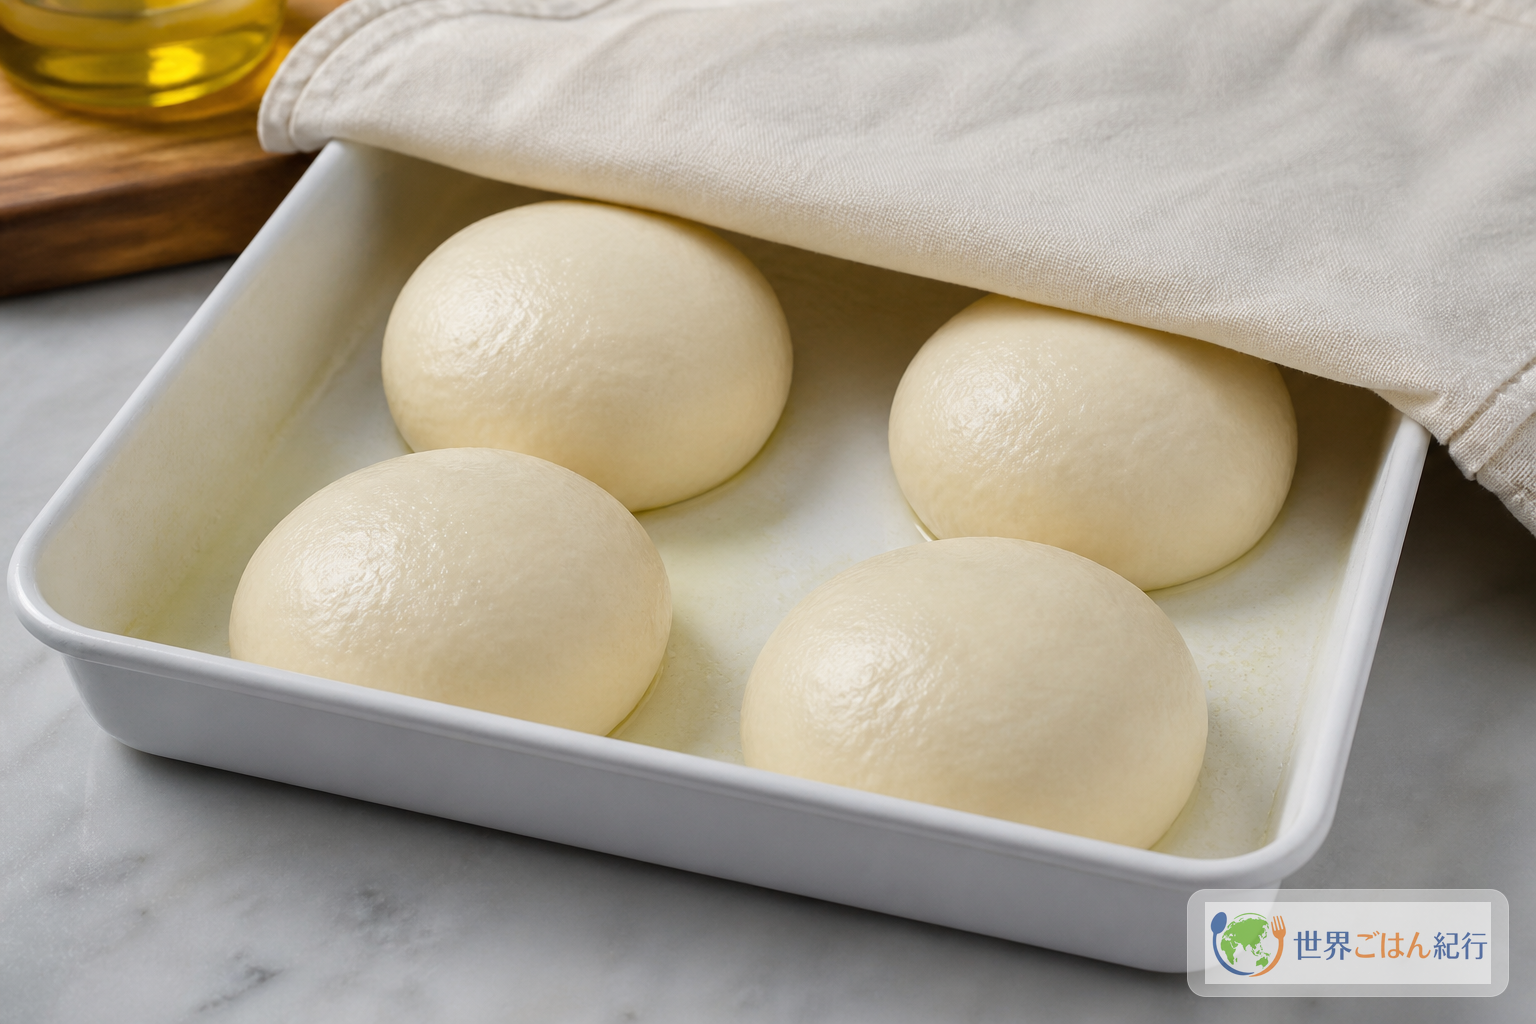
Turn the risen dough onto the surface and divide it into four with a bench scraper; each piece is about 249 g. Fold the cut edges underneath and rotate the dough with your palm while pulling it lightly against the surface to make a taut ball. Place the four balls seam side down, spaced apart, in a lightly oiled lidded container. Leave at 20–25°C (68–77°F) for 4–6 hours, until they've grown to about 1.5 times their volume and spring back slowly when you press the side with a finger. In a cramped container the balls join together, so leave enough space to take them out easily just before baking.
Make the surface of the dough balls taut and move on to the second rise without letting them dry out
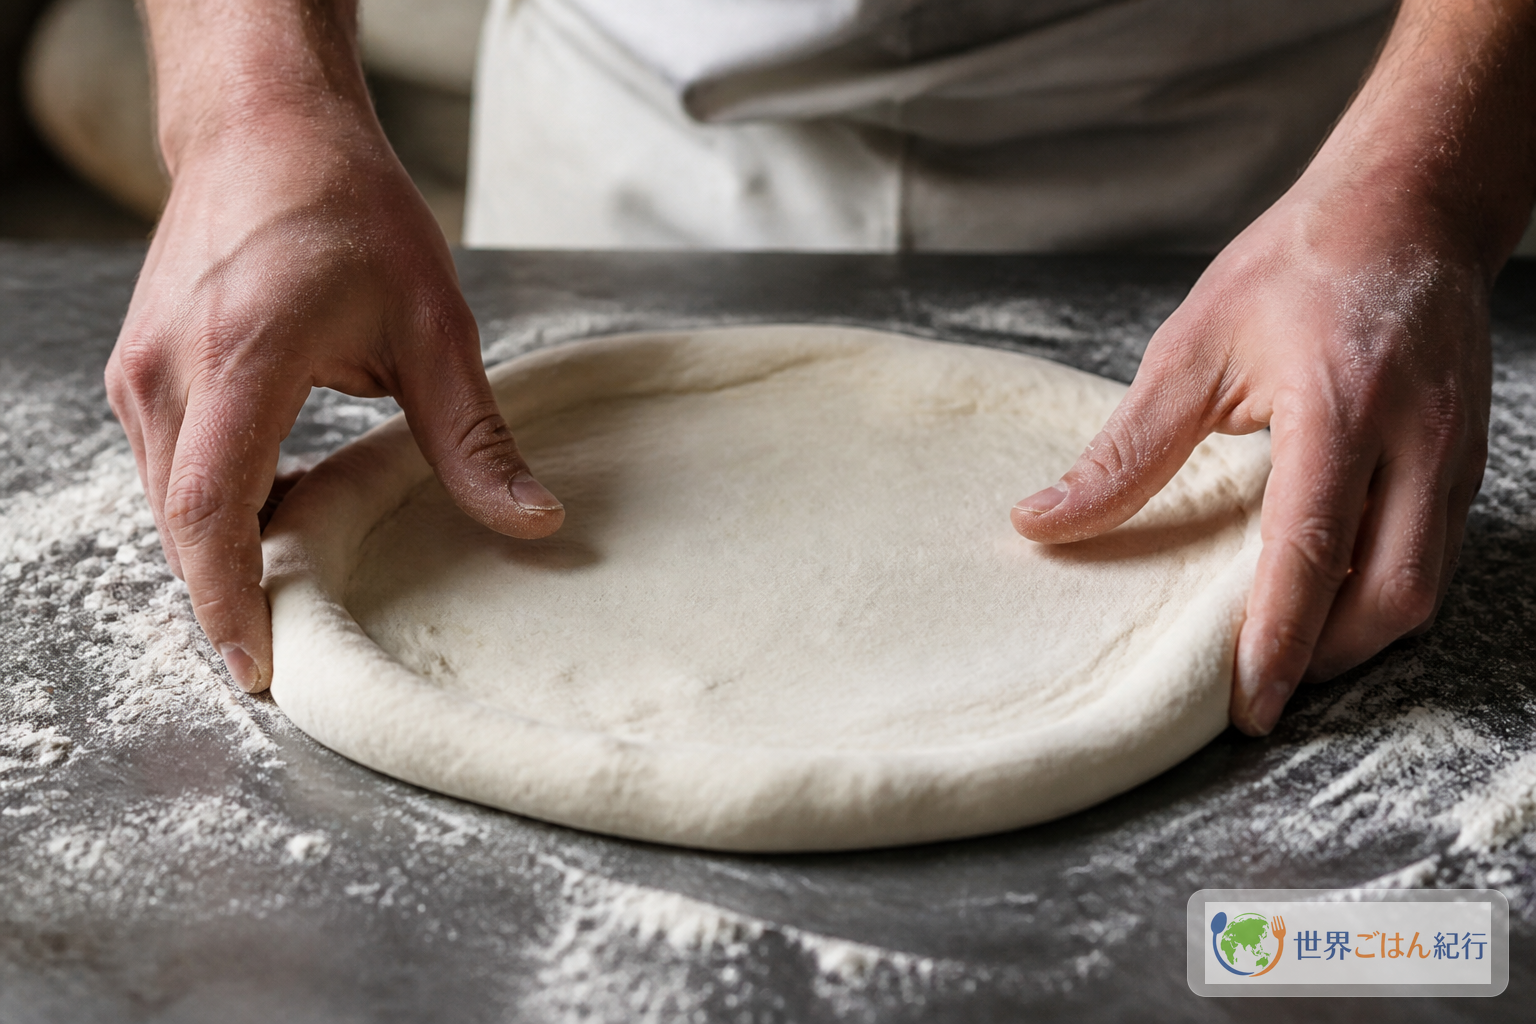
Press the center and leave the rim
5 min for 1 pizza
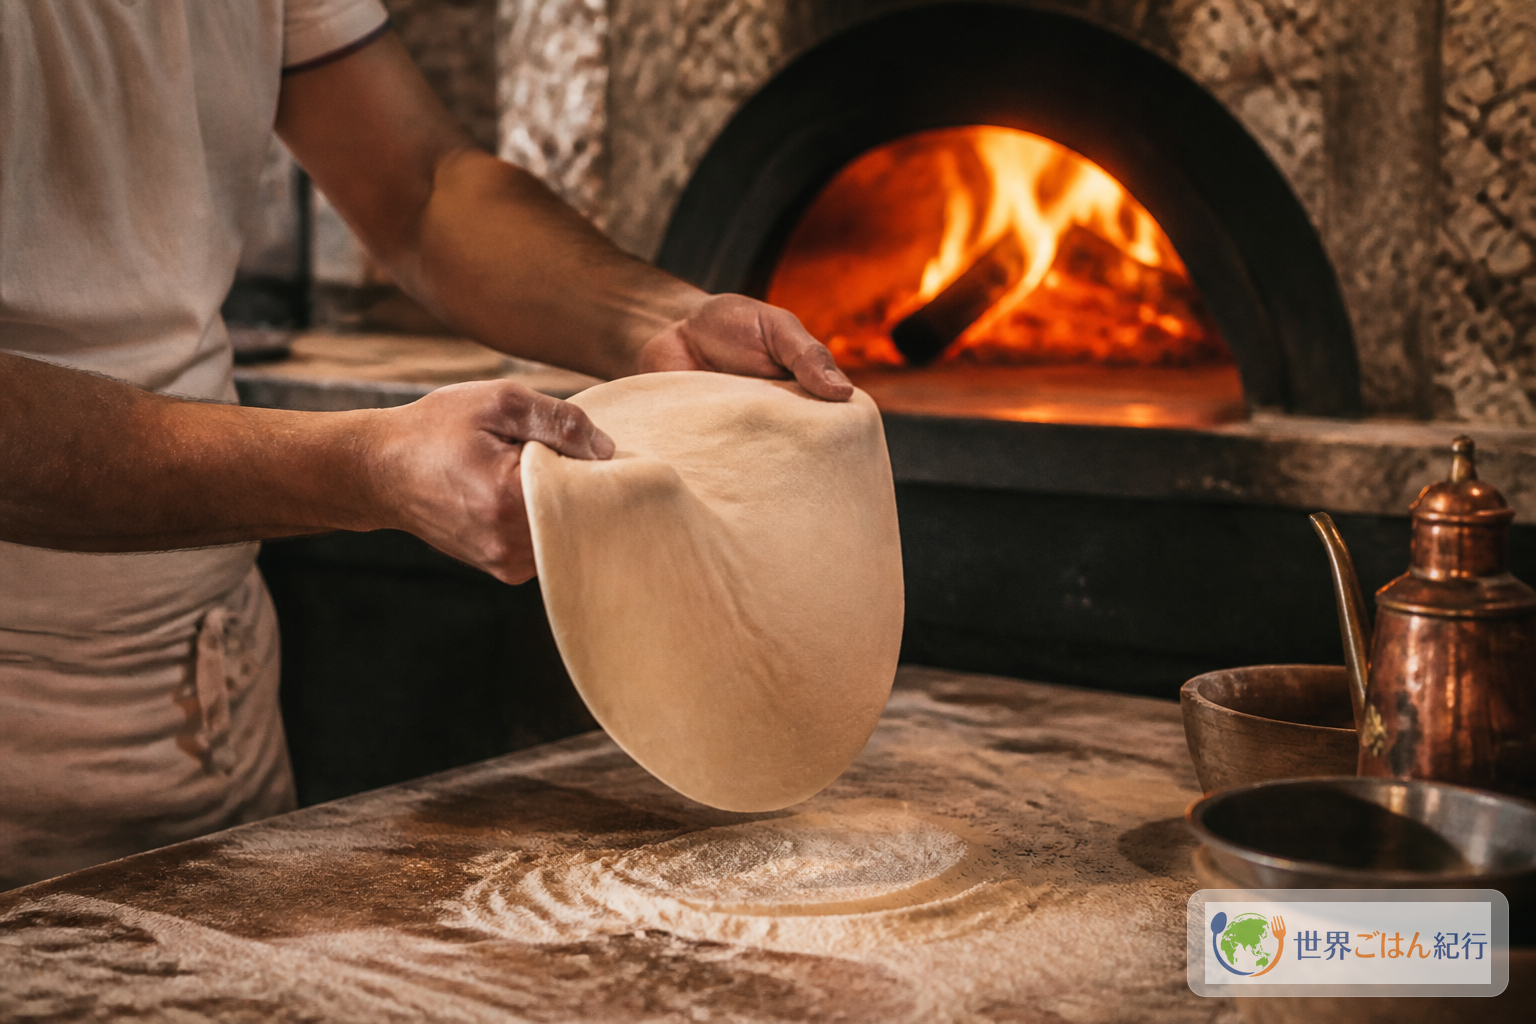
Take just one ball that has finished its second rise onto the dusting flour and press it outward from the center with your fingertips. Aim for a smooth surface, a center 2–4 mm thick, and an outer 1–2 cm left mostly untouched. Spread it to 25–28 cm across. Don't use a rolling pin, which presses the air out of the rim. If the dough springs back, rest it for 5 minutes and start again rather than forcing it.
Spread the center thin without pressing the air out of the rim
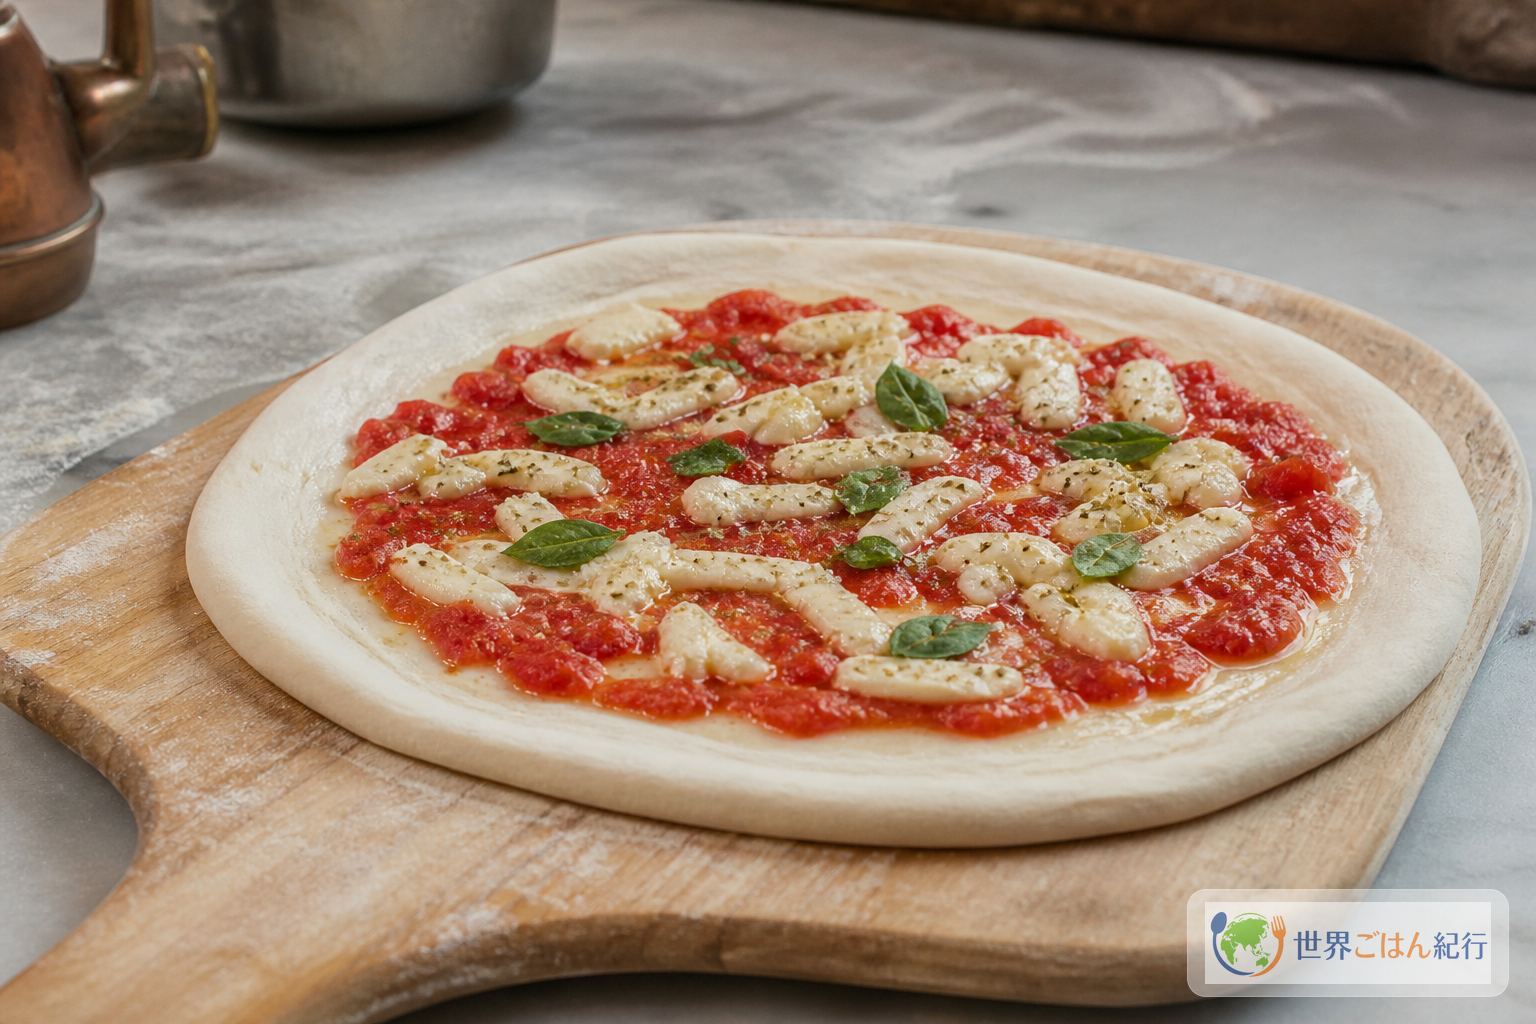
Top lightly with tomato and toppings
3 min for 1 pizza
Mix 5 g salt into the crushed whole tomatoes, and spread 80 g per Marinara or 70 g per Margherita in a spiral from the center. The tomato sauce should spread smoothly and thinly; coarse pieces can remain, but the juice shouldn't run onto the plate. On each of the 2 Marinara, place 1/2 clove sliced garlic, 1 g oregano and 5 ml oil. On each of the 2 Margherita, place 80 g blotted mozzarella, 4 basil leaves and 5 ml oil. Keep toppings 2 cm in from the edge. No heat is needed; once topped, get it into the oven within 1–2 minutes. The longer it sits on the peel, the more the tomato moisture makes the dough stick.
Place the sauce and toppings thinly in the center and leave the rim bare for baking
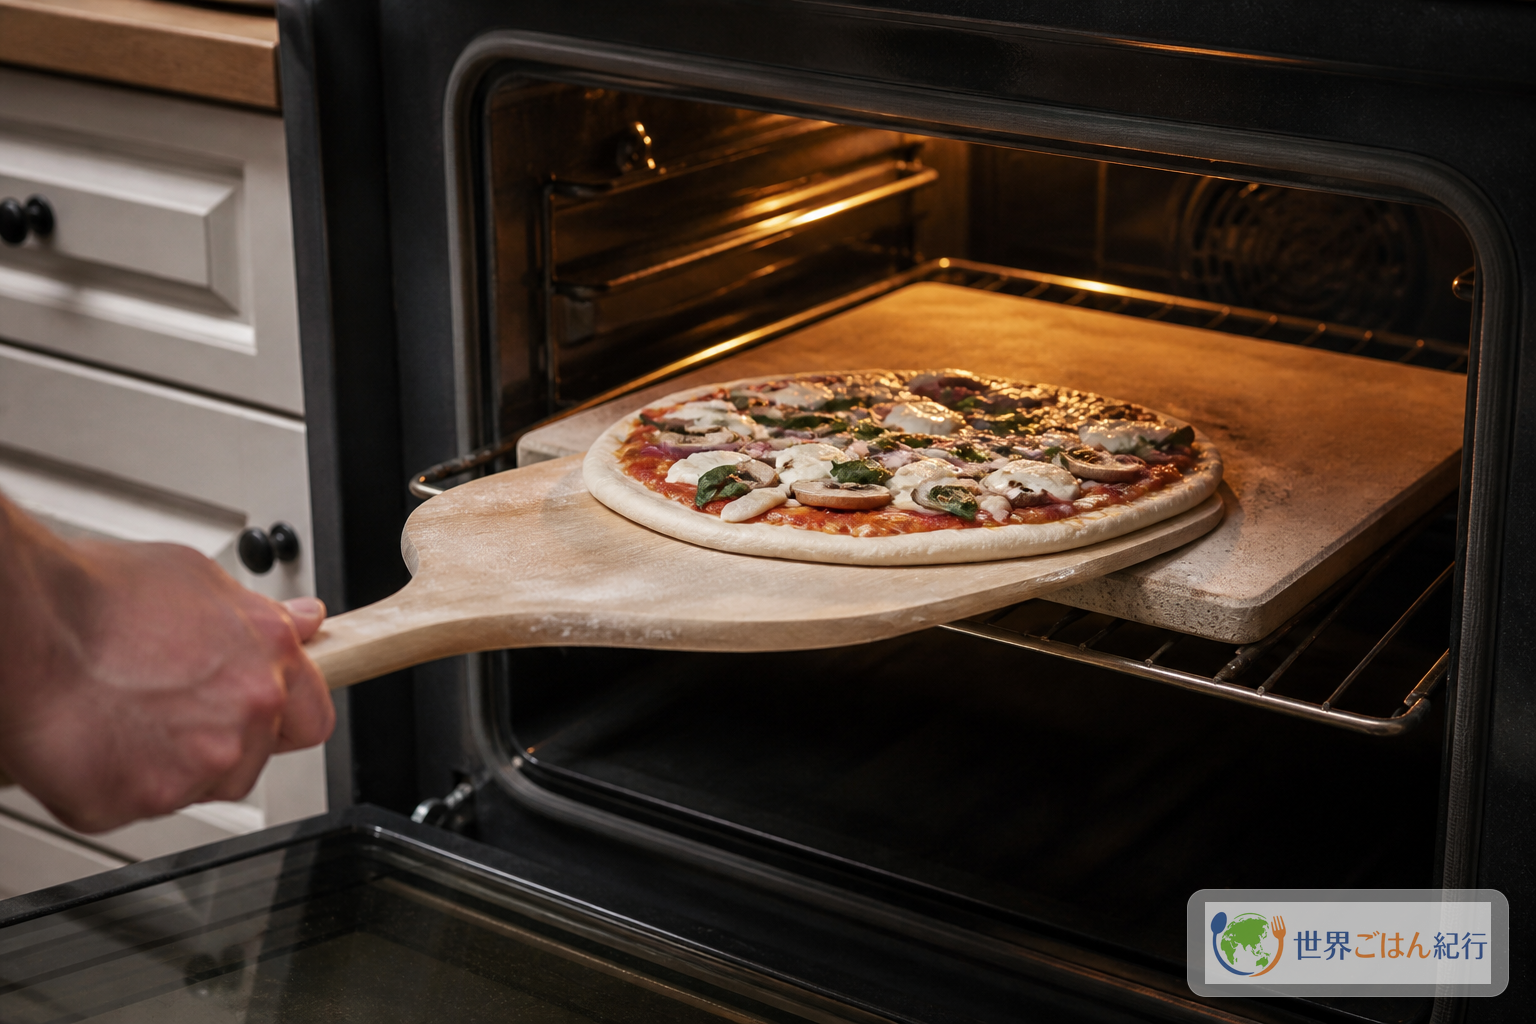
Bake at the highest temperature
6–8 min for 1 pizza
Put a stone or steel on the upper rack and preheat the oven at its highest temperature for 45 minutes. Slide the dough onto the preheated surface and bake at 250–275°C (480–525°F) for 6–8 minutes. If your oven's maximum is below 250°C, allow 8–12 minutes and turn the pizza once partway through. Take it out when the rim has puffed up well, the bottom is lightly browned, and the surface of the mozzarella has melted with small dots of oil. If the top heat is weak and only the center dries out first, switch to the broiler for just the last minute. You won't get the same result as a 485°C wood oven in 60–90 seconds, so don't extend the time and end up with only a burnt rim. Transfer to a plate, leave for about 30 seconds, then cut into 6–8 slices with a pizza cutter.
Transfer one at a time to the preheated stone and judge doneness by the color of the rim and bottom
Cooking tips: recover based on the state of the dough and heat
In a home oven, check the stone's preheat and the color of the bottom more than the thermometer reading
In a home oven, rather than trying to recreate wood-oven temperatures, a setup that doesn't lose heat and working one pizza at a time pay off. Put the stone or steel on the upper rack and preheat for at least 45 minutes after the oven reaches temperature. If you use an upside-down baking sheet, it loses heat more easily than a thick stone, so allow about 2 minutes longer, and if the bottom comes out pale, preheat longer before the next pizza.
Before throwing out failed dough, figure out what's happening
Symptom
What's happening
How to recover
It shrinks right back when stretched
The dough is cold, or the gluten is tight
Cover so it doesn't dry, rest 10 minutes and press again from the center
It sticks badly to your fingers
Over-fermented, or the work surface is warm
Dust only the surface thinly with 5 g flour, without working flour into the dough. If it tears, reshape and rest 20 minutes
It won't move off the peel
Tomato moisture has soaked into the dough
Move the toppings to another plate and slip a little flour under the dough. Next time, bake within 1–2 minutes of topping
The center is watery
Too much moisture from the tomato or cheese
Drain the tomatoes in a sieve for 5 minutes and leave the cheese on paper for 10 minutes. Reduce toppings by 20% on the next pizza
Only the rim burns while the center stays pale
Top heat is strong and the stone isn't hot enough
Move the stone down a rack and preheat 15 minutes longer. Don't use the broiler at the end
The bottom is pale and soft
The stone hasn't stored enough heat, or the baking sheet cooled
Preheat at least 10 minutes before the next pizza, and rest the baked pizza on a rack for 30 seconds to let steam escape
Three signs that it's done
The rim doesn't have to be one even color all the way around. Charred spots on the tops of the big bubbles, a center that bends softly when lifted, and a light brown on the bottom: when all three are there, you've baked it in a home oven while keeping moisture inside. If the center is stiff, the cause may be wet toppings rather than underbaking, so use less tomato and cheese on the next pizza.
Enjoy home variations, but keep them apart from the Neapolitan name
After baking the two basics, you can branch out to other pizzas with ingredients from home
Limiting the first four pizzas to Marinara and Margherita makes it easier to compare topping amounts and how the dough bakes. After that, enjoy the ones below as "home pizzas that depart from the official basics." Not mixing up the names is the key to taking liberties while respecting the dish's background.
1. Seasonal pizza with mushrooms and greens
Slice 80 g shimeji or button mushrooms and sauté in 1 tsp oil for 2 minutes to cook off their moisture. Raw mushrooms placed straight on top make the center watery, so cool them before combining with 70 g tomato. Add greens after baking to keep their aroma and color. This isn't one of the two Neapolitan basics, but it's a way to bring the season onto a pizza.
2. A pizza with just a little spicy salami
Use 40 g thinly sliced salami, 4–5 slices, placed along with 80 g mozzarella. If it's very fatty, reduce to 30 g and skip the oil. The more toppings you add, the longer it takes to bake, so don't pile them in the center; scatter them around. With salty cured meats, halve the salt added to the tomatoes.
3. Drained eggplant and basil
Cut 1 eggplant into 5 mm slices, sprinkle with 1 g salt and leave for 10 minutes, then pat dry and brush thinly with oil. Cook 1 minute per side under a broiler or in a skillet, cool, and arrange on top of the tomato. Managing the eggplant's moisture and oil in advance keeps the center from getting wet.
4. A cheese-free Marinara with a different aroma
Rather than adding another half clove of garlic, add just 0.5 g more oregano per pizza. Doubling it for a stronger aroma lets the bitterness of the dried herb cover the tomato. Rub whole oregano between your fingers and scatter it just before baking.
5. Toward a white pizza
Skip the tomato and divide 100 g ricotta, 160 g mozzarella and a little black pepper among the four pizzas. If the ricotta is watery, drain it on paper towels for 10 minutes. On a white pizza the browning of the rim stands out, so don't pile toppings in the center, and keep the oil to 3 ml per pizza. This, too, is a home dish separate from the two basics of Pizza Napoletana.
Take it straight to the table, and handle leftovers safely
Eat it fresh from the oven; cool leftovers in a shallow container before reheating
Official Neapolitan pizza is defined right down to being eaten as soon as it's baked. Folded and eaten before the moisture in the center settles, the springiness of the rim and the acidity of the tomato arrive together. If you eat it folded by hand, like the pizza a portafoglio the Italian tourism board describes, don't fuss over plating; hand out each pizza while it's hot.
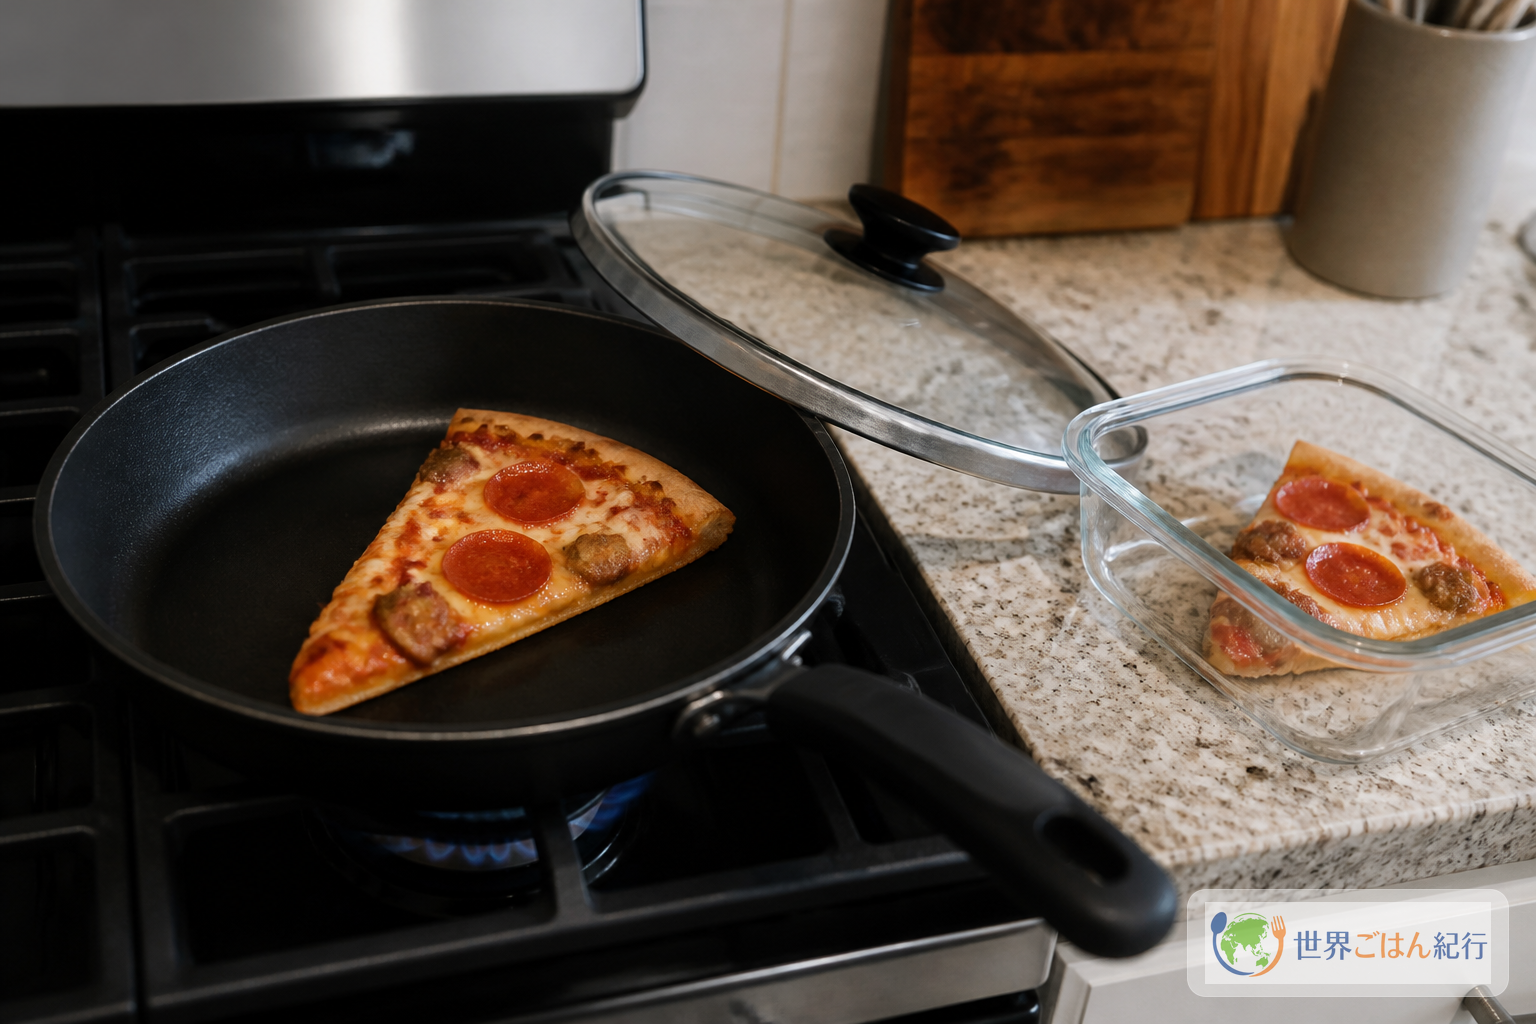
At home, you may not be able to bake four at once. If the first pizza waits on a cold plate, the center steams and the rim deflates, so decide who's eating which before baking them in turn. Don't leave leftover pizza at room temperature for long; once it has cooled slightly, divide it into shallow, clean containers and refrigerate. Japan's Ministry of Health, Labour and Welfare advises dividing leftovers into shallow containers to cool them quickly and reheating them thoroughly to 75°C (167°F) or above.
To eat it the next day, warm a skillet over medium-low heat for 30 seconds, add the pizza, cover, and heat for 2–3 minutes until the bottom recovers. If you want the cheese softer, drop just 1 tsp water down the side of the pan and trap the steam with the lid. A microwave alone tends to toughen the dough, so if you use one, finish by drying the bottom in a skillet or toaster oven. If you have any doubt about the smell, a sticky surface or how it was stored, throw it out rather than deciding by tasting.
Frequently asked questions
Eat Neapolitan pizza while watching the state of the rim and center as it comes out of the oven
Can I make it without 00 flour?
Yes. Make it with 600 g bread flour, and don't switch brands partway; that makes it easier to read how the dough changes. If you use 00 flour, don't set the fermentation time by the label alone; adjust based on the volume in the first rise and the spring-back in the second. Absorption and elasticity differ by product, so you can also hold back some water: mix in 350 g first, then add the remaining 25 g according to the dough.
My home oven only goes up to 250°C.
Put a stone or heavy baking sheet on the upper rack and preheat another 45 minutes after the oven reaches the set temperature. At 250°C, check each pizza at 6–8 minutes, and if the center dries before the rim colors, use fewer toppings. Opening the door repeatedly during baking drops the heat, so limit checks to once. There's no need to claim 485°C like a wood oven; judge doneness by the color of the bottom and the softness of the center.
My mozzarella gets watery.
Lay the cut cheese on paper towels for 10 minutes to remove surface water. If it's a very moist fresh type, reduce 80 g to 70 g and reduce the tomato to 60 g per pizza too. Cutting the cheese too finely releases water all at once, so scattering 2–3 cm chunks keeps the center from getting wet.
What if I want to make the dough the day before?
After the 2-hour first rise, divide into 4, put in containers and refrigerate. How fast it proceeds depends on your refrigerator's temperature and the amount of yeast, so the next day take it out to room temperature 4–6 hours before baking and check whether it reaches 1.5 times its volume. Stretched cold, it shrinks easily and the rim puffs less, so judge by the dough's elasticity, not just the time.
I don't have a peel. Is there a substitute?
A thin cutting board or an upside-down flat baking sheet works. The conditions are dusting the surface with a thin layer of bread flour and baking within 1–2 minutes of topping. Parchment paper makes the transfer easier, but follow the product's label for the temperature and time it can withstand. If the dough won't move, pulling it by force crushes even the bubbles in the rim.
The nutrition figures are estimates for the ingredients above divided into four. Sodium and calories vary with the cheese, canned tomatoes and oil you use. Check labels for wheat, dairy, tomato and so on, and if anyone in the family has dietary restrictions, check the ingredients of any substitutes too.
EUR-Lex, "Commission Regulation (EU) No 97/2010": checked for the Traditional Speciality Guaranteed registration of Pizza Napoletana, shaping dimensions, fermentation, toppings and the 485°C, 60–90 second specification. Accessed and checked 20 August 2026.
UNESCO, "Art of Neapolitan 'Pizzaiuolo'": checked for the 2017 Intangible Cultural Heritage inscription and the four stages from dough to wood oven. Accessed and checked 20 August 2026.
Napo, "Authentic Neapolitan Pizza": checked for preheating a stone or steel on the upper rack of a home oven, 275°C, and practical conditions for home tomato sauce. Accessed and checked 20 August 2026.