Brazil

Coxinha: Brazilian Teardrop Chicken Croquettes

How to make coxinha, Brazil's favorite snack-bar croquette, at home with chicken breast and cream cheese: a dough cooked in the poaching broth, a moist chicken filling, a Catupiry stand-in, the teardrop shape, frying at 180°C, freezing, and fixes for common failures.

This recipe was translated from the Japanese original by the Sekai Gohan editorial team. Read the original (Japanese)

  • Prep55 min
  • Cook45 min
  • Total1 hr 40 min
  • Serves4 servings (12 coxinhas)
  • LevelIntermediate

Brazilian coxinha: golden fried teardrop-shaped chicken croquettes with a red sauce

Break open the hot tip, and out comes the aroma of chicken

When you want a quick bite on a Brazilian street corner, the first thing you spot in the glass case is coxinha. You take the teardrop-shaped fritter in a paper napkin and bite in from the tip. The thin crust cracks, revealing a dough scented with chicken broth and a filling of shredded chicken. It looks like a croquette, but the star is a wheat dough worked with chicken stock rather than potato, so it eats quite differently.
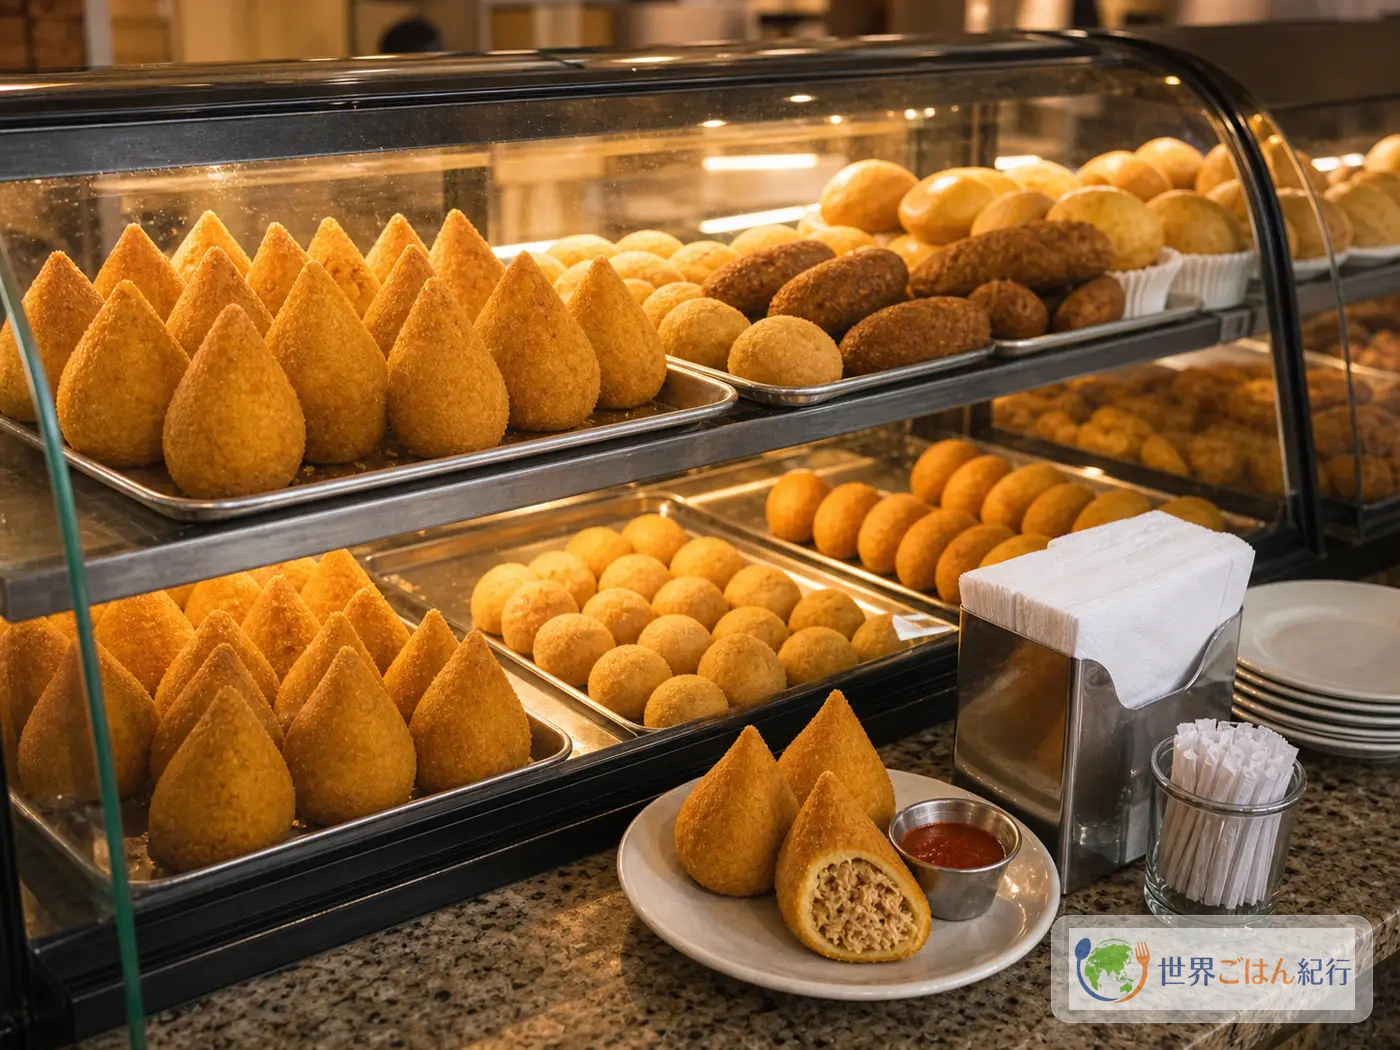
Coxinhas lined up in the glass case of a Brazilian snack bar
At Brazilian snack bars, coxinha is a standard fried snack alongside pastel and kibe

The name coxinha means something like "little thigh" in Portuguese. Its teardrop shape recalls a chicken drumstick. The filling is finely shredded chicken, and depending on the region or the shop, creamy Catupiry or requeijão is mixed in. Catupiry itself can be hard to find outside Brazil, so this recipe gets close to its texture with cream cheese and a little of the poaching broth.

There are three keys to making it at home. Don't throw out the broth you poached the chicken in; use it in the dough. Keep the filling moist without drying it out too much, but thick enough that it doesn't wet the dough. And fry quickly in oil at around 180°C (356°F) to color the crust. Get those right, and with ordinary chicken breast, all-purpose flour and breadcrumbs you'll have a coxinha with that Brazilian snack-bar quality: "a fine, toasty outside and chicken flavor inside."

If you're cooking a run of Brazilian dishes, coxinha is handy as a snack to serve before the big platters. Put it next to meat-centered churrasco (in Japanese), black-bean feijoada (in Japanese) and farofa (in Japanese), which soaks up the meat juices, and you start to see the differences within Brazilian food: snacks, stews, charcoal grilling and flour-based dishes.

Not overstating the name and origin

There are several stories about coxinha's origin, including that it spread around São Paulo and an anecdote that it was shaped like a chicken thigh for a child who loved thighs. Sources outside Japan don't agree on the details either. This article treats it as "a Brazilian snack shaped like a chicken thigh" and does not present the legends as established history.


The story of coxinha — a Brazilian snack raised in the lanchonete
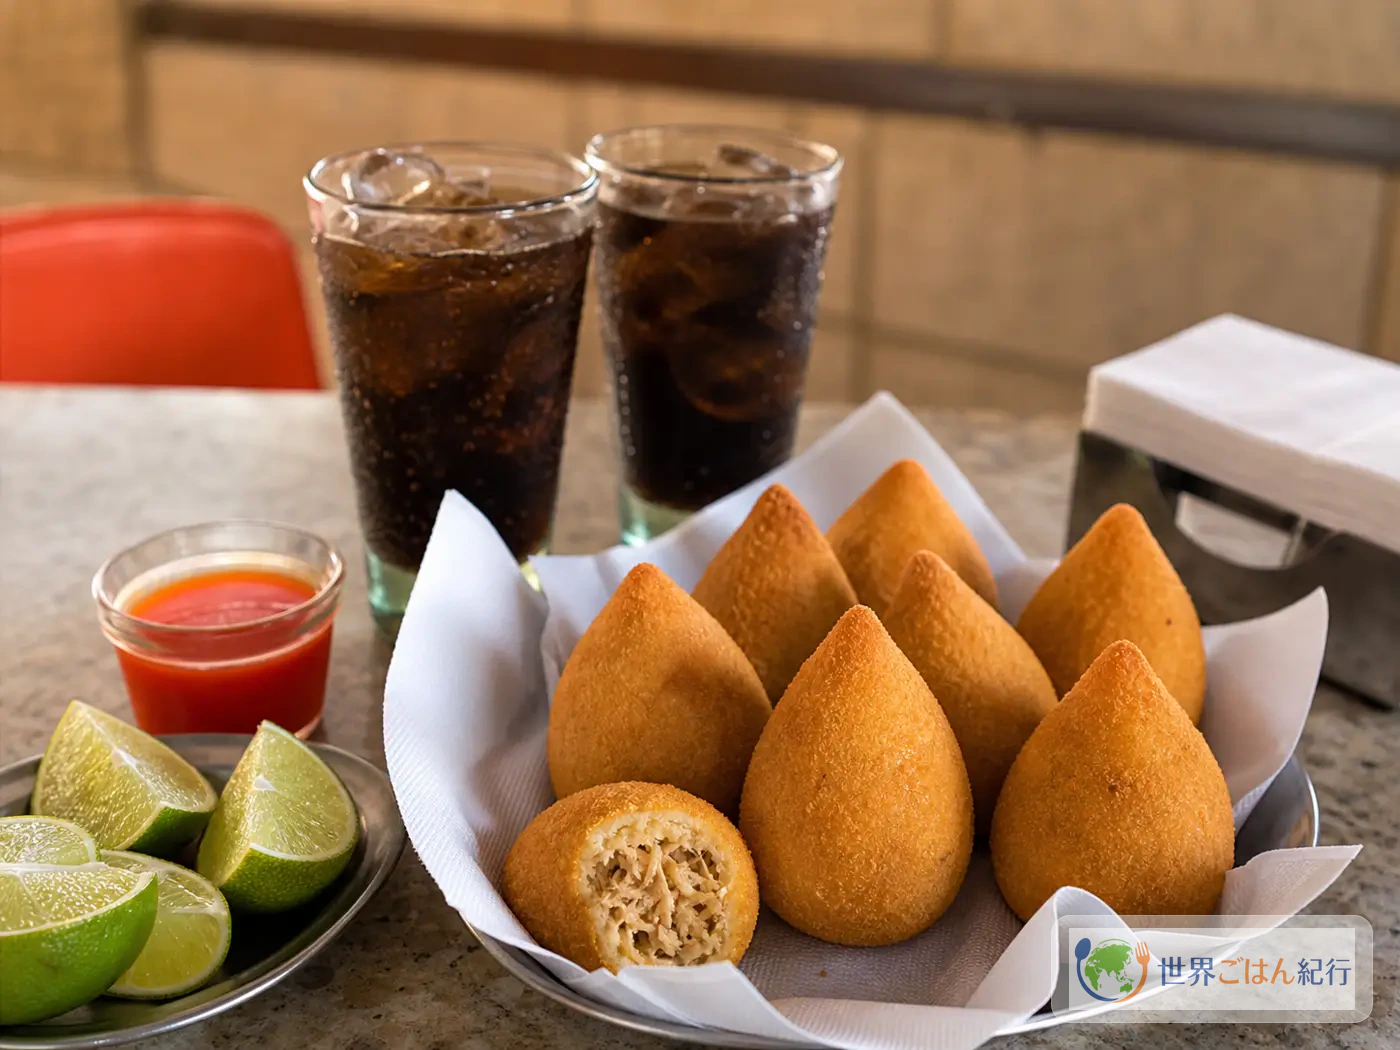
A Brazilian snack table with coxinhas and drinks
Fresh-fried coxinhas are eaten at snack-bar counters and at family gatherings alike

Coxinha is both home cooking and shop snack. In Brazilian lanchonetes (snack bars) and padarias (bakeries), fried snacks fill the glass cases from morning until evening: coxinha, pastel, kibe, pão de queijo. A large one makes a light lunch on its own; small ones appear by the dozen at birthday parties and family get-togethers.

English-language and Brazilian food writing describes coxinha as "shredded chicken and cheese covered in dough, breaded and deep-fried." In other words, the meat isn't fried as is; it's wrapped in a dough that carries the chicken's flavor. Panelinha's recipe, too, treats making a good chicken broth first as an essential step. That is the big difference from an ordinary chicken croquette.

At shops in Brazil you often see coxinhas with Catupiry. Catupiry is known as a Brazilian brand of creamy cheese, and inside a coxinha it keeps the chicken moist and holds it together. Because the real thing is hard to come by elsewhere, rather than making the filling rich with cream cheese alone, add a little chicken broth so the filling doesn't set too firm. Making a stretchy cheese like mozzarella the star pushes it toward a different dish, so here the aim is "keeping the chicken filling moist."

Shape matters for authenticity too. Not a round croquette, but a teardrop that swells at the base and tapers to a point at the top. It doesn't have to be identical, but closing the top narrowly means each bite gets dough, filling and crust all at once. The shape isn't just for looks; it's tied to the way you eat it.


Ingredients — chicken and dough from an ordinary kitchen
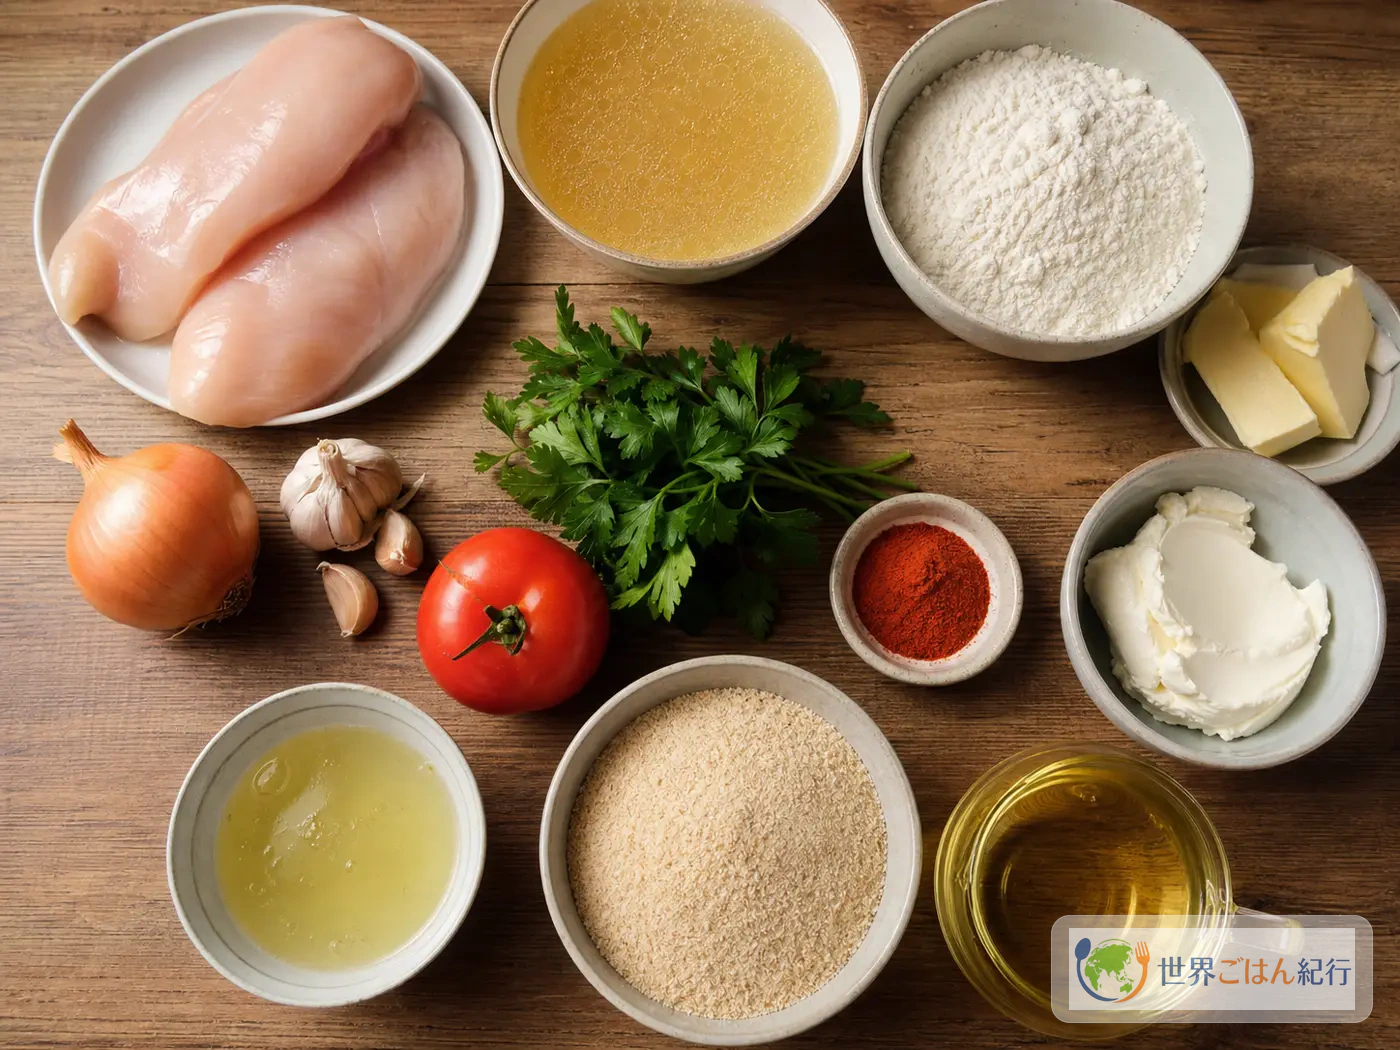
Coxinha ingredients: chicken breast, broth, flour, breadcrumbs, cheese and aromatics laid out
Coxinha uses the chicken poaching broth in the dough, so even a short ingredient list comes together well

This makes 12 fairly large coxinhas. As a snack it serves 4; as a party appetizer it can stretch to 6. The first time, don't make them too small: about 45 g dough and about 25 g filling per piece is easiest to wrap.

Chicken broth and filling

Ingredient Amount Substitutes & notes
Boneless, skinless chicken breast 350 g About 12 oz. Chicken tenderloins work too. Thighs are fattier and make a heavier filling
Water 700 ml About 3 cups. Don't discard the broth; it goes into the dough
Onion 1/2 (100 g) Half goes into the poaching broth, half into the filling
Garlic 1 clove Minced
Tomato 1/2 (80 g) Seeded and cut into 5 mm dice. 1 tsp tomato paste also works
Vegetable oil 1 tbsp For sautéing the filling
Paprika 1 tsp Stands in for Brazilian colorau, adding color and aroma
Chicken poaching broth 3 tbsp Keeps the filling moist
Cream cheese 60 g Stands in for Catupiry or requeijão. Bring to room temperature
Parsley 10 g Minced. Flat-leaf parsley works too
Salt 1/2 tsp For the broth. Taste the filling and add 1/4 tsp
Black pepper 1/4 tsp Coarsely ground

Dough and coating

Ingredient Amount Substitutes & notes
Chicken poaching broth 300 ml If short, top up with water to 300 ml (about 1 1/4 cups)
Milk 100 ml Makes a smoother dough than broth alone
Salted butter 30 g If using unsalted, add another 1/4 tsp salt
Cake flour (soft wheat flour) 240 g Always sift once. Bread flour tends to make it hard; all-purpose flour is the closest common substitute
Salt 1/2 tsp For the dough
Egg whites From 2 eggs Mixed with 1 tbsp water to help the coating stick
Water 1 tbsp For the egg whites
Fine breadcrumbs 120 g Pulse briefly in a food processor so they coat evenly
Oil for deep-frying About 1.2 L At least 4 cm (1 1/2 in) deep in an 18 cm (7 in) pot
For anyone with allergies

This recipe uses chicken, wheat, eggs and dairy. Some breadcrumbs and cream cheese may contain soy or other allergens depending on the product. When making these for a party, check the ingredient labels before serving.

Shopping items that can be confusing

The paprika is there for color and aroma, not heat. A lot of smoked paprika pushes the aroma toward Spain, so regular sweet paprika is easier for a first try.

The oil temperature makes or breaks a coxinha. If you want to avoid crusts that darken only on the surface, or coxinhas that soak up oil and turn heavy, a cooking thermometer is a real help.

On days when you make dozens, chopping the onion and breaking down the breadcrumbs adds up. You can do it by hand, but a small food processor makes larger batches easier.


Method — work the dough, wrap the filling, fry briefly

Coxinha is a long process: poach the chicken, make the filling, cook the dough, shape, and fry. Rush any stage and they burst. Simply cooling the filling first and wrapping only once the dough is at a workable temperature raises your success rate considerably.
  1. Poach the chicken and shred it finely

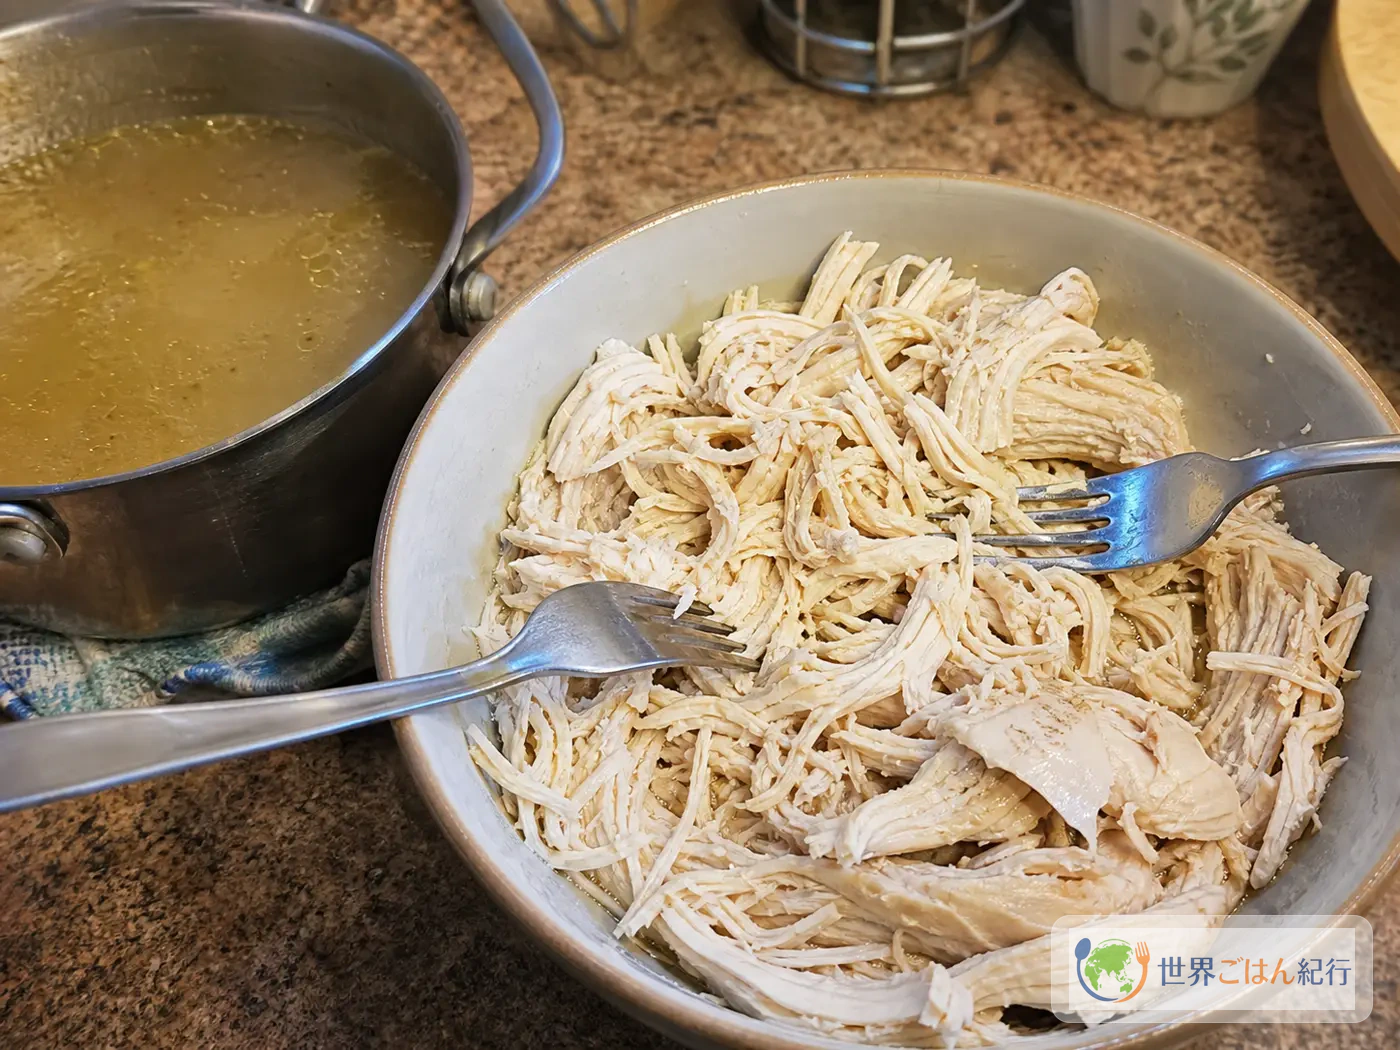
    Put 350 g chicken breast, 700 ml water, 1/4 onion and 1/2 tsp salt in a pot and bring to a boil over high heat. Once it boils, lower the heat, set the lid slightly ajar and simmer for 15–18 minutes. It's done when the center is white all the way through; if you have a thermometer, check for 74°C (165°F) in the center. When it's cool enough to handle, pull it along the grain into thin strands 3–4 cm long, and set aside 300 ml of the broth for the dough.

    Shredding poached chicken breast finely with forks
    The finer the chicken is shredded, the easier it is to wrap in dough and the better it blends with the cream cheese
  2. Sauté the chicken filling

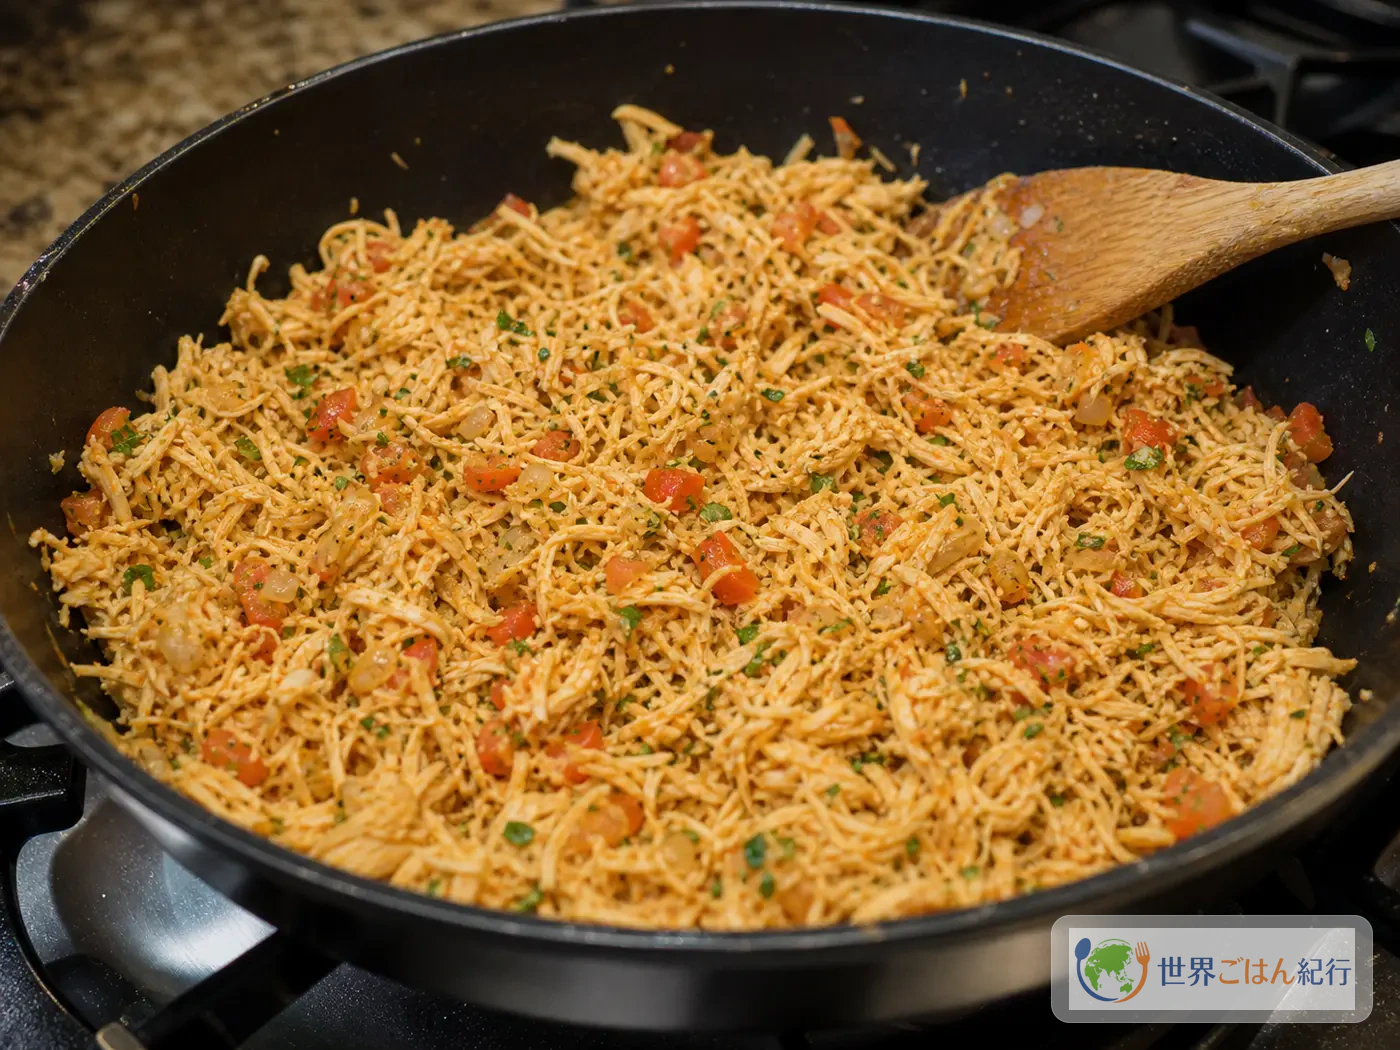
    Heat 1 tbsp vegetable oil in a skillet over medium heat and sauté 1/4 onion, minced, for 3 minutes. When it turns translucent, add the garlic, tomato and paprika and sauté 2 more minutes to cook off some of the moisture. Add the shredded chicken, 3 tbsp broth, 1/4 tsp salt and the black pepper, and stir over medium-low heat for 4 minutes. Turn off the heat, then mix in the cream cheese and parsley. The filling should hold together without any liquid running.

    Sautéing the chicken filling in a skillet
    Bring the filling to the point where it's moist but no liquid runs when you tilt the pan
  3. Cook the dough in the broth

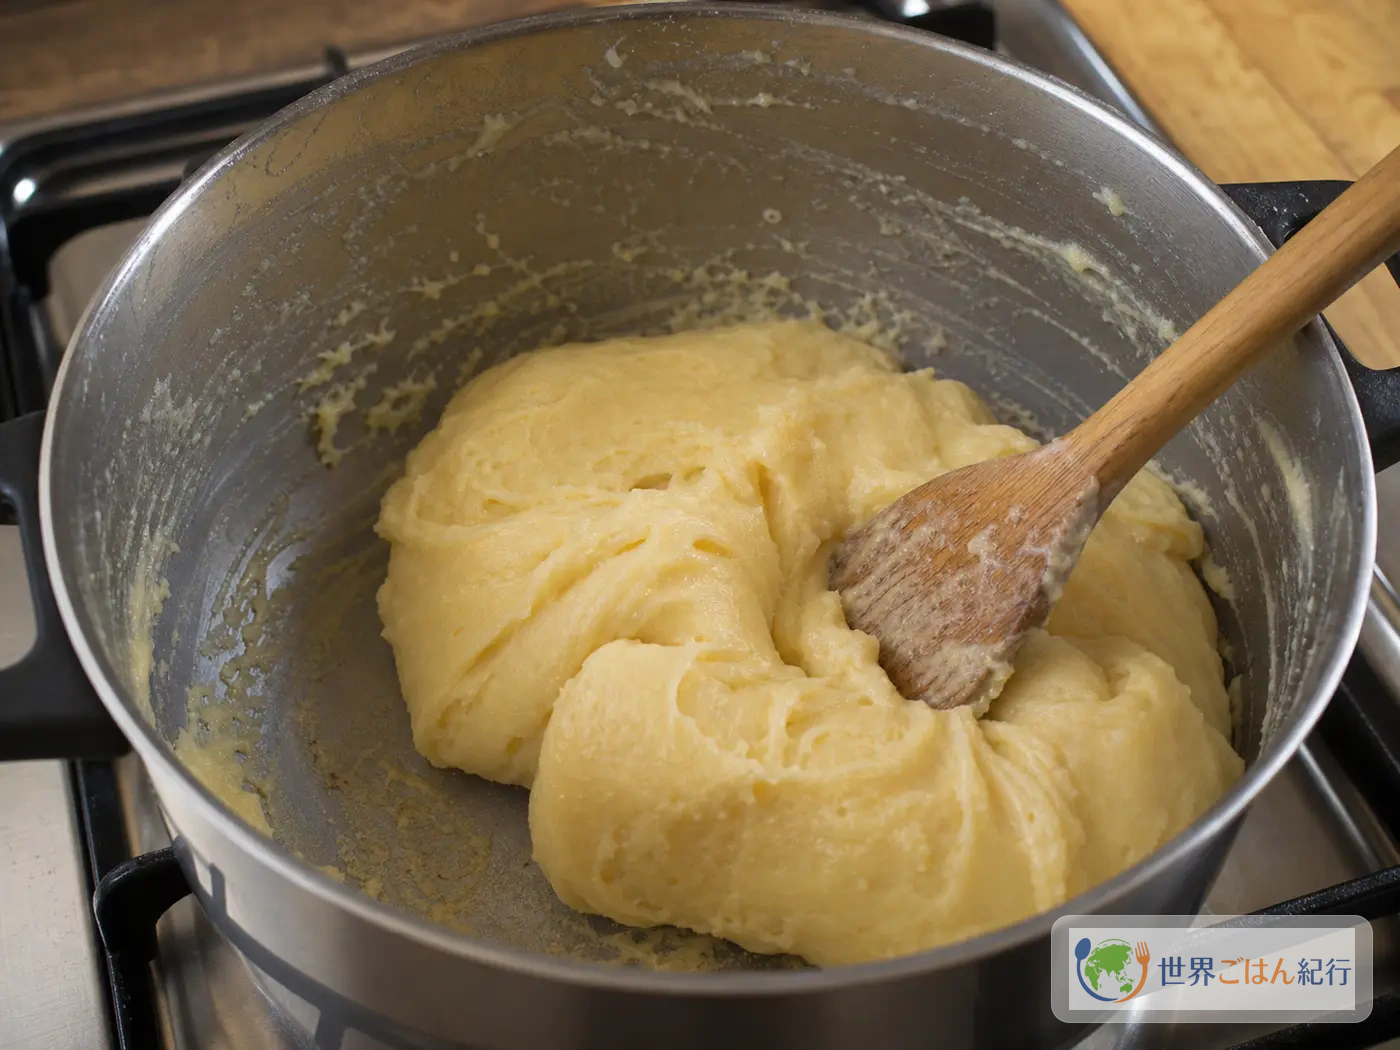
    In a separate pot, warm 300 ml chicken broth, 100 ml milk, 30 g butter and 1/2 tsp salt over medium heat. When it bubbles and the butter has melted, lower the heat to medium-low and add 240 g sifted flour all at once. Stir hard from the bottom with a wooden spoon for 5–6 minutes, until a thin dry film forms on the bottom of the pot and the dough comes together in one mass that pulls away from the pot. Any raw floury taste left behind makes them heavy after frying, so don't stop stirring here.

    Working the coxinha dough in a pot
    Work the dough until it pulls away from the pot and a thin film appears on the bottom, and it will be less sticky when shaping
  4. Cool the dough and divide it

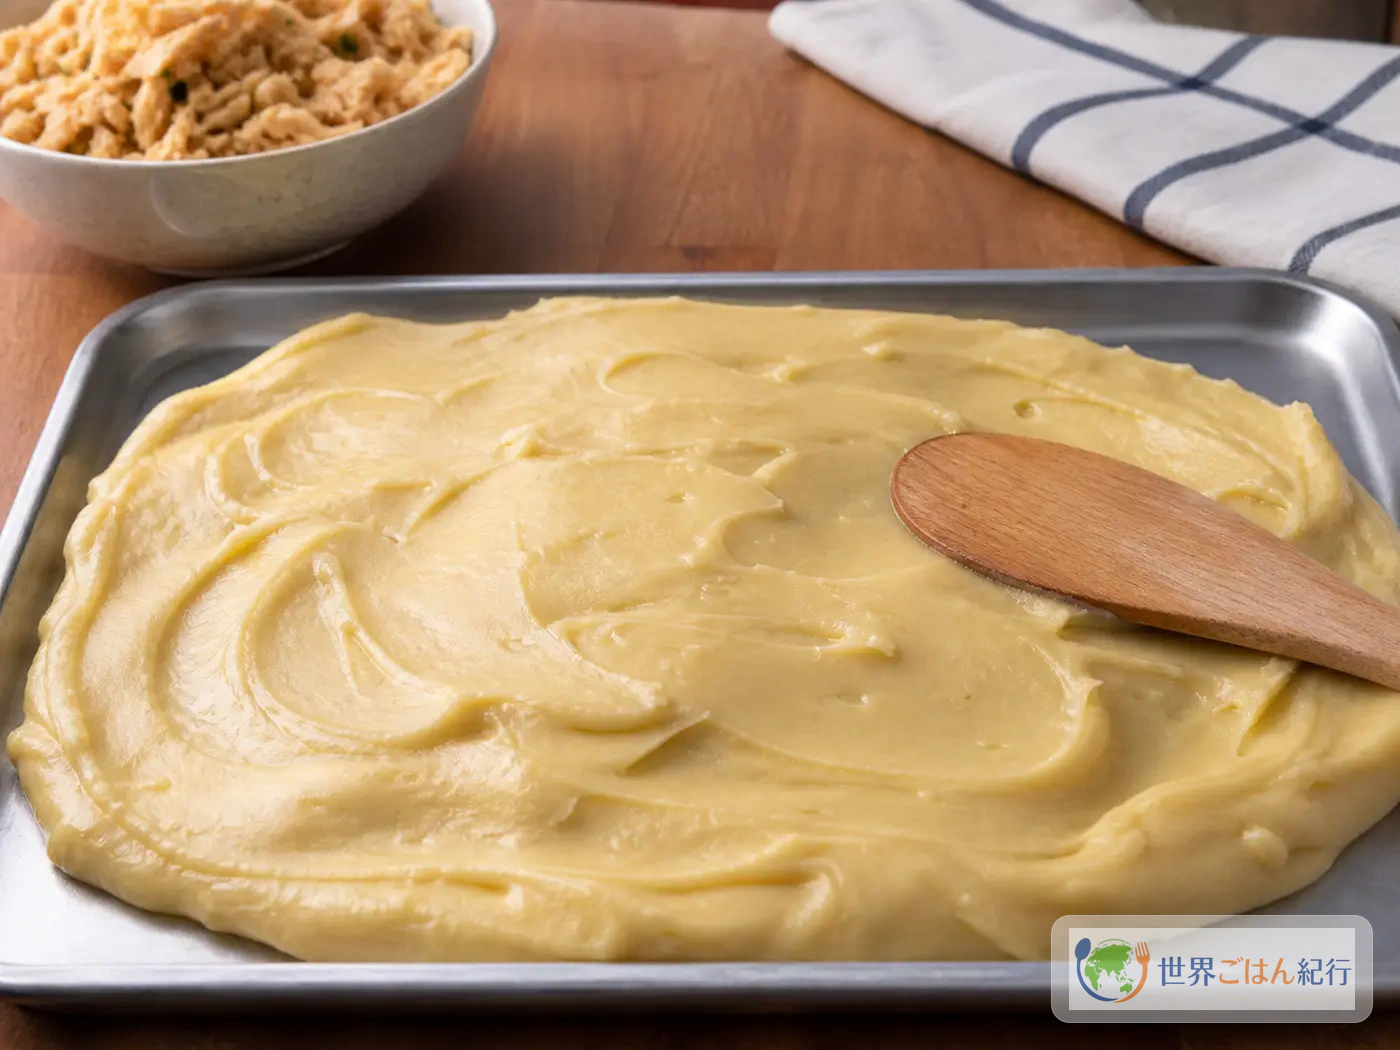
    Spread the dough in a tray and cover loosely with plastic wrap so the surface doesn't dry out; let it cool for 15–20 minutes. It's ready when it no longer feels hot to the touch and a fingertip dent springs back slowly. If you wrap while it's still hot, the cheese in the filling loosens and the dough tears easily. Divide it into 12 and roll each into a ball of about 45 g so they're all the same size.

    Cooling the cooked coxinha dough spread in a tray
    Cooled too much, the dough cracks; too hot, and the filling loosens. Warm enough to handle comfortably is easiest
  5. Wrap the filling and shape into teardrops

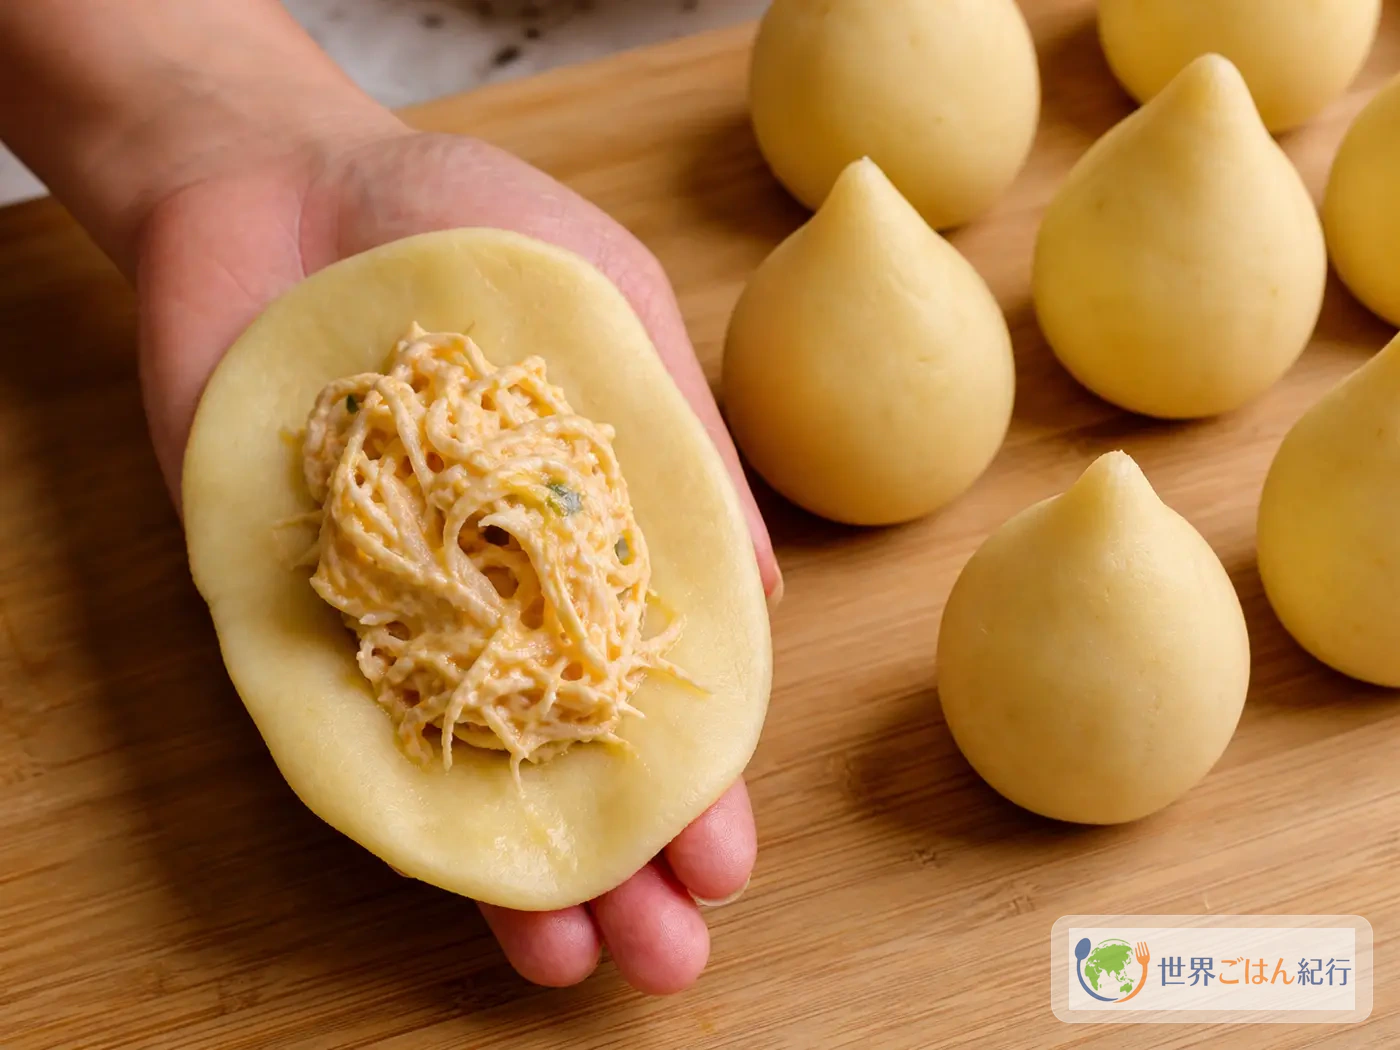
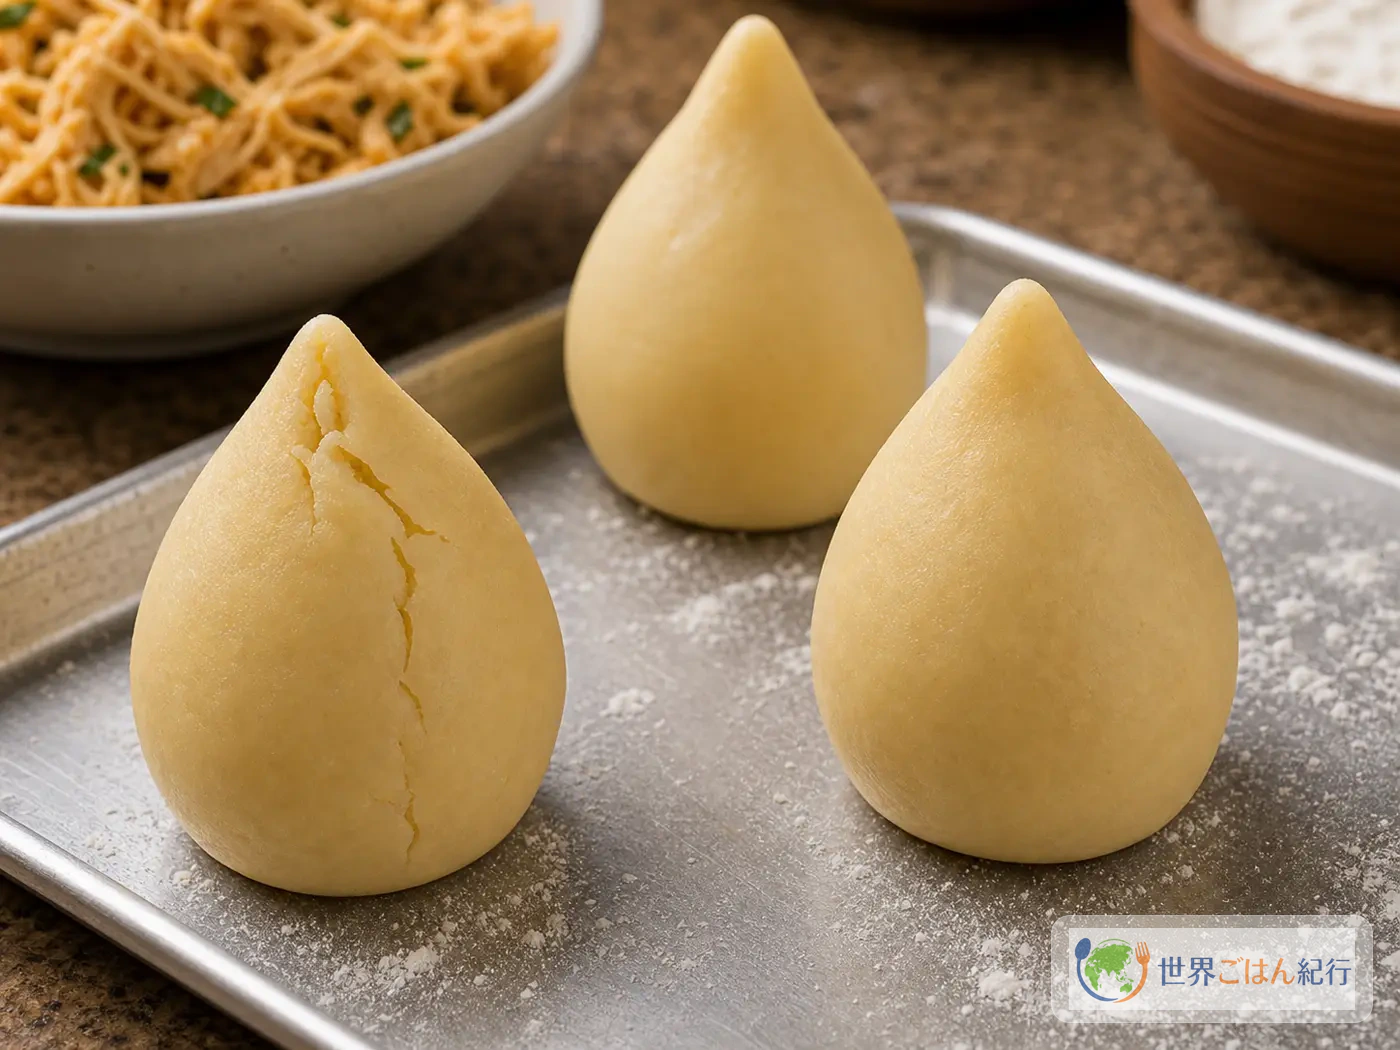
    Allow 12–15 minutes for 12 pieces. Flatten a ball of dough in your palm into a disk about 9 cm (3 1/2 in) across and make a slight hollow in the center. Place a heaping tablespoon, about 25 g, of filling in it, and draw the edges of the dough up to close. Pinch the tip, keep the base flat, and smooth the sides into a teardrop. Aim for about 8 mm thick at the base, with the tip not too thick. If cracks appear, smooth them with a fingertip lightly dampened with water.

    Placing chicken filling on coxinha dough and wrapping it
    Don't stretch the dough too thin; set the filling in the center and close it upward for an easy teardrop shape
  6. Coat with egg white and breadcrumbs

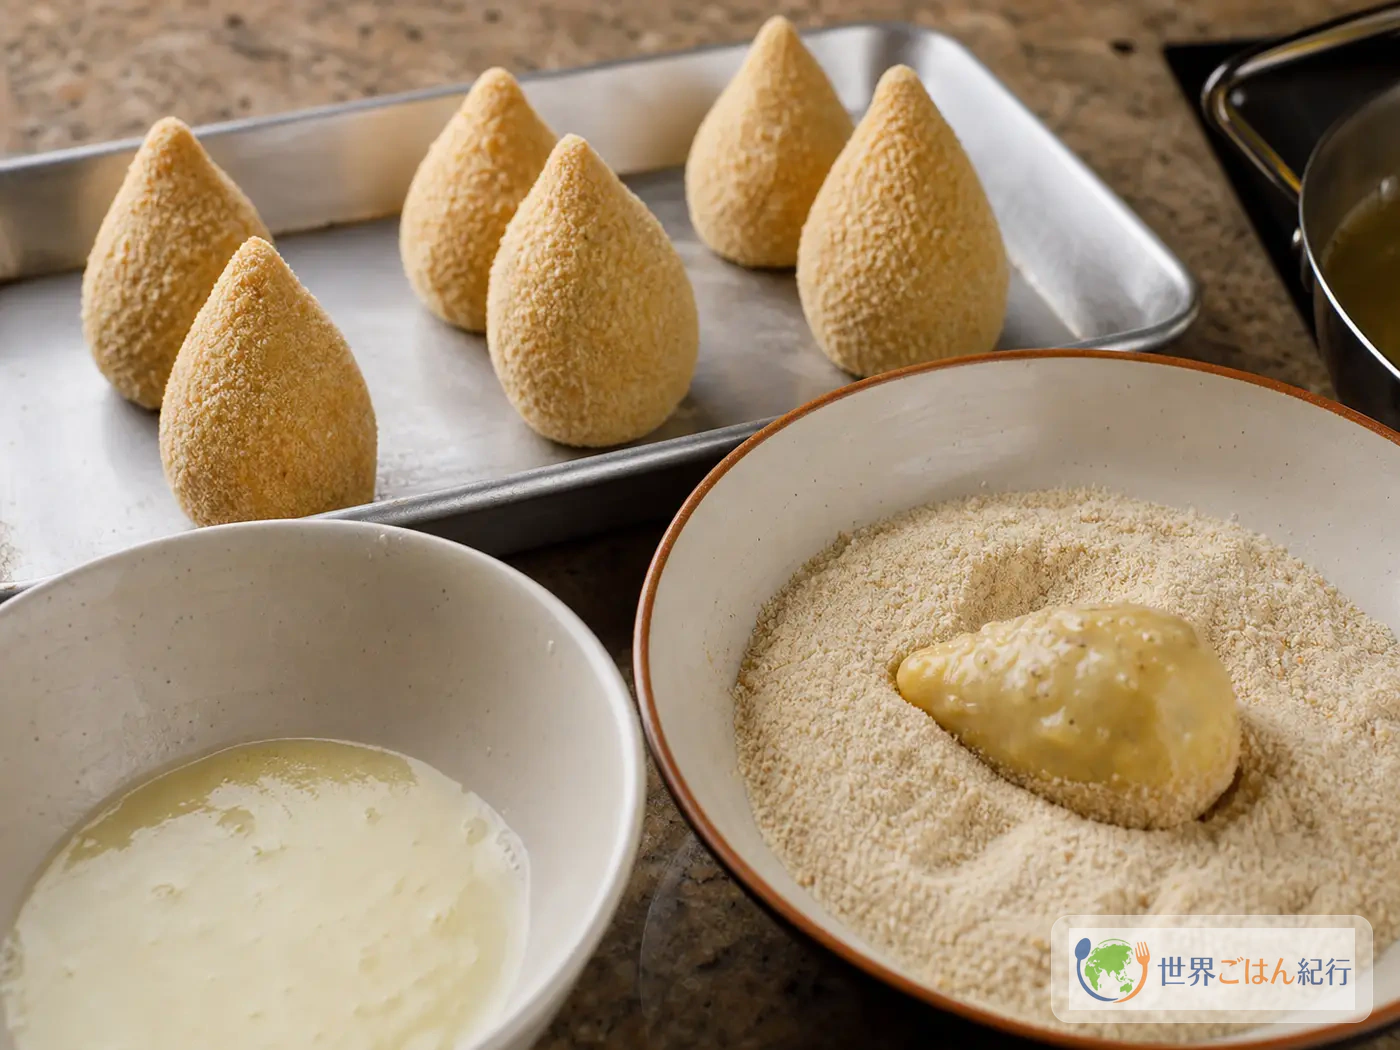
    Mix the 2 egg whites with 1 tbsp water with a fork for 30 seconds. Overbeating makes the coating thick and patchy, so stop as soon as the whites loosen. Dip each coxinha in the egg white mixture, then press on fine breadcrumbs, crushed to about 2–3 mm, all over. Finish all 12 in 8–10 minutes and set them on a tray with space between them. If the crumbs coat evenly with no dough showing, they're less likely to split during frying.

    Coating coxinhas with egg white and breadcrumbs
    The finer the breadcrumbs, the more evenly they coat and the smoother the fried surface
  7. Fry briefly at 180°C

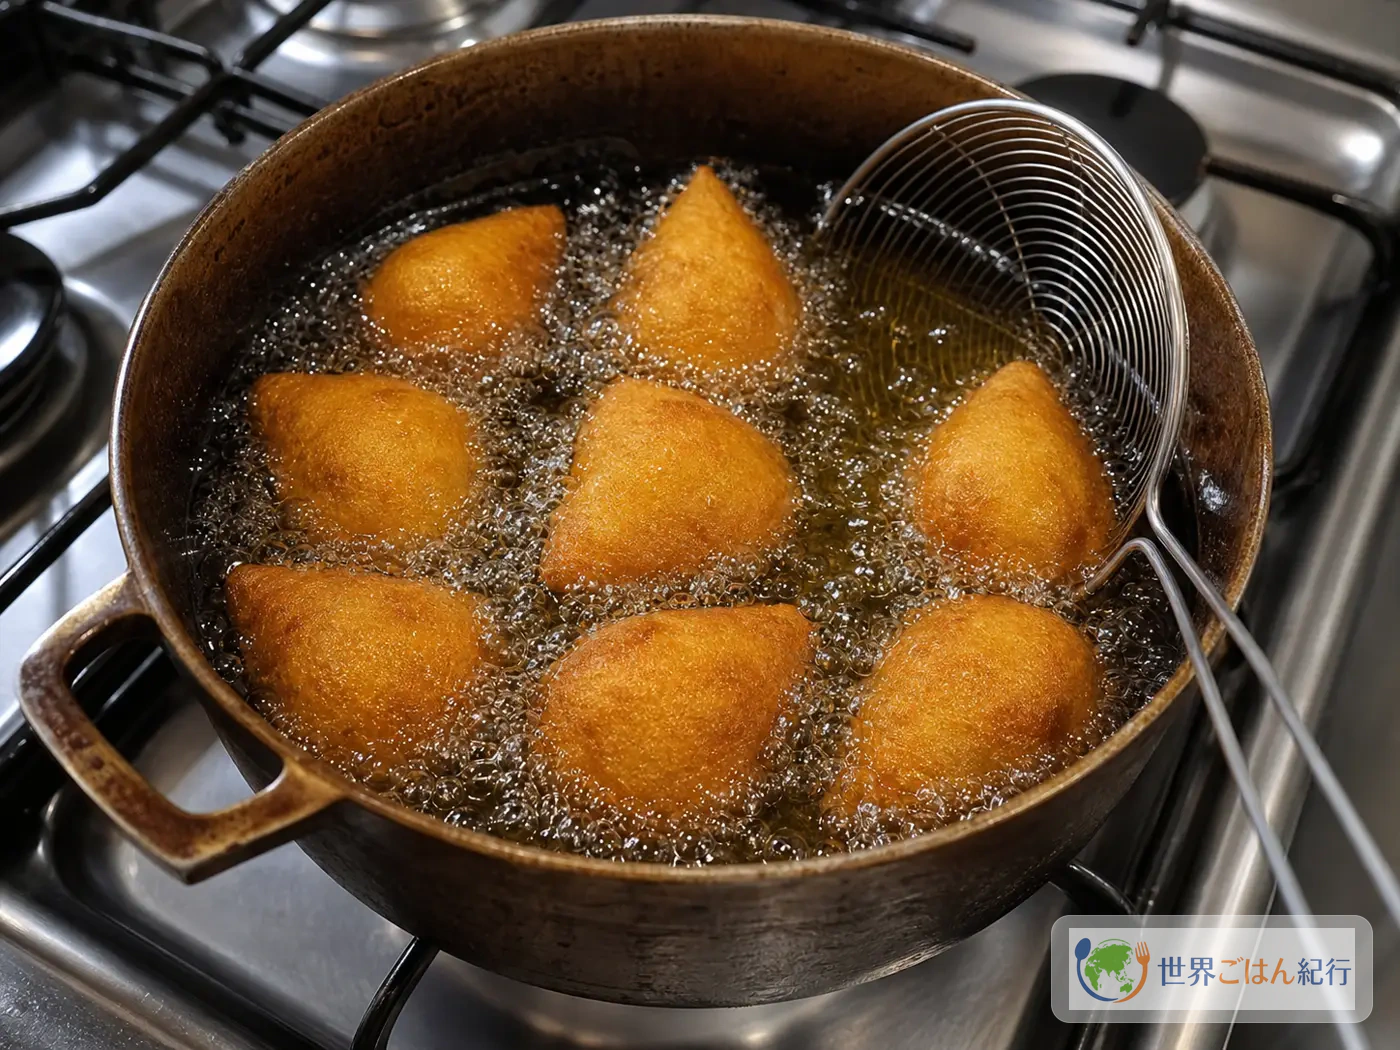
    Pour oil at least 4 cm deep into a pot and heat over medium to 180°C (356°F). Without a thermometer, drop in a few breadcrumbs: they should immediately release fine bubbles and float without burning. Fry 3–4 at a time, keeping the heat at medium as the oil temperature drops. Fry for 2 1/2–3 minutes, turning occasionally, until deep golden all over. The filling is already cooked, so think of it as coloring the crust, not frying for a long time.

    Frying coxinhas in 180°C oil
    Oil that's too cool makes them heavy; too hot, and only the outside darkens. Fry briefly at around 180°C
  8. Drain on a rack and serve hot

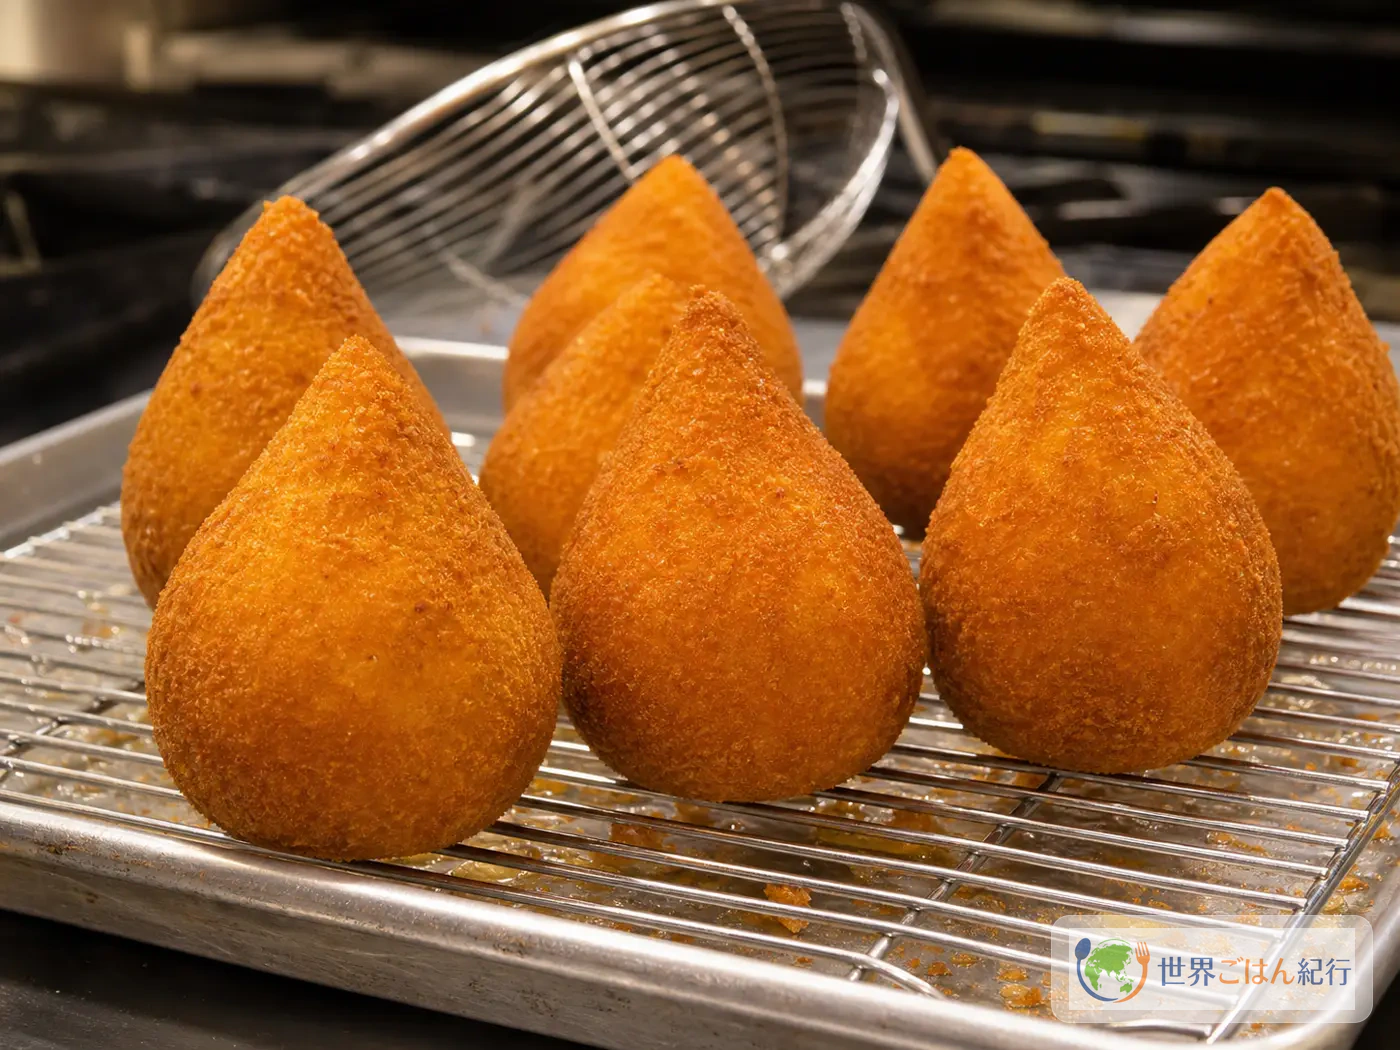
    Don't pile the fried coxinhas on paper; stand them on a wire rack and let them drain for 3 minutes. Oil won't pool at the base, and the fine crispness of the crust stays. They're done when, cut open, the inside of the dough is moist and the filling is hot and steaming. A little red pepper sauce, mayonnaise mixed with lime, or vinagrete (in Japanese) on the side lightens the richness of the fried food.

    Draining fried coxinhas on a wire rack
    Rest them on a rack straight from the oil. The crust stays lighter than when piled on paper
If freezing, do it before frying

The easiest approach at home is to freeze them shaped and breaded. To fry from frozen, lower the oil to 170°C (338°F) and take 4–5 minutes so they heat through to the center. If they go into oil that's too hot, the outside darkens while the inside stays cold.


Cooking tips — a shape that won't burst, and how to think about oil temperature

Coxinhas comparing correct shaping and cracked shaping
Fix cracks before frying. Check not only the tip but also any thin spots on the sides

Coxinha failures show up in the shape more than the flavor. They split while frying, the filling seeps out of the base, the coating peels off. The causes are almost always the same.

If the dough is sticky, it wasn't worked long enough. Even if it comes together right after the flour goes in, taking it off the heat then leaves moisture behind. Working it an extra 2–3 minutes, until a thin film forms on the bottom of the pot, makes it less likely to stick to your hands. Conversely, if it cracks from cooling too much, cover it with plastic wrap to keep it moist and knead it lightly by hand before shaping.

If the filling is watery, rethink how you sauté it before adding more cheese. After adding the chicken, tomato and broth, cook off the moisture over medium-low heat until it holds together when lifted with a wooden spoon. A runny filling wets the dough from the inside and the seam opens.

A double coating is sturdier, but at home one coat is enough. What matters is how fine the breadcrumbs are. Coarse crumbs look rough and tend to pile up thickly at the tip. Pulse them briefly in a food processor, or crush them a little with a rolling pin through the bag, and you get closer to the smooth surface of a snack-bar coxinha.

Use 180°C as your benchmark oil temperature. Since the filling of shaped coxinhas is already cooked, frying is really "setting the coating while warming them through." Fry low and long and they soak up oil; fry hot and fast and only the tip darkens. Don't crowd the pot; frying 3–4 at a time is more consistent.


Variations and serving — big snacks, small party bites

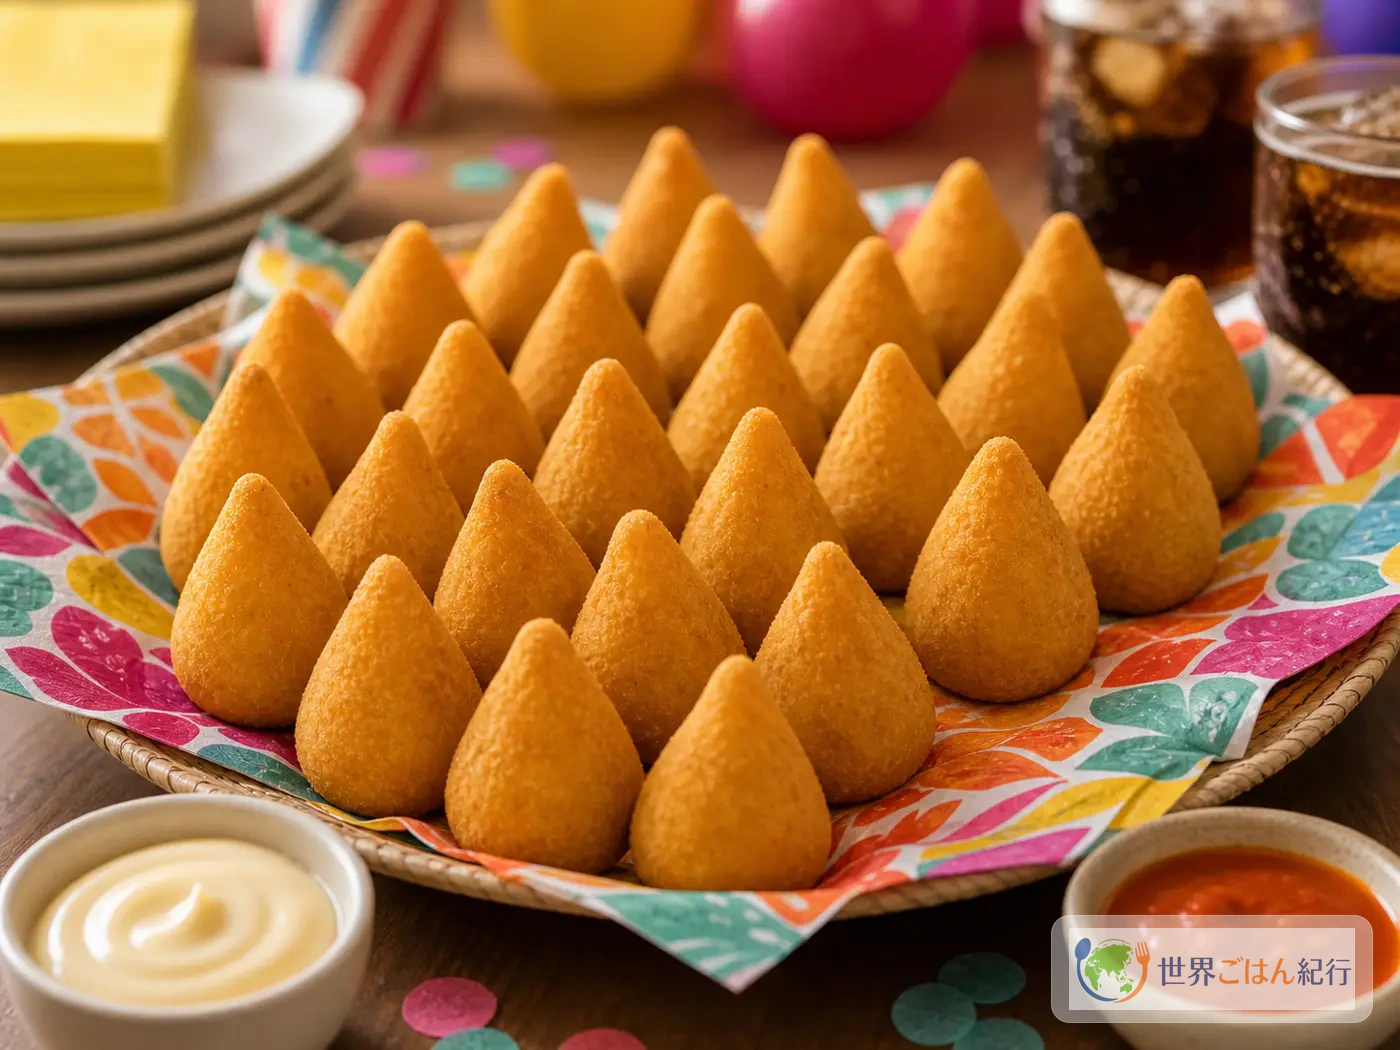
Small coxinhas arranged on a platter for a party
Small coxinhas suit birthday parties and potlucks. Fry a few at a time so the oil temperature doesn't drop

A large coxinha like the ones from a shop is quite filling on its own. At home, slightly smaller ones are easier to wrap and keep the oil temperature steady. Once you've got the basic 12-piece batch down, you can make 24 minis instead. In that case, use 2 tsp filling and about 25 g dough each, and shorten the frying time to around 2 minutes.

For something closer to Catupiry, loosen the 60 g cream cheese with 2 tsp milk. Add a pinch of salt as well, and saltiness comes forward rather than sweetness. Some versions use mozzarella, but the stretchy fun takes over and it feels different from the traditional chicken filling. Start with the chicken-and-cream-cheese combination.

For heat, adjusting with a sauce at the table is more reliable than putting chili in the filling. Brazilian snack bars sometimes serve a little red pepper sauce on the side. At home, a quick hot sauce of vinegar, chili and garlic, or a store-bought chili sauce, is plenty.

On a menu, coxinha sits on the appetizer side. On a day when black-bean feijoada (in Japanese) is the main, make the coxinhas small. On a churrasco (in Japanese) day, serving a few first makes the wait more fun. If you don't want to stack fried food on fried food, pairing them with a stewed fish dish like moqueca baiana (in Japanese) changes the balance.


Storage and make-ahead — freezing before frying is easiest

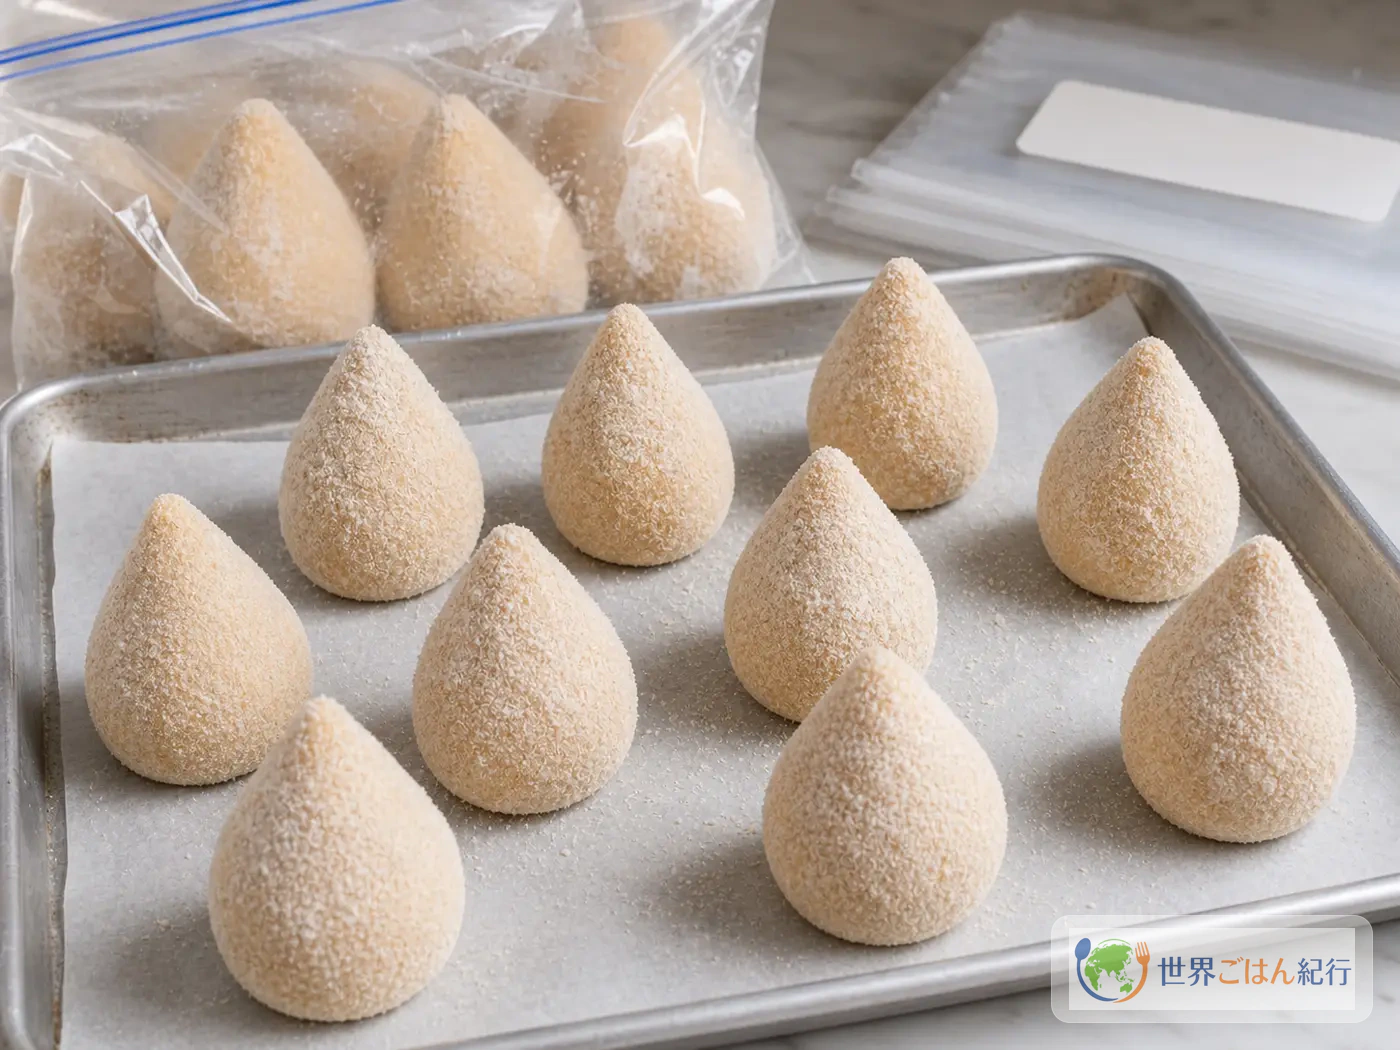
Coxinhas spaced out on a tray before freezing
Freeze breaded coxinhas spaced apart, then transfer them to a bag so they keep their shape

Coxinhas take effort, so if you're making them, it's worth making extra. But freezing them before frying gives more reliable results than storing them after frying.

Arrange shaped, breaded coxinhas on a tray with space between them. Freeze for 2–3 hours until firm, then transfer to a freezer bag. Doing it in this order keeps them from sticking together in the bag or crushing their tips. In a home freezer, use them within 2–3 weeks so they don't pick up freezer odors.

When frying from frozen, set the oil to 170°C. Frying at 180°C darkens the surface first and can leave the inside cold. Fry for 4–5 minutes, until the bubbling calms down and they're golden all over. If you're unsure whether the center is hot, cut one open and check for steam and warmth.

Fried coxinhas keep in the refrigerator until the next day once cooled. Reheating only in the microwave softens the crust. Microwave at 600 W for 30 seconds, then bake in a toaster oven or a 180°C (356°F) oven for 4–5 minutes and the surface crisps up a little. They won't be quite like fresh from the fryer, but they work for breakfast or as a small item in a packed lunch.


Frequently asked questions

Does coxinha have potato in it?

Some recipes include it, but it isn't essential. A dough made only with flour and chicken broth is common too. Potato makes the dough softer and easier to handle, but it can feel heavy once cooled. Here the dough is mainly flour, to bring out the aroma of the chicken broth.

What can I use if I don't have Catupiry?

Cream cheese is the easiest. On its own, though, it tends to be rich and firm, so mix it into a filling with a little chicken broth. To get closer to requeijão, add 1–2 tsp milk to the cream cheese to smooth it out.

Can I use ordinary breadcrumbs?

Yes. But coarse breadcrumbs, such as panko, give a surface closer to a Japanese croquette. For the smooth coating of a Brazilian snack bar, put dry breadcrumbs in a bag and crush them lightly with a rolling pin, or pulse briefly in a food processor to make them finer.

Can I make them in the oven or an air fryer instead of frying?

You can, but the texture will differ from fried coxinha. In an air fryer, brush the surface lightly with oil and cook at 200°C (392°F) for about 10–12 minutes. Turn them once halfway, and take them out when the surface is dry and golden. The dough and filling are already cooked, so think of it as a step for coloring the coating.

Can I leave out the heat for kids?

Absolutely. This filling contains no chili; the paprika is only for color. Adults can add pepper sauce at the table, so for family meals it's easier to adjust the heat on the side.

Won't chicken breast turn out dry?

It dries out if overcooked. Aim for 15–18 minutes over low heat and take it out as soon as it's cooked through. And because the shredded chicken is then sautéed with 3 tbsp broth and bound with cream cheese, it ends up moister than chicken breast eaten on its own.


Wrap-up — coxinha is a snack that uses even the poaching broth

On paper, coxinha is a fried chicken croquette. In practice, it's a dish where the broth from poaching the chicken goes back into the dough, a little goes into the filling, and everything is sealed into a teardrop at the end. That's why not diluting the broth, not letting the filling get watery, and working the dough until it pulls away from the pot decide both flavor and shape.

Start with a batch of 12 to get a feel for shaping. Once you're comfortable, double it: fry half fresh and freeze the other half. That way, the next time you have a Brazilian food day, you can put out a plate right away before the feijoada (in Japanese) or churrasco (in Japanese). It takes some effort in the kitchen, but the moment you break open a hot tip, that effort pays off.


Sources