Frog Cake: Adelaide Sponge Squares Under Green Fondant

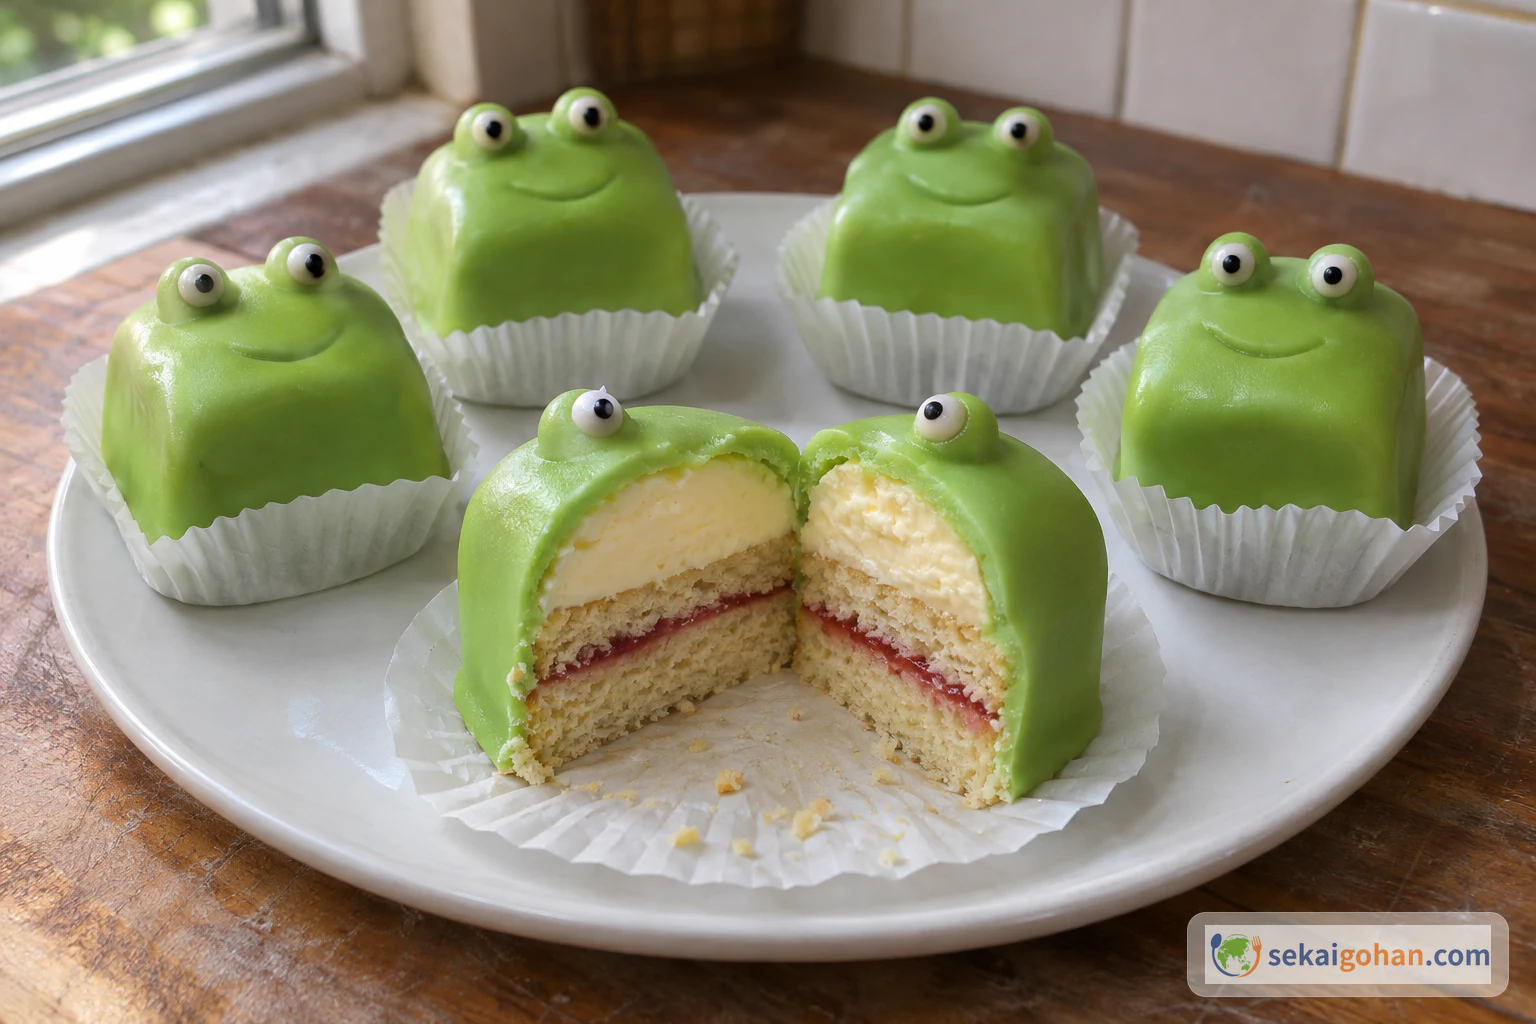
Five frog cakes wrapped in green fondant in paper cases on a white plate, one cut in half to show the sponge, jam and buttercream layers
Level
Intermediate
Cuisine
Australian

Frog cake from Adelaide, South Australia: sponge, jam and a buttercream dome under green fondant. Learn the crumb coat, the ¼-inch fondant drape and the face.

Cooking flow

Cooking steps

STEP 11 / 11

Line the pan and mix the batter all at once

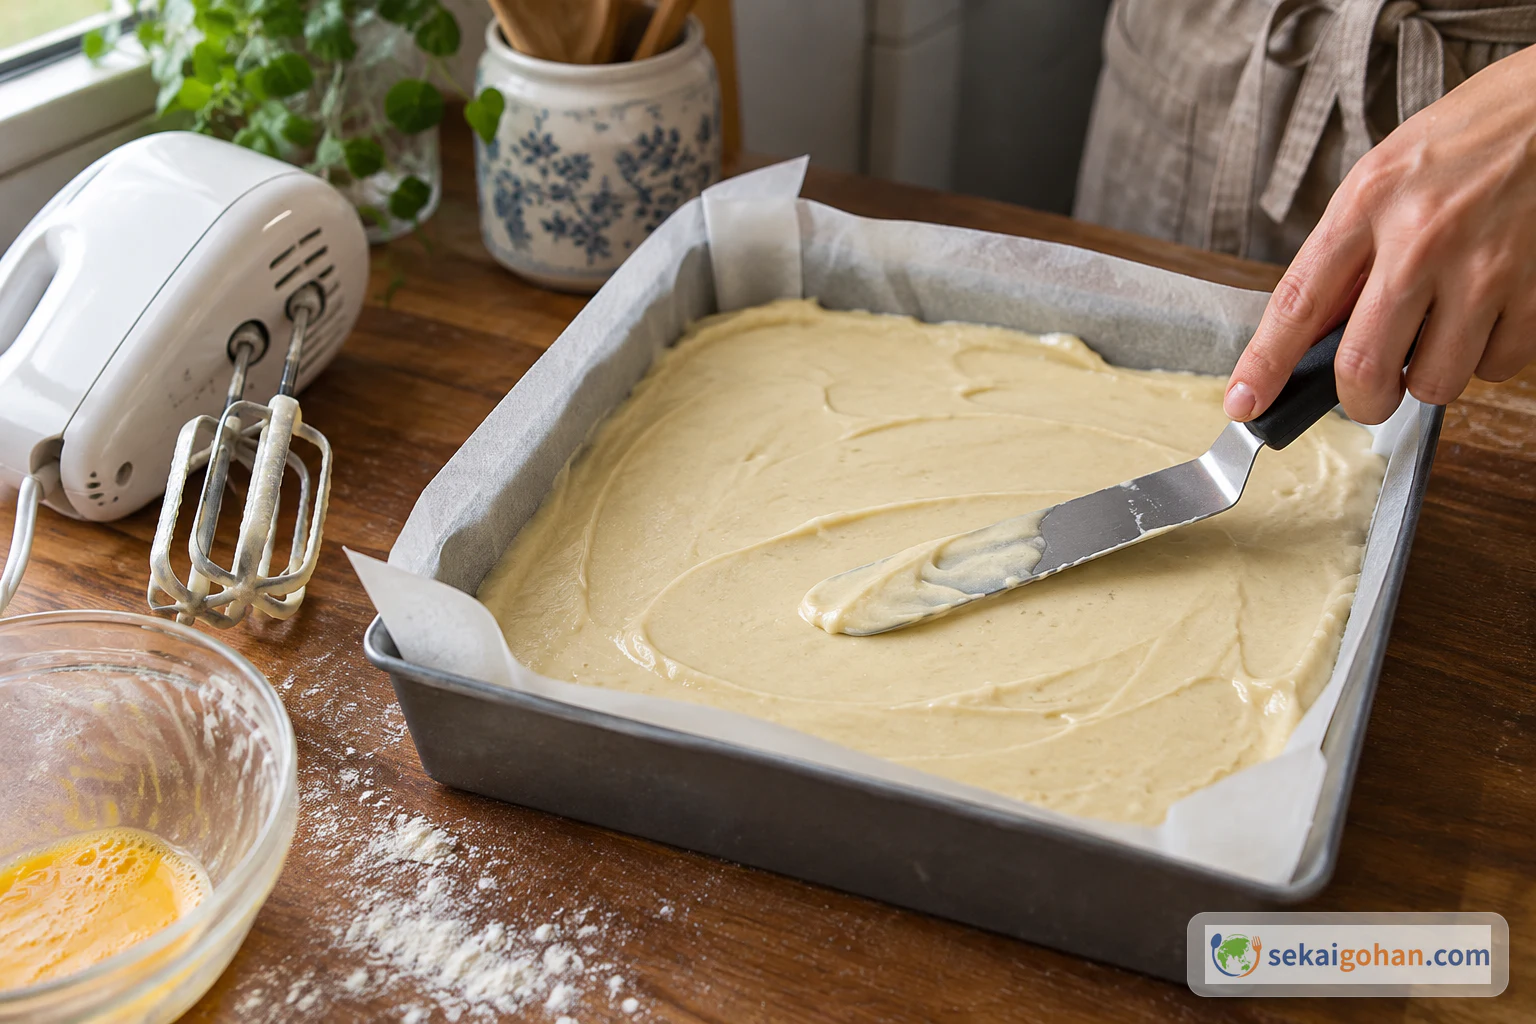
Pale sponge batter in an 8-inch square pan being levelled with an offset palette knife
Push the batter right into the corners so the squares cut from the edge are as tall as the ones from the middle

Heat the oven to 340°F (170°C). Rub a little butter over the pan and line it with parchment cut to fit, so the corners stand up and the base lies flat without creases. Paper that is too big lets batter run underneath. Put the sponge butter, caster sugar, eggs, self-raising flour, baking powder and milk into one bowl and beat with an electric mixer until the batter is smooth, soft and glossy. Scrape it into the pan and level the top. No specks of flour remain, and the batter falls from the beaters in a thick ribbon.

STEP 22 / 11

Bake and cool completely in the pan

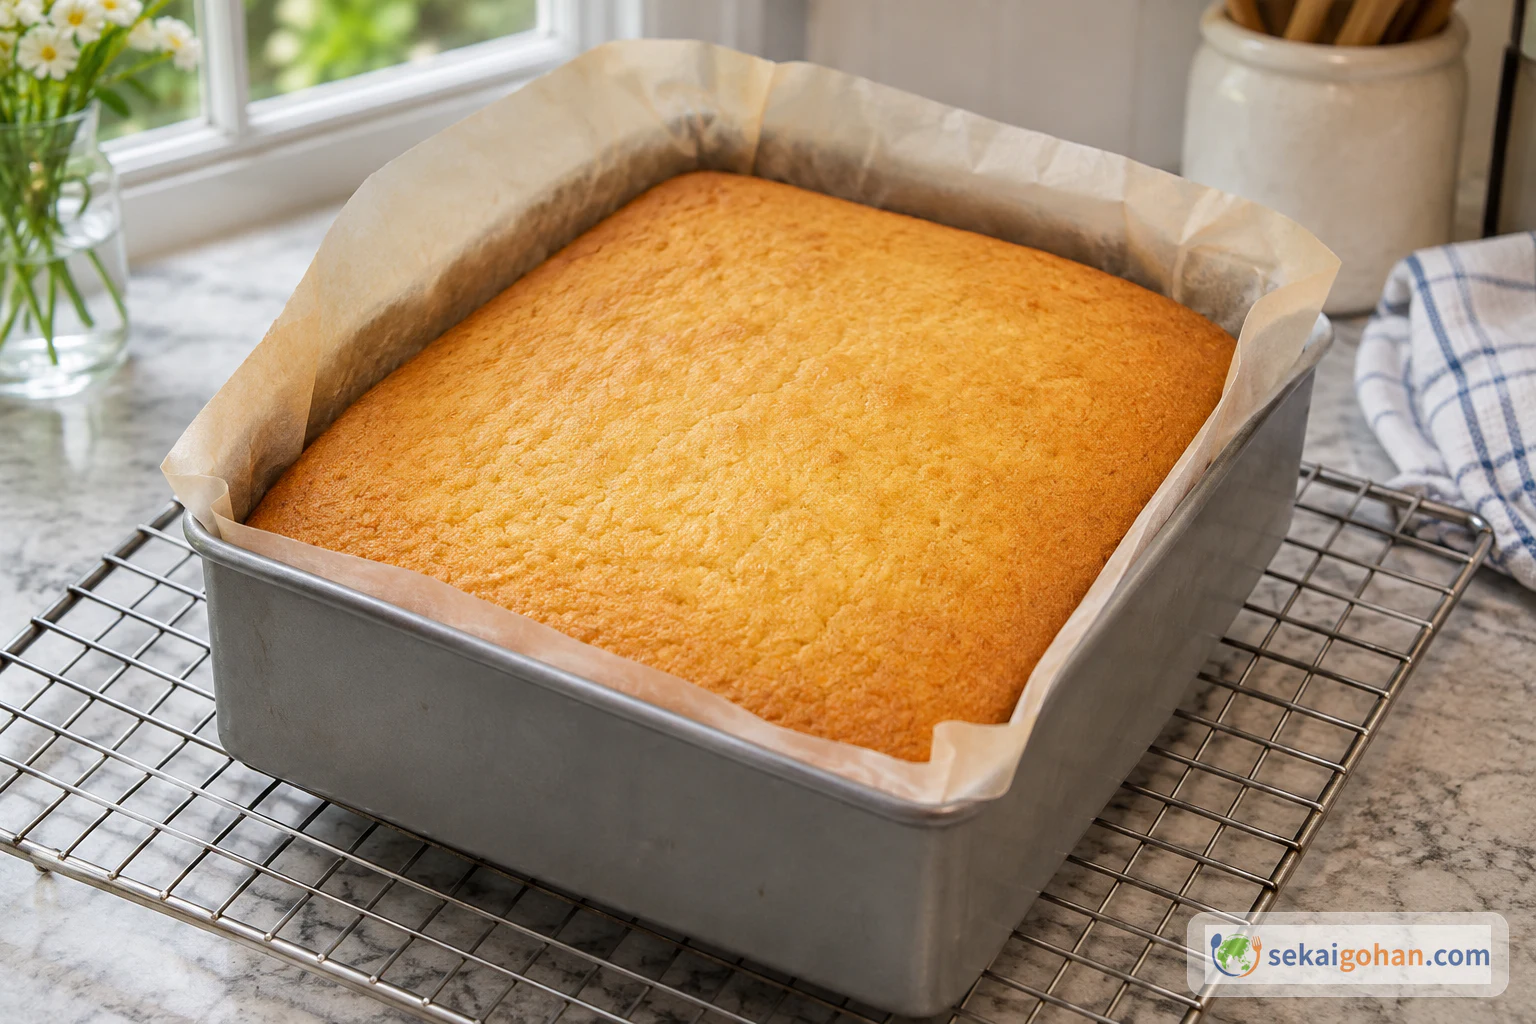
A golden square sponge cooling in its lined pan on a wire rack
A level top bakes into level squares, so a domed middle is worth noticing before you cut

Bake for 25–30 minutes. The edges turn golden, the centre springs back when you press it lightly, and a skewer pushed into the middle comes out clean. If batter clings to the skewer, bake 5 minutes more and test again. The eggs have to be cooked right through to the centre. Set the pan on a wire rack and leave the sponge in it until cold all the way through. The pan feels cool to the touch underneath.

STEP 33 / 11

Split the sponge into two layers

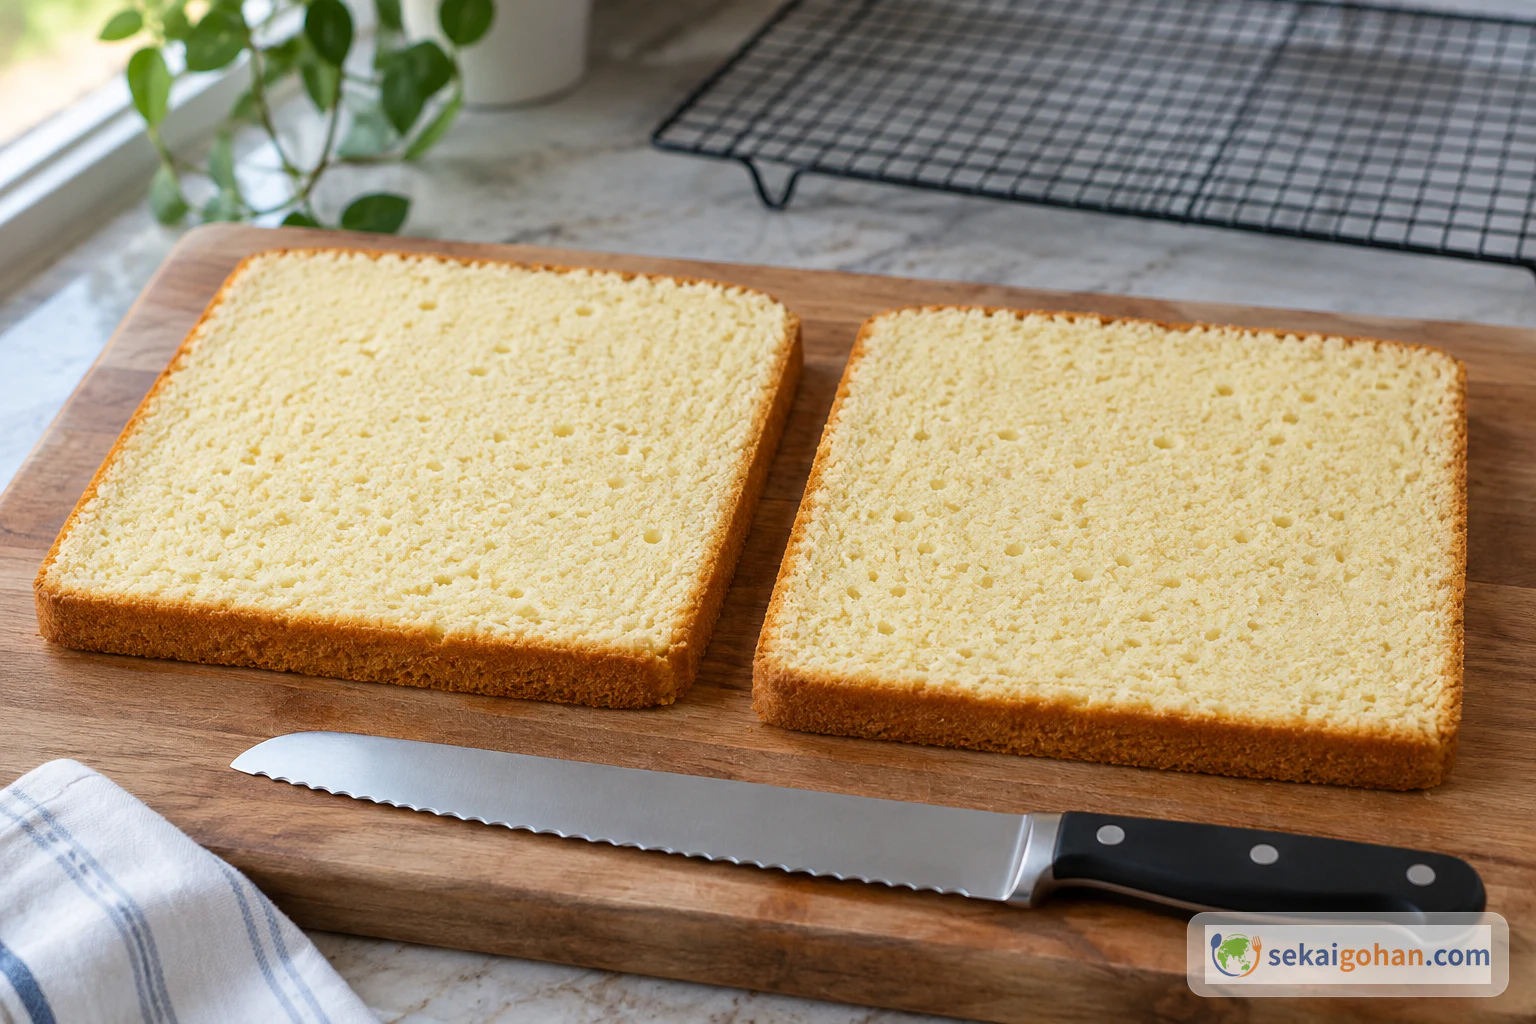
The baked sponge split horizontally into two layers on a board
Lay the layers side by side, cut faces up, so the top layer goes back on in the same orientation

Lift the cold sponge out by the parchment and peel the paper away. Lay it on a board and cut it horizontally into two even layers with a long serrated knife, using long, gentle strokes and keeping the blade flat. A warm sponge tears and crumbles here, which is why it must be cold. You have two layers of the same thickness with flat, fine-crumbed cut faces.

STEP 44 / 11

Spread the jam and stack the layers

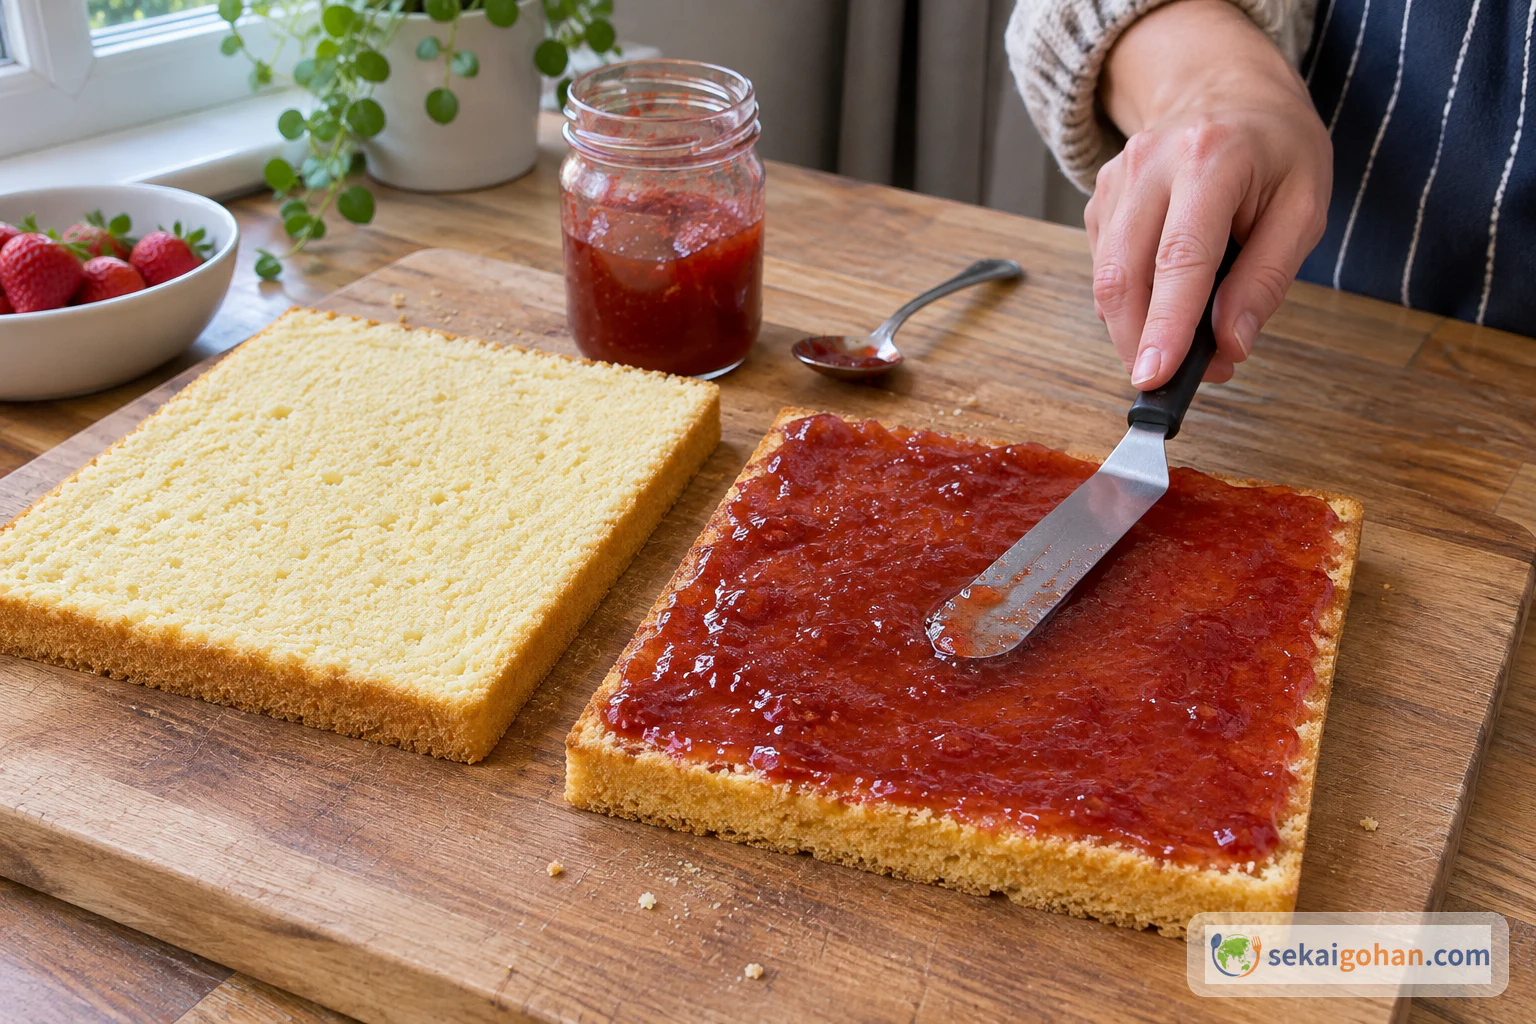
Strawberry jam spread over the bottom square layer, with the top layer waiting beside it
Work the jam into the corners so every square gets a stripe

Spread the strawberry jam over the cut face of the bottom layer with an offset palette knife, thinly and evenly, right to the edges. Set the top layer back on and press gently with a flat hand. Thick jam squeezes out and slides when you cut. The jam is thin enough that the sponge shows through it.

STEP 55 / 11

Cut into 1½-inch squares

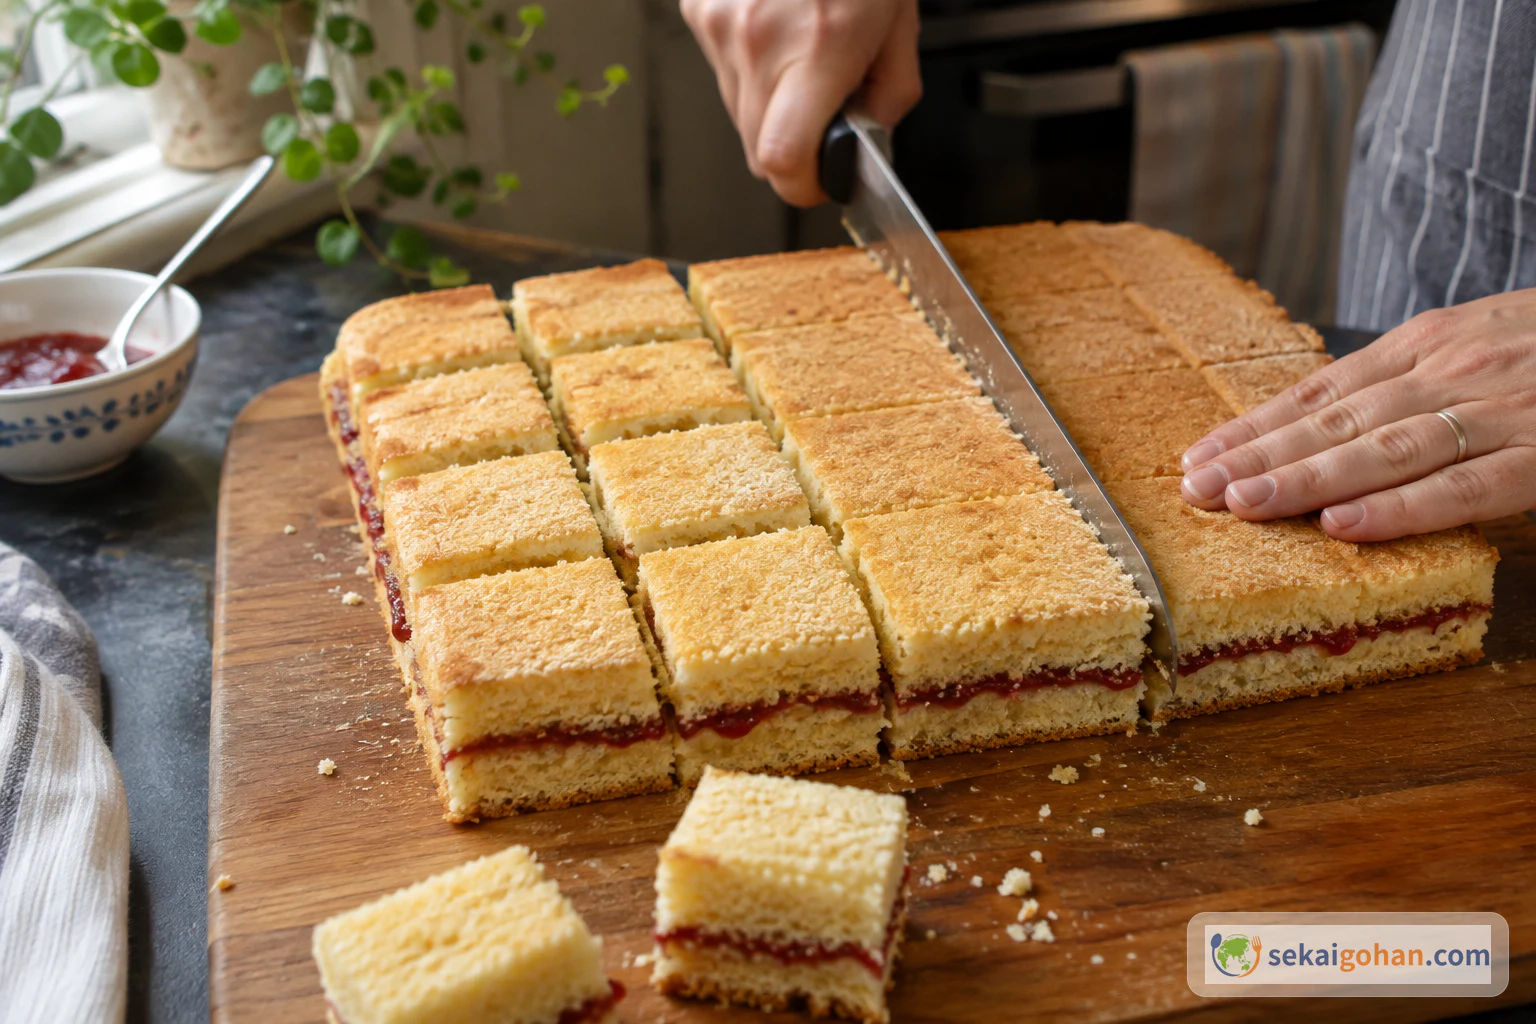
The jam-filled cake being cut into a grid of 1½-inch squares
The squares from the edge of the pan sit a little lower, so set them aside for tasting

Score the top of the cake at 1½-inch (4 cm) intervals in both directions as a guide. Cut along the marks by pressing the knife straight down in one firm push. Sawing back and forth makes the layers shift. Lift the squares apart and set them on a parchment-lined tray. The cut faces stand straight and the jam line runs level.

Press, don't saw

Every square becomes a base for a dome and a sheet of fondant. Straight walls and sharp corners now give a smart frog later, and a squashed corner shows through the green skin.

STEP 66 / 11

Make the buttercream

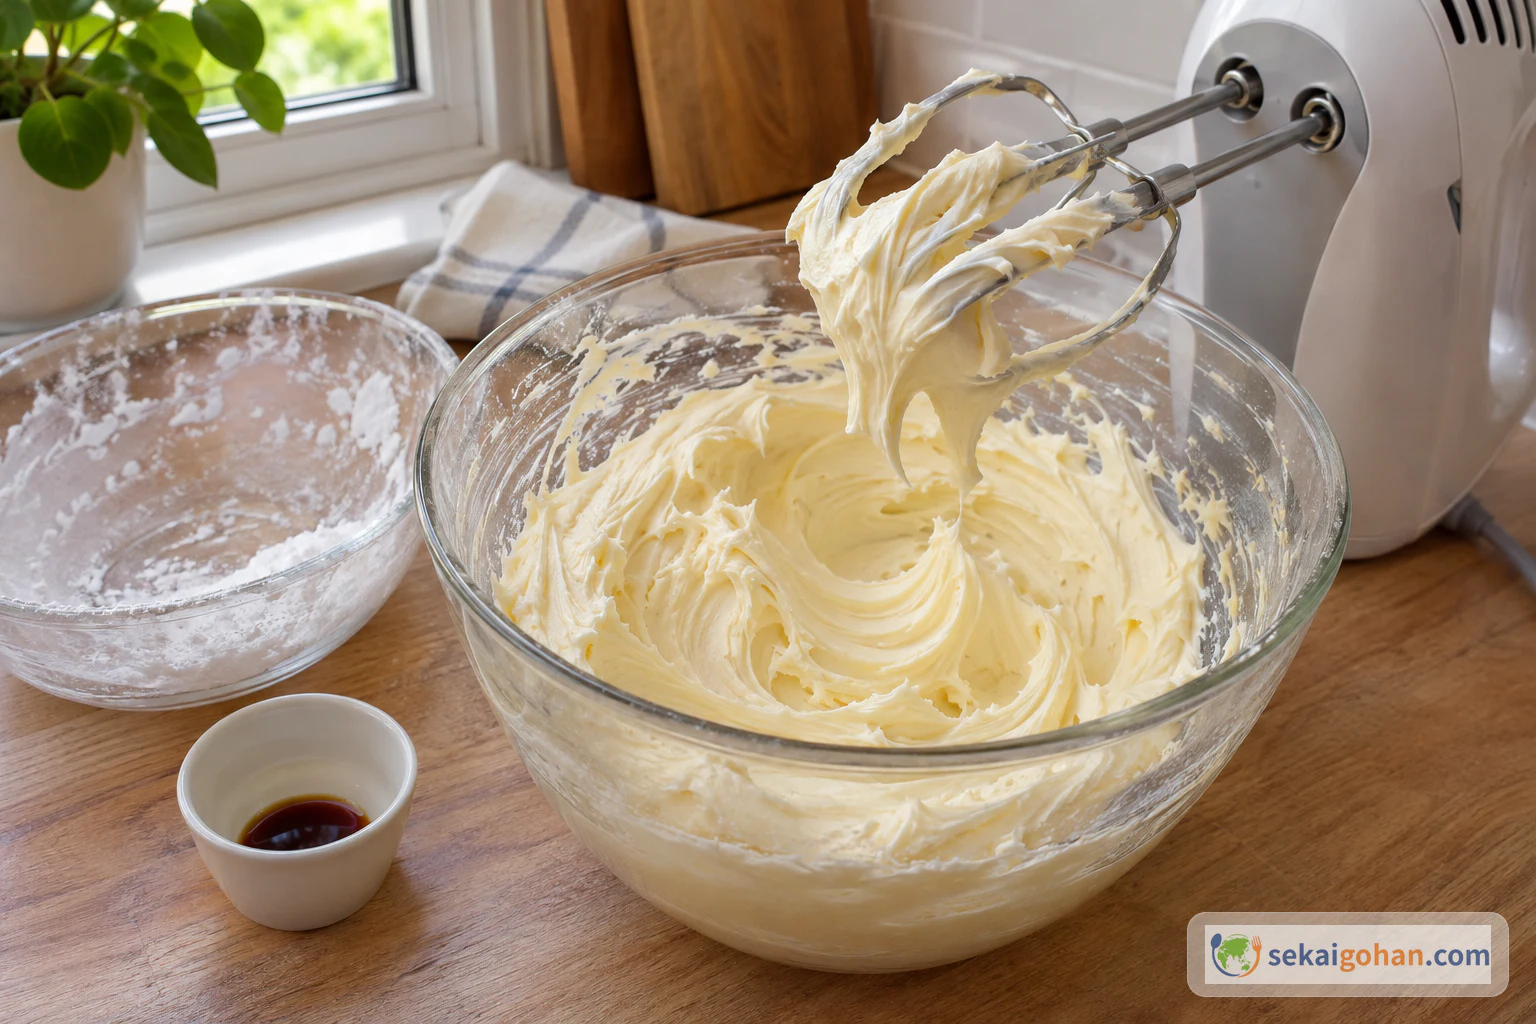
Smooth pale buttercream in a bowl, with the mixer beaters lifted and holding a thick ribbon
Scrape the bowl once between the sugar additions so no butter streaks remain at the bottom

Beat the second portion of butter in a clean bowl until it turns pale. Add the icing sugar in two additions, mixing each one in on low so the sugar does not fly. Add the vanilla, then beat on medium speed for 5 minutes. Keep the full amount of icing sugar, because a softer cream will not hold a dome. The buttercream is smooth and pale and stands in a thick ribbon on the lifted beaters.

STEP 77 / 11

Pipe the domes and chill

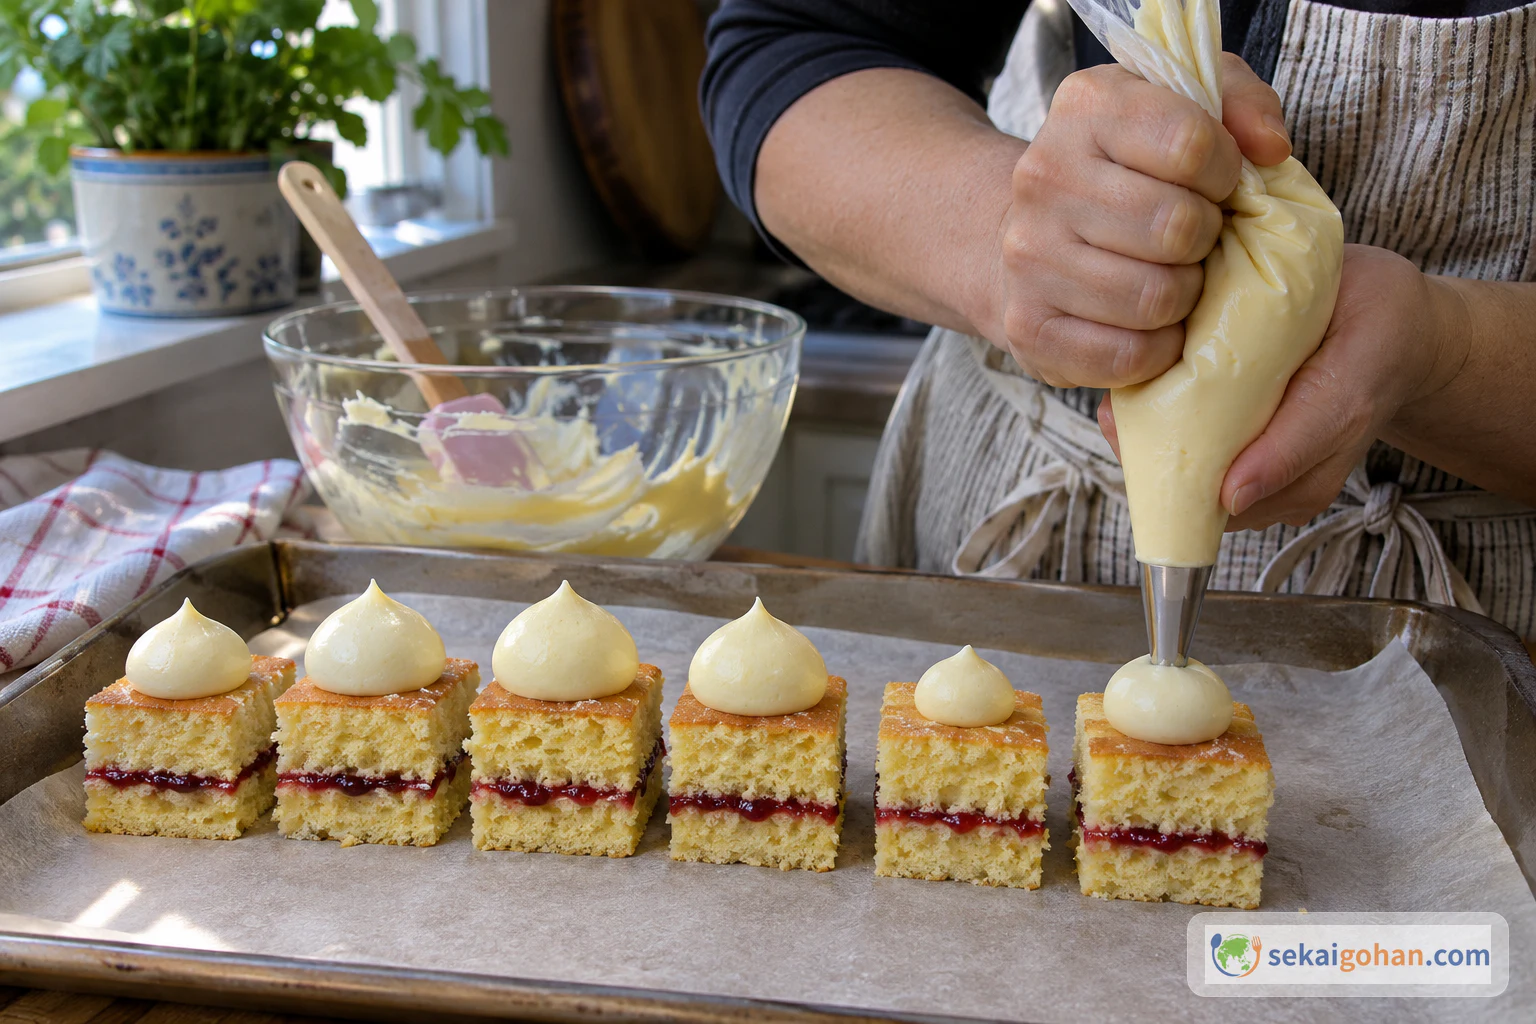
Buttercream domes piped onto a row of sponge squares from a bag with a round nozzle
Squeeze with steady pressure and stop before lifting, so each dome ends without a peak

Spoon part of the buttercream into a piping bag fitted with the ⅜-inch (1 cm) plain nozzle and twist the top closed. Hold the bag upright over the centre of a square and pipe a 1-inch (2.5 cm) dome, then lift away cleanly. Keep the rest of the buttercream for the sides. Refrigerate the tray for 30 minutes. The domes stand up by themselves with smooth surfaces and no ridges.

STEP 88 / 11

Crumb-coat the sides

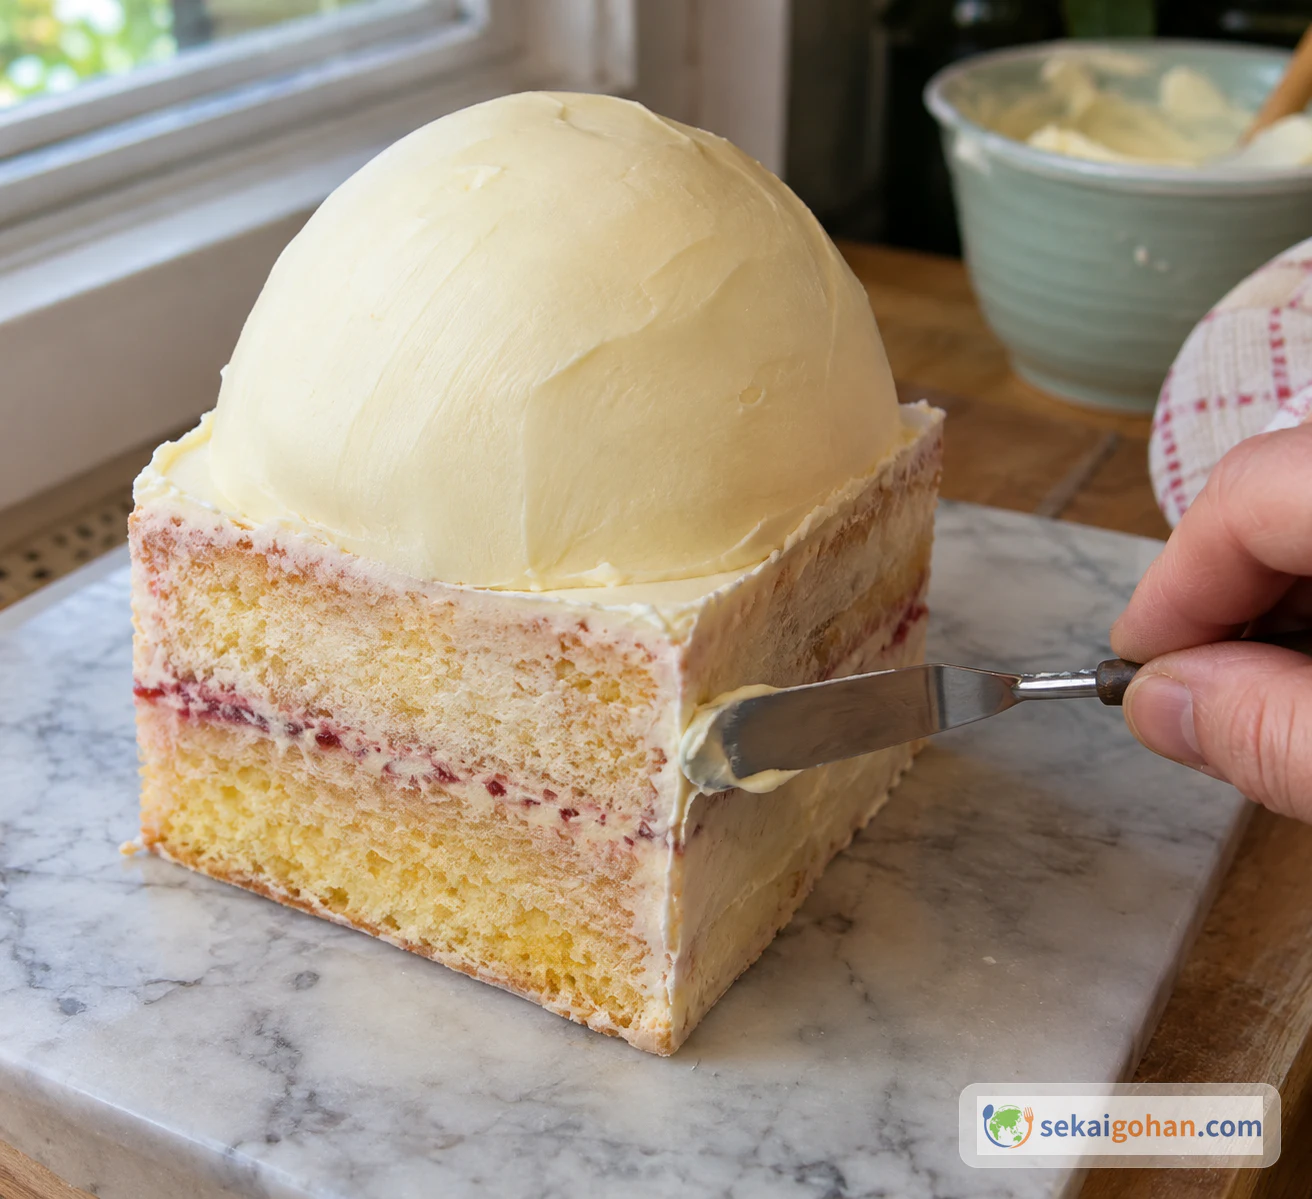
A thin buttercream coat being spread on the side of a domed cake
The jam line still shows through a good crumb coat, and that is the right thickness

Take the tray out and spread a thin layer of the remaining buttercream over the four sides of each cake with a small palette knife. Leave the chilled dome alone. This coat holds down the crumbs, which otherwise come up under the fondant. A thick coat rounds the corners and makes the fondant wrinkle. The sponge colour still shows through, and no crumbs sit on the surface.

When the buttercream runs short

If there is not enough buttercream left for every cake, spread the sides thinner. Do not make a larger batch. The coat only needs to hold the crumbs.

STEP 99 / 11

Roll the fondant and wrap each cake

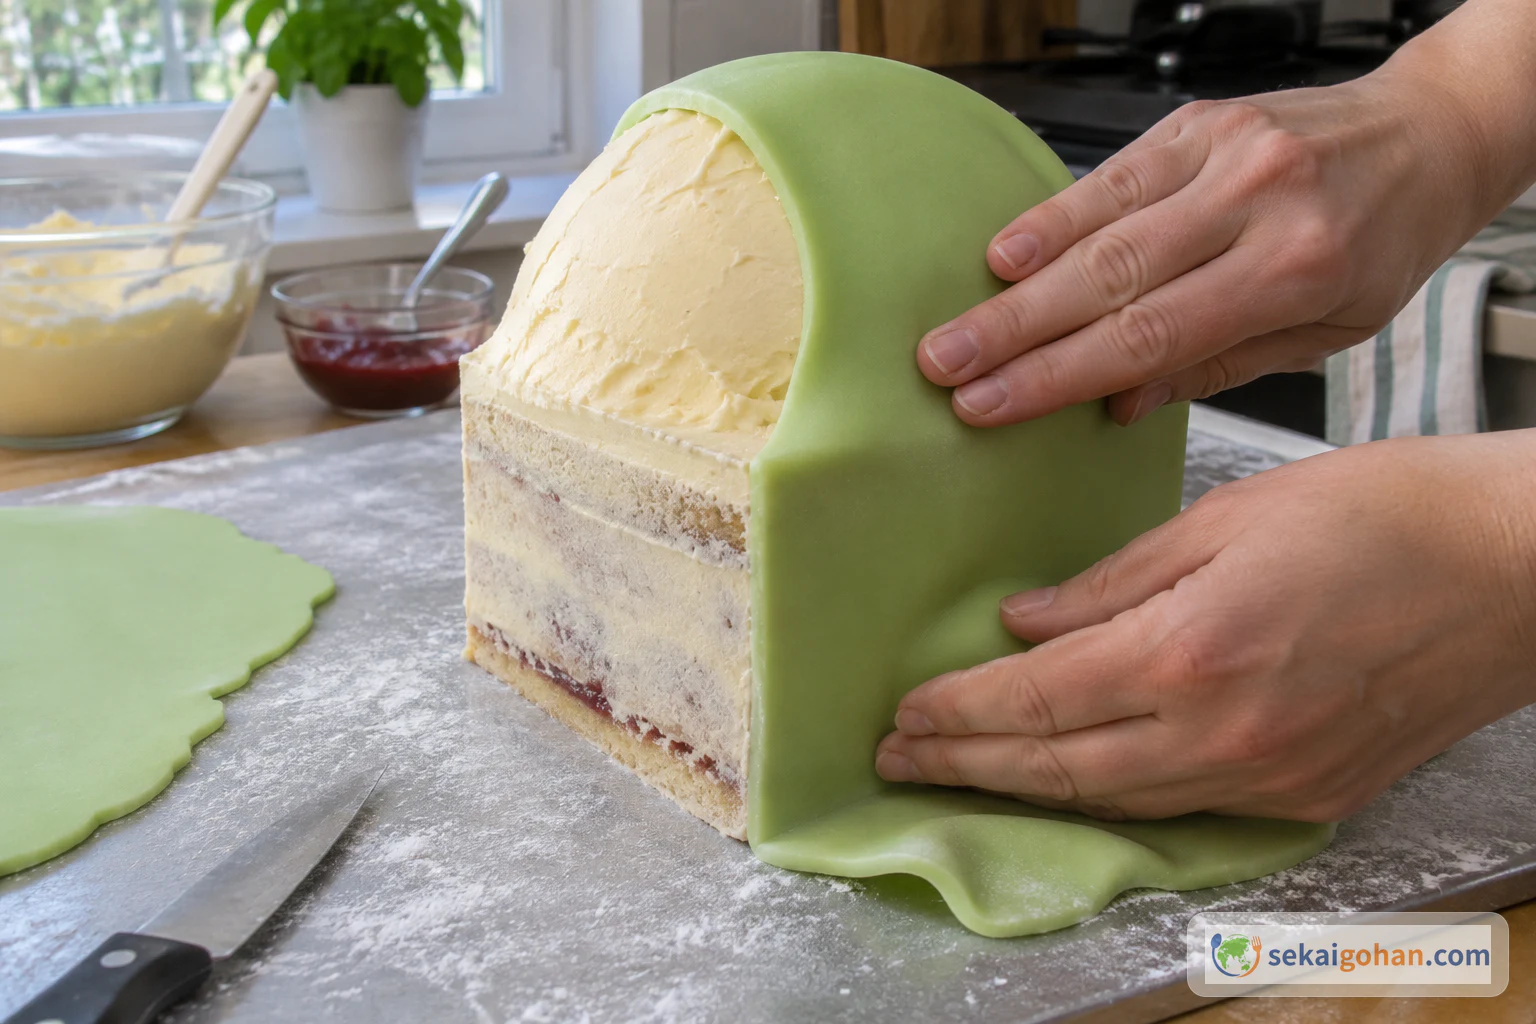
A sheet of green fondant being smoothed down the sides of a square cake
Smooth from the top of the dome downwards, so the air escapes at the base instead of bubbling at the corners

If you want a deeper green, knead a little gel colouring into the fondant first. Dust the board and rolling pin with icing sugar and roll the fondant to ¼ inch (6 mm). Thinner fondant tears, and thicker fondant is heavy. Cut a square big enough to cover one cake, drape it over the dome, then smooth it down each side and around the corners with your palms. Trim the excess at the base. If it tears, press the edges together and patch with a small scrap. Wrapped cakes have sharp corners and no wrinkles or trapped air.

STEP 1010 / 11

Give each frog its face

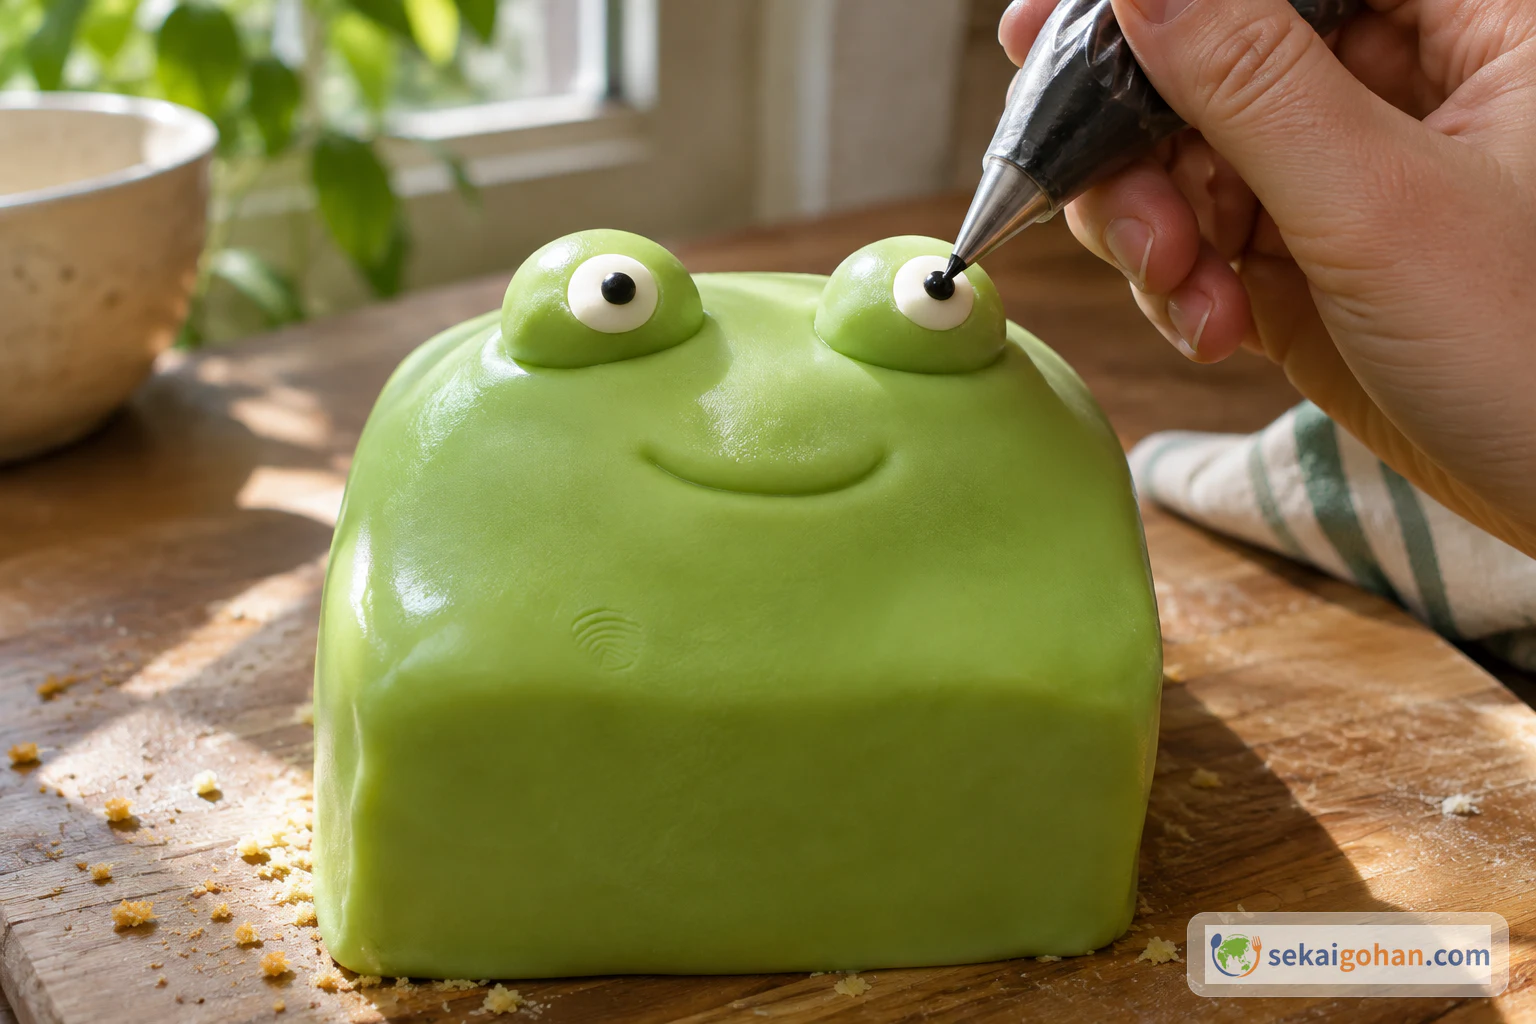
A green frog cake with green eye bases, white icing, black pupils and a pressed mouth
Pipe the pupils a touch smaller than the white so the frog looks friendly rather than startled

Roll two small balls of green fondant for each cake and press them onto the front of the dome as eye bases. Pipe a dot of white royal icing on each, then a smaller black pupil in the middle. Press the rim of a small round cutter into the fondant under the eyes to make a curved mouth. Both eyes sit at the same height with the pupils centred.

Cutting the mouth open

Adelaide's frogs have the mouth cut open so the cream shows. To make that version, warm a knife in boiling water, dry it, and cut a slit under the eyes. Handle the hot water and the blade with care, and keep children back while you work.

STEP 1111 / 11

Set in paper cases and store cold

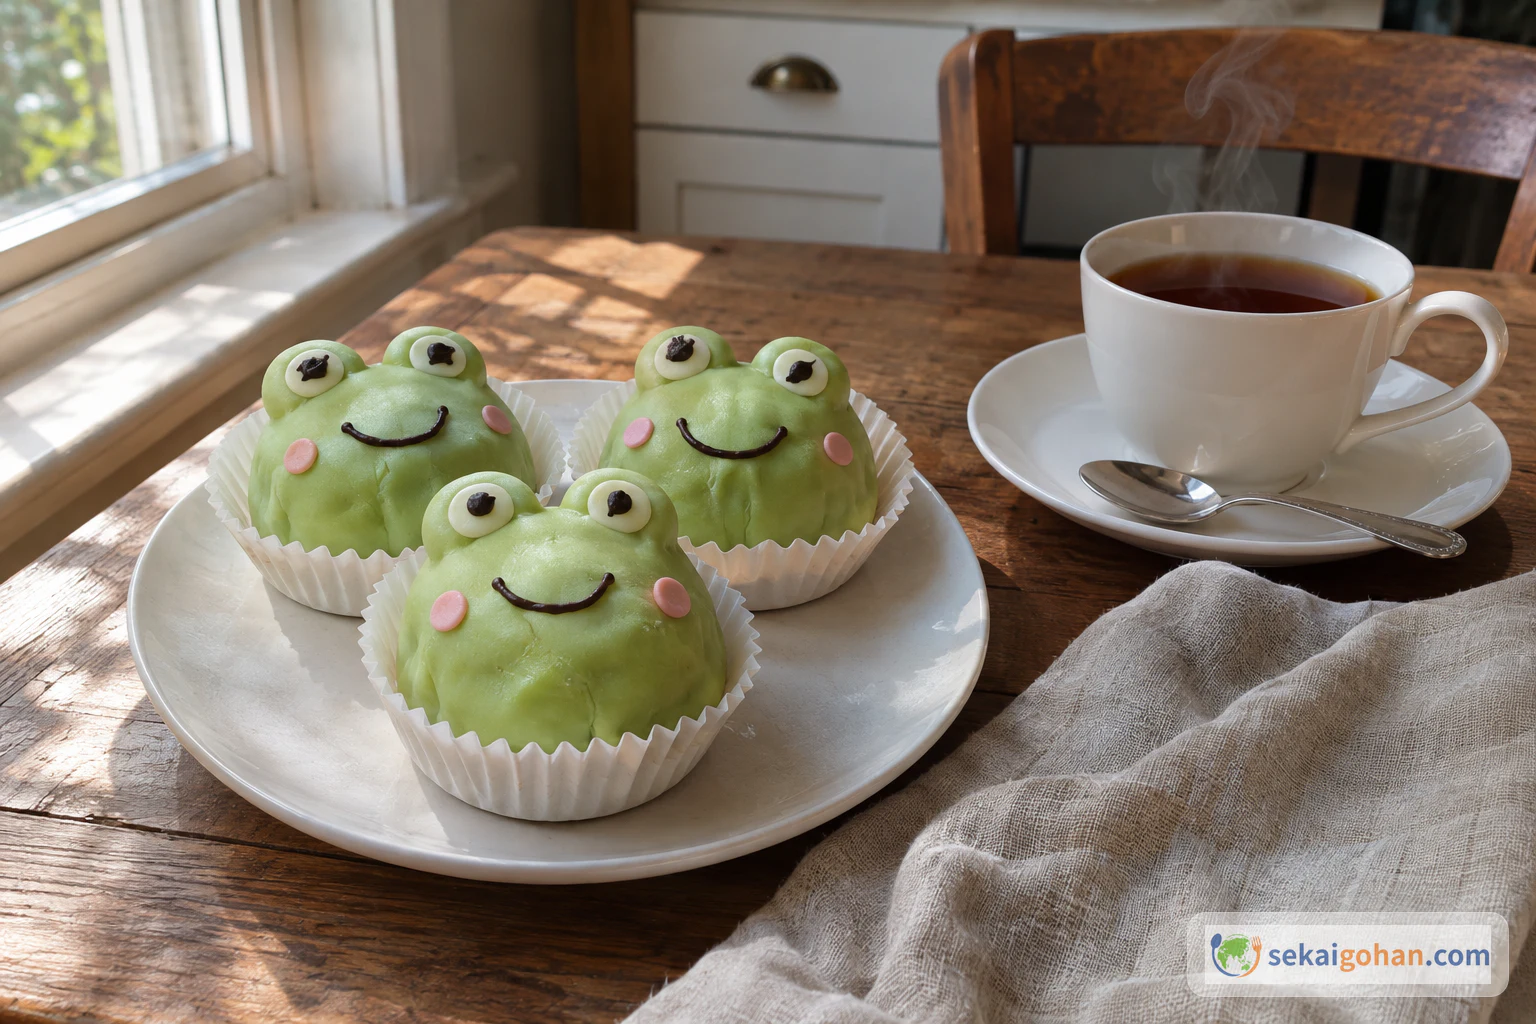
Three green frog cakes in paper cases on a small plate beside a cup of black tea
A cup of strong black tea next to the plate balances the sweetness

Stand each frog in a paper case, which also hides any bumps on the sides. Cover them with plastic wrap or put them in an airtight container so the fondant does not dry out. Keep them in the refrigerator, because buttercream is a dairy filling and must not sit at room temperature for long. Take them out only a short time before eating. The fondant has a soft shine and no beads of moisture.

0 / 0
Ingredients

Ingredients

1 / 1

Ingredients

Ingredient Amount Role
Butter, for the pan a little Greases the pan under the parchment
Unsalted butter, softened (sponge) 7 oz (200 g) Fat for the sponge; must be at room temperature
Caster sugar (superfine sugar) 7 oz (200 g) Sweetness and a stable batter
Eggs, medium 4 Moisture, structure and lift; all go into the sponge
Self-raising flour 7 oz (200 g) Flour with leavening already mixed in
Baking powder 1 tsp Extra lift
Milk 1 tbsp Loosens the batter
Unsalted butter, softened (buttercream) 5¼ oz (150 g) Body of the buttercream
Icing sugar (powdered sugar), sifted 7½ oz (210 g) Sweetness and stiffness for the dome
Vanilla extract 1 tsp Scent for the buttercream
Strawberry jam 5¼–5¾ oz (150–160 g) The sharp layer and the red line
Green ready-to-roll icing (fondant, sugar paste) 1 lb 2 oz (500 g) The outer skin and the eye bases
Green food colouring, gel a little Adjusts the green of the fondant
Royal icing as needed White of the eyes
Black writing icing as needed Pupils
Icing sugar (powdered sugar), for dusting as needed Keeps the fondant from sticking to the board and pin
0 / 0

When the knife goes through a frog cake, it cuts the glossy green skin first. Then it passes through a firm, pale dome of cream and reaches two layers of soft sponge with a thin red line of jam between them. Two eyes sit on top, and a little smile is pressed under them. These small square cakes come from Adelaide, the capital of South Australia. They are very sweet: butter and sugar on every side, with only the jam to cut through it. One cake is rich enough to share in quarters at teatime.


From Adelaide's tea rooms to a state icon

The frog cake belongs to Balfours, an Adelaide bakery that goes back to 1853. That year, the Scottish immigrants James Calder and Margaret Calder (born Balfour) opened their first shop on Rundle Street. In 1894 Elizabeth Balfour opened a café and confectionery on the same street. In 1924 the firm became Balfour Wauchope. The frog cake arrived in the early 1920s, when tea rooms were thriving and the city liked small, pretty cakes with its tea. The idea came from French pâtisserie, where fondant-covered petits fours were already being made.

A year nobody can pin down

Where the frog cake began is not settled. One account names 1922 and credits Gordon Balfour after a trip to France. Gordon did not travel to Europe until 1928, though, and in 1922 he was still a pupil at Prince Alfred College. Another account points to his father, Jack Balfour, and a trip to Paris in 1923. The bakery's history says only that the frog cake existed by the 1920s. In 2023 Adelaide marked the frog cake's hundredth year, with celebrations planned and talk of a statue in Rundle Mall. The cake has a look in common with the Swedish princess cake, but that recipe appeared in print in the 1930s, so it was unlikely to be the model.

Green first, then pink, brown and team colours

The first frog was green. Pink and brown (chocolate) frogs came later, and the bakery has also made red frogs for Christmas, Santas, snowmen, Easter chicks and frogs in the colours of the Adelaide Football Club. One writer who grew up in Adelaide remembers the frog cake as the treat on a day spent shopping in town. The frog is counted as a South Australian heritage icon, a status dated to 2001. The same year, after many copies, Balfours trademarked the name and the shape. What you make at home here is a home version for your own table, built in the same layers.

For most of its life the frog cake was sold only inside South Australia. Attempts to sell it across the country never really worked, partly because the cakes travel badly: in summer heat, a box that tips over arrives with the icing melted. The bakery passed to San Remo in 2008 and to Aus Pie Co of Western Australia in 2023. For more of the country's cooking, see our Australia page.

Other frogs with the same name

Denmark has its own frog cake, frøkage, from the 1950s. In the 1970s it took the name kajkage after Kaj, the frog in the puppet show "Kaj & Andrea". It sits on a thin macaroon base under green marzipan. Mr Kipling's French Fancies in Britain look similar but are a different product. Australia also has a whole party cake called a frog cake, baked from mix in a big tray and cut into the shape of a frog. This article is about the small, single Adelaide cake.


Ingredients
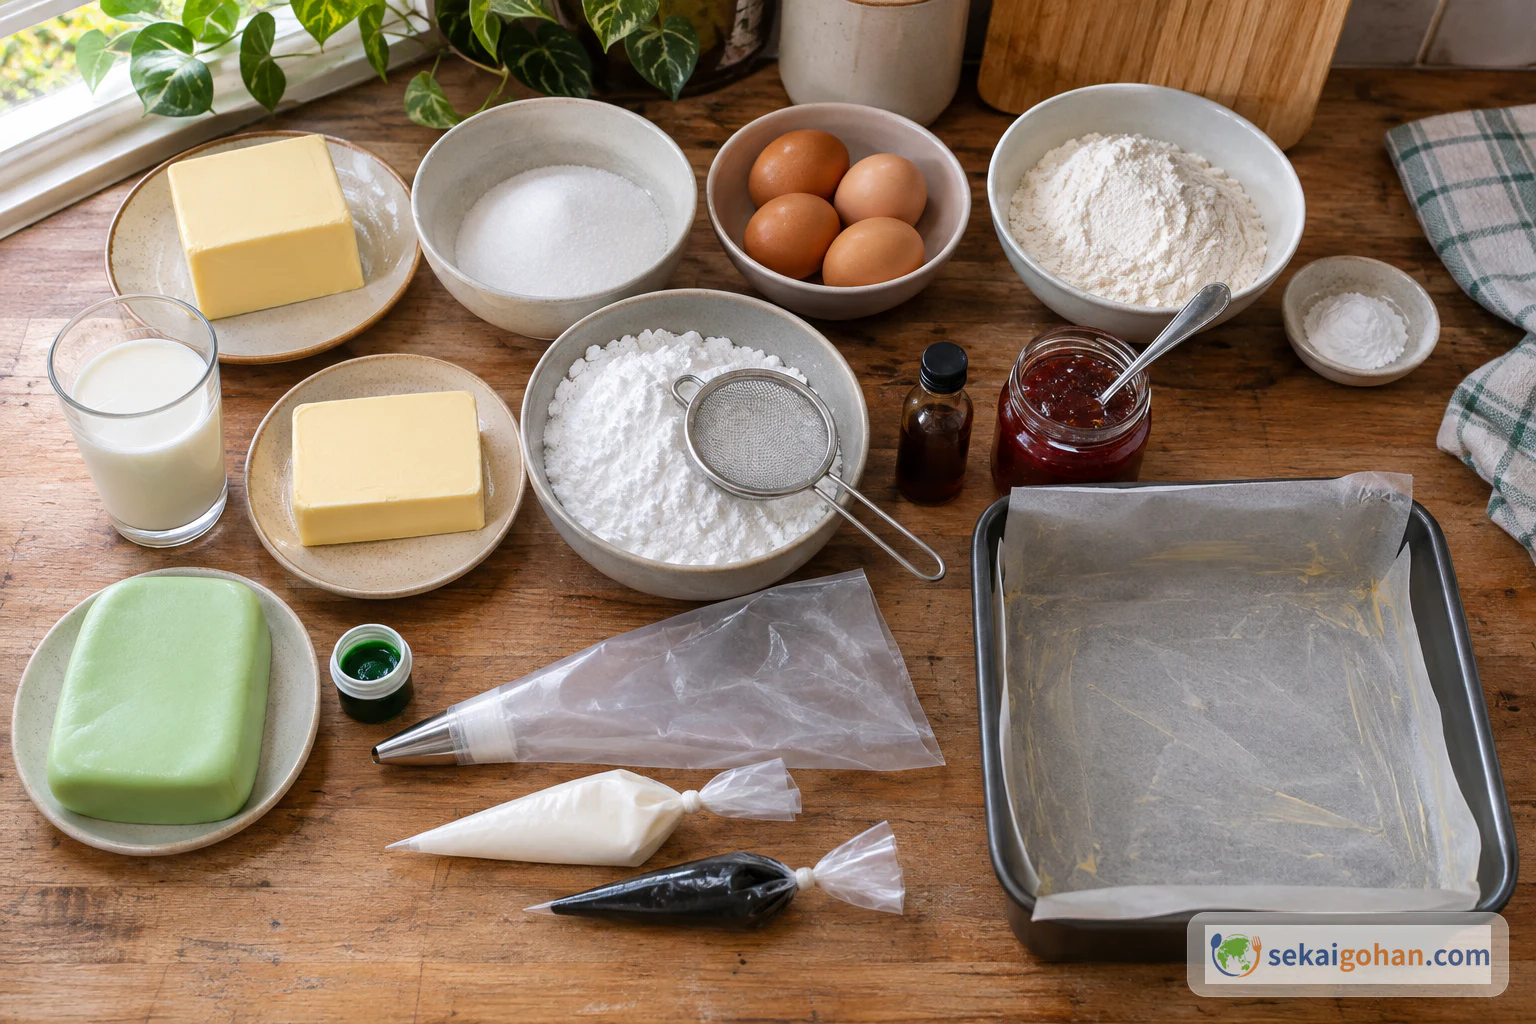
The ingredients for frog cakes: separate butter for the sponge and the buttercream, four eggs, self-raising flour and extra baking powder, sugar and icing sugar, milk, vanilla, jam, green fondant, white and black icing, and the pan
The two portions of butter are kept apart from the start: one goes into the sponge, the other into the buttercream

This makes one 8-inch (20 cm) square pan of sponge, cut into 1½-inch (4 cm) squares. The butter is listed twice: one portion for the sponge, one for the buttercream. Keep them apart and do not move butter from one to the other.

Allergen information

Frog cakes contain wheat, egg and milk. Check the labels on the jam, the fondant and both icings, because their ingredients vary by product. Use food colouring within the amount on its label.

Equipment

  • 8-inch (20 cm) square cake pan, at least 1½ inches (4 cm) deep
  • Parchment paper
  • Electric mixer and two mixing bowls
  • Wooden skewer
  • Wire rack
  • Long serrated knife or cake leveller
  • Offset palette knife and a small palette knife
  • Piping bag with a ⅜-inch (1 cm) plain round nozzle
  • Rolling pin, with ¼-inch (6 mm) guides or a ruler
  • Small sharp knife
  • Small round cutter, for pressing the mouth
  • Small fine-tipped piping bags or tubes for the white and black icing
  • Paper cases
  • Oven thermometer

Choosing and substituting

Ready-to-roll icing decides the look. This is the firm cake fondant, sometimes sold as sugar paste, that rolls out and drapes over a cake. Look for it at cake-decorating shops or online, and a block that is already green saves colouring work. A quick paste of icing sugar and water will not roll to ¼ inch (6 mm) or drape over the dome. If you have to use one, treat it as a spread-on glaze finish, and expect a different cake.

Buy self-raising flour from an import grocer or online if your supermarket does not stock it. You can swap in plain flour and baking powder, but the total leavening changes, and so does the rise of the sponge. For colouring, a gel adds green without adding water. Liquid colouring softens the fondant and makes it harder to drape.

The rest is easy to find. Caster sugar can be replaced with ordinary granulated sugar. Any strawberry jam works, and one with some fruit or seeds gives a clearer stripe.

Keep the square and the skin

The frog cake reads as itself when it has a square body, a domed head and a rolled fondant skin. Colour and jam are free choices. A round pan or a poured glaze moves it toward a different cake.


Method

Baking is the quick part. The work is the assembly. Mix and bake the sponge first, then let it cool completely in the pan. That cooling time is when you can soften the second portion of butter for the buttercream. The domes then need 30 minutes in the refrigerator, which is the moment to clear the board for rolling fondant. After that, the coating and the faces go one cake at a time.

When it goes wrong

What you see Why What to do
The sponge is tough or coarse The butter was cold, or the batter was overmixed Next time, soften the butter fully and stop beating as soon as the batter is smooth and glossy
The sponge barely rose The leavening was stale, or plain flour replaced self-raising flour Use fresh self-raising flour and baking powder
The layers slide when cut Too much jam, or the knife was sawed Spread the jam thinner and press straight down
The domes slump The buttercream was soft, or the chill was cut short Keep the full icing sugar and give the domes the full 30 minutes in the refrigerator
Crumbs show under the fondant The sides were not crumb-coated Coat every side thinly before the fondant goes on
Fondant tears or wrinkles It was rolled too thin, or the corners were rounded Roll to ¼ inch (6 mm) and keep the crumb coat thin so the corners stay sharp
The fondant looks wet and the colour bleeds Condensation after the cold refrigerator Do not wipe it; take the cakes out only a short time before serving and serve promptly

Serving, variations and storage

At the table

Frog cakes belong at teatime with a pot of black tea. They are rich enough to cut into quarters, so set out a small knife and let people share one. For a birthday or a school treat, line the frogs up in their paper cases on a plain plate and let the colours stand out. Serve them chilled or after a short rest at room temperature. Never warm them, because the fondant melts.

Variations

  • Pink or brown frogs. Colour the fondant pink or brown instead of green, the way Adelaide's frogs come in three colours. The taste stays the same, and a mixed plate looks like a bakery tray.
  • Another jam. Use the same weight of a different jam. A sharper jam makes the cake taste less sweet.
  • The open mouth. Cut the mouth with a hot knife so the buttercream shows. The face looks closer to the frog sold in Adelaide.
  • Seasonal colours. Make red frogs for Christmas or Easter chicks, or use your team's colours. Change only the fondant colour and keep the recipe as written.

Storage

Keep the frogs covered with wrap or in an airtight container in the refrigerator, and bring them out only a short time before eating. Do not leave them at room temperature for long: the buttercream is a dairy filling, and the fondant sweats as it warms.

Frequently asked questions

Can I bake the sponge in a round pan?

Use the 8-inch (20 cm) square pan. A round pan changes how the cake cuts into 1½-inch (4 cm) squares and leaves more curved offcuts. The square edges are also what give the frog its straight body.

What is mock cream, and should I use it?

Mock cream is the lighter cream inside the frog cakes Adelaide's bakery sells. Buttercream is the usual choice at home because it pipes into a firm dome that holds up under ¼-inch (6 mm) fondant. The cake tastes richer with buttercream, so the small portions matter more.

Can I take frog cakes to a picnic or post them?

They travel poorly. Heat softens the buttercream and melts the fondant, and a box that tips over spoils the faces. Carry them cold, in a container where they cannot slide, and eat them soon after you arrive.

Should the fondant feel hard once it sets?

It firms up on the outside but stays soft enough to take a fingerprint. Handle the cakes by their paper cases, not by the fondant.
Sources