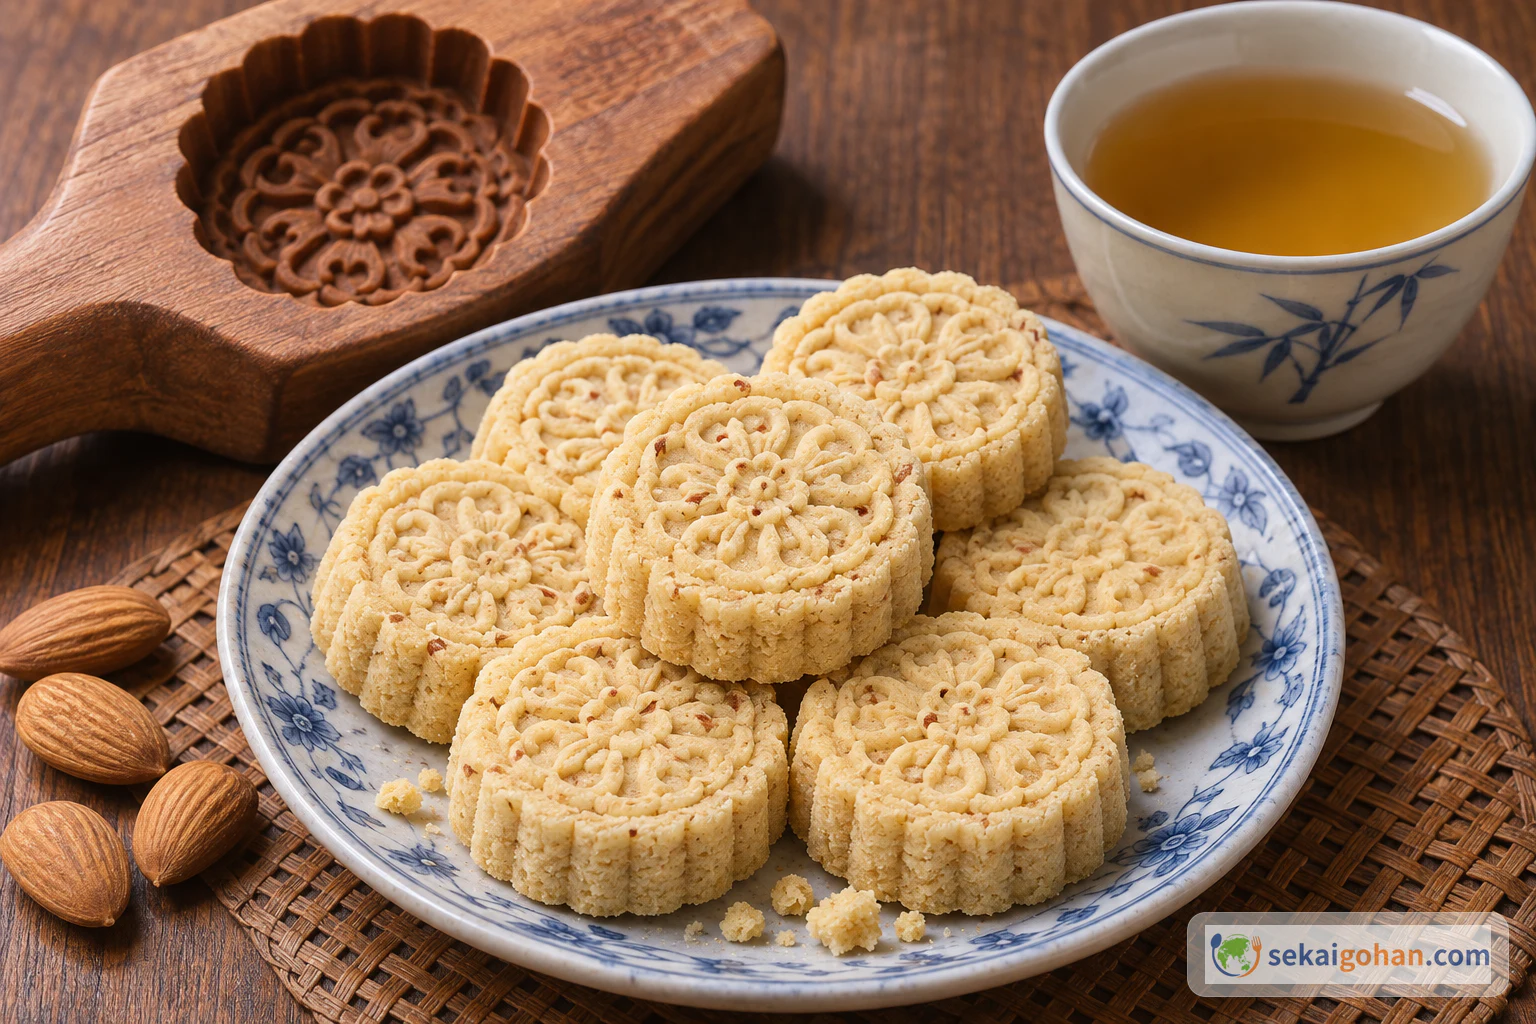
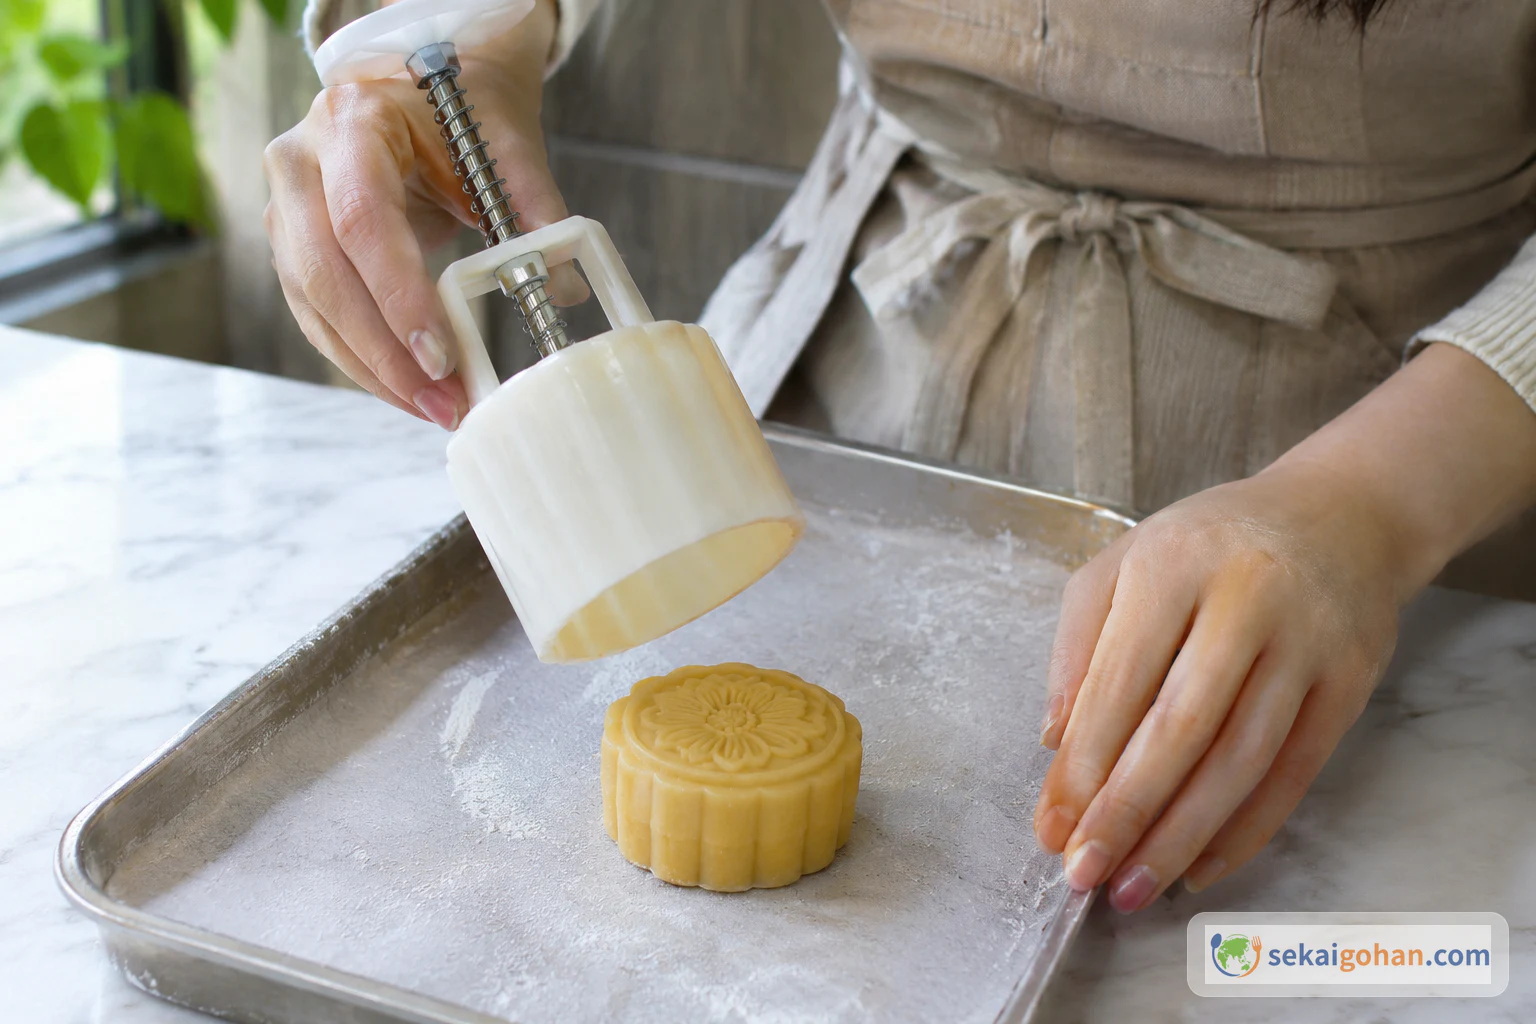
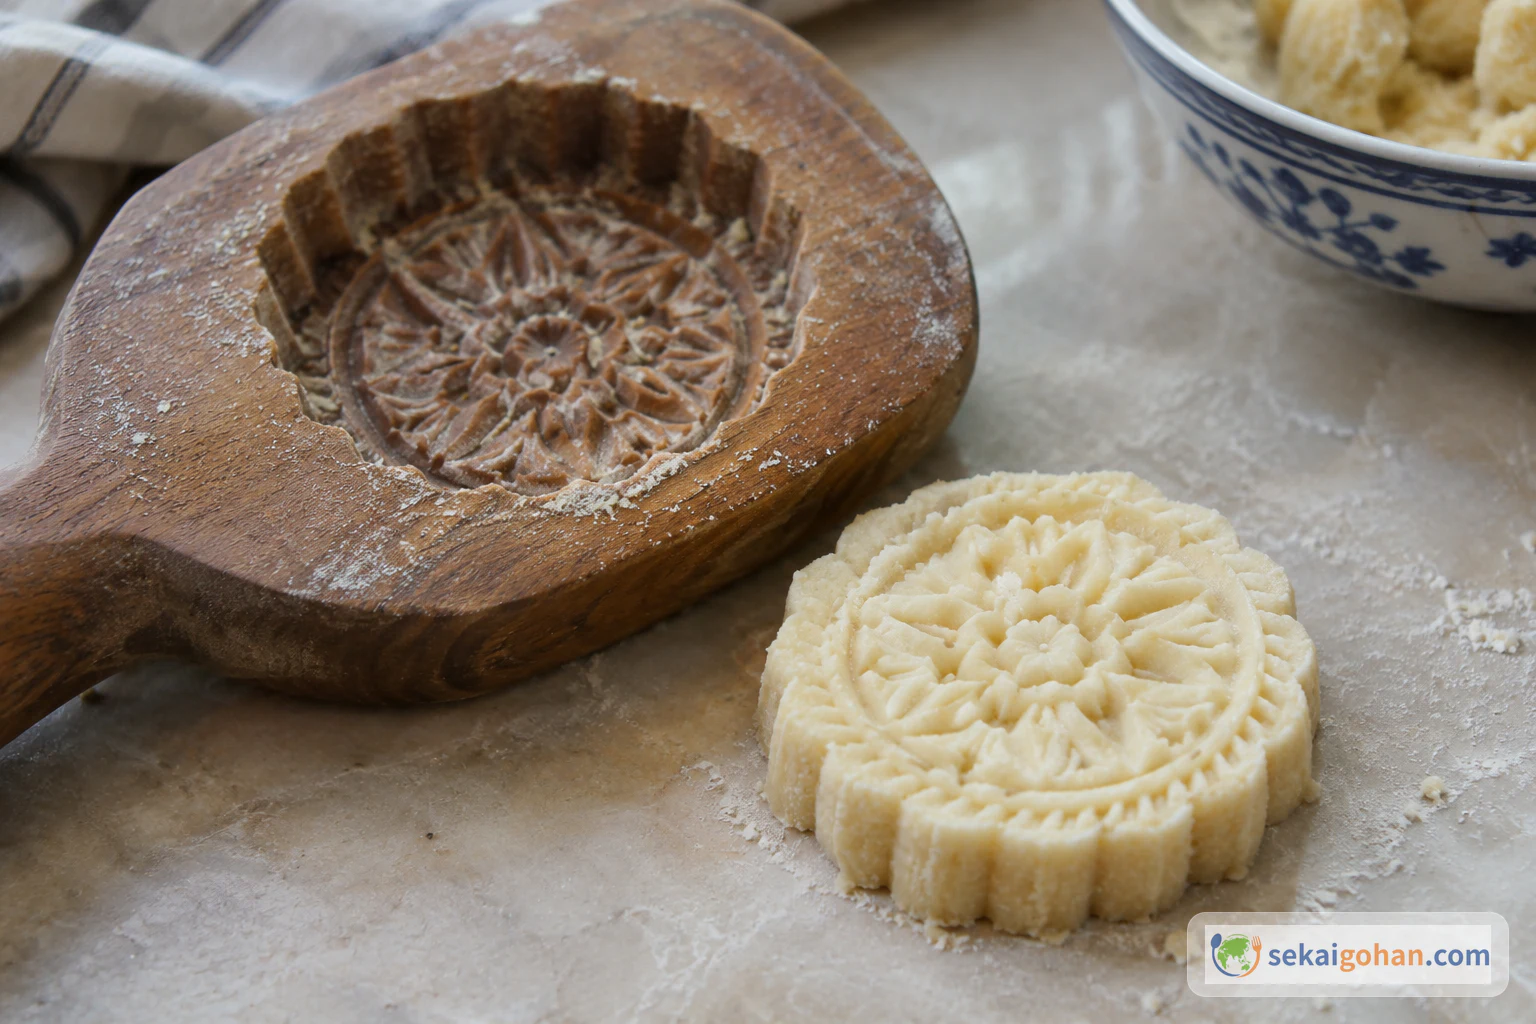
Finished Macao almond cookies: crumbly stamped cookies made from mung bean flour and almonds
CuisineMacao

Macao Almond Cookies: Pressed Mung Bean and Almond Cookies from Macao

Macao almond cookies pressed from ground almonds, mung bean flour, icing sugar and lard. How to judge the water, release them from a carved mold and bake them.

Level: Intermediate

Cooking flow

Cooking steps

STEP 11 / 17

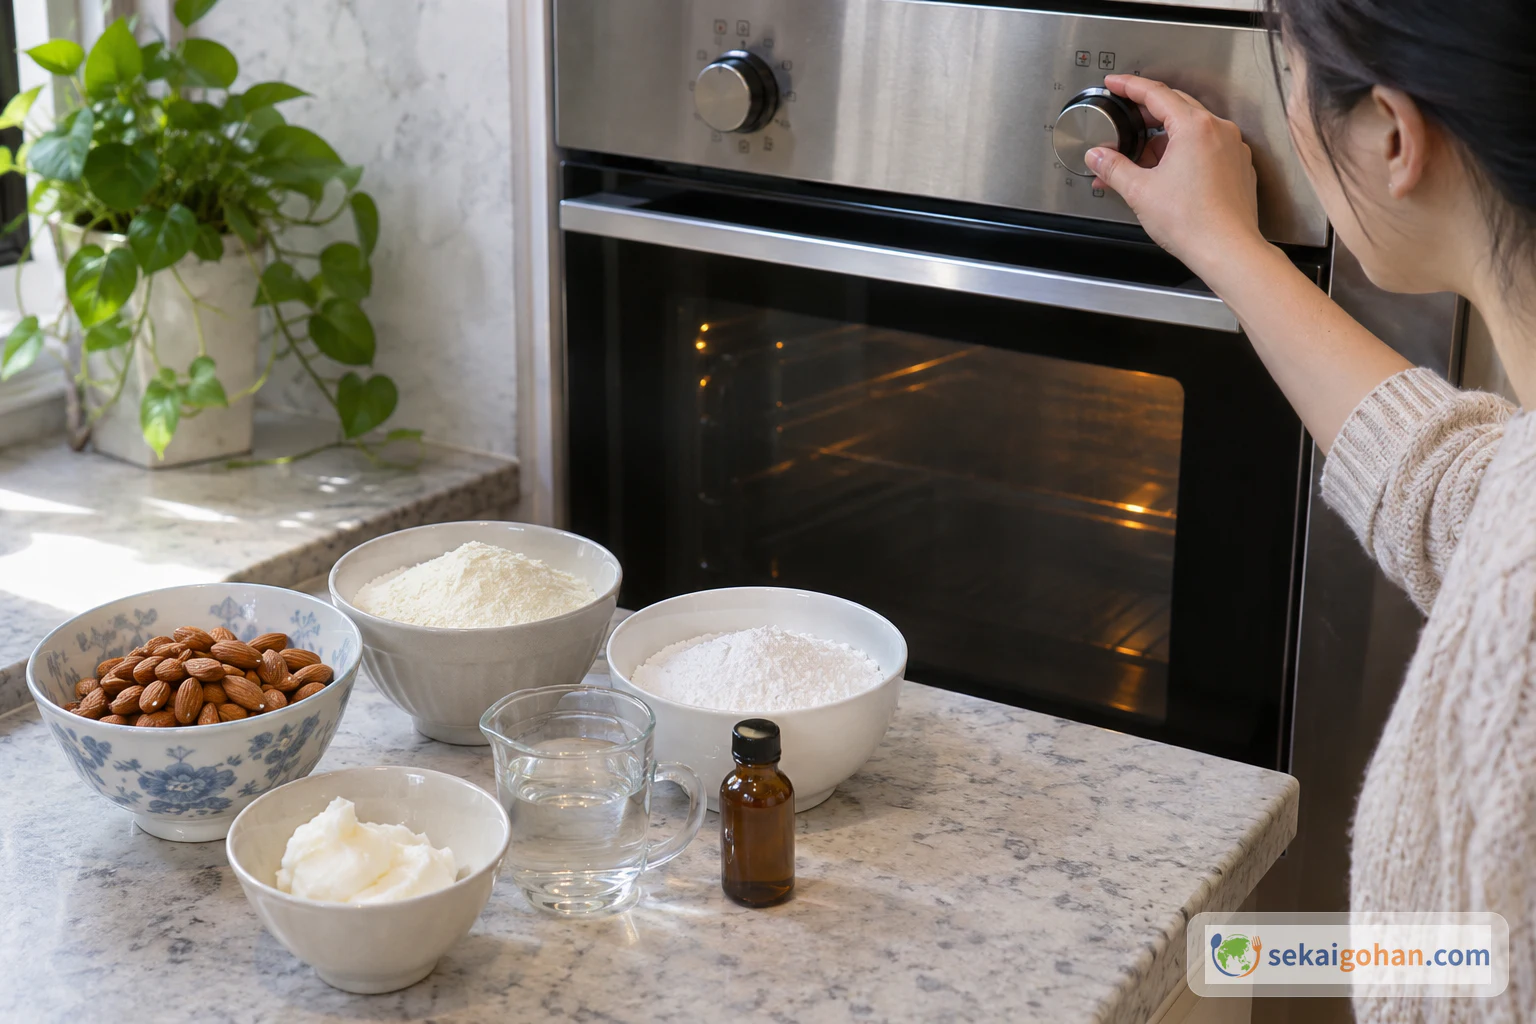
Heat the oven and line the tray

Setting the oven to preheat at 150°C
Turn the oven on before anything else so it is hot by the time the first cookies are molded

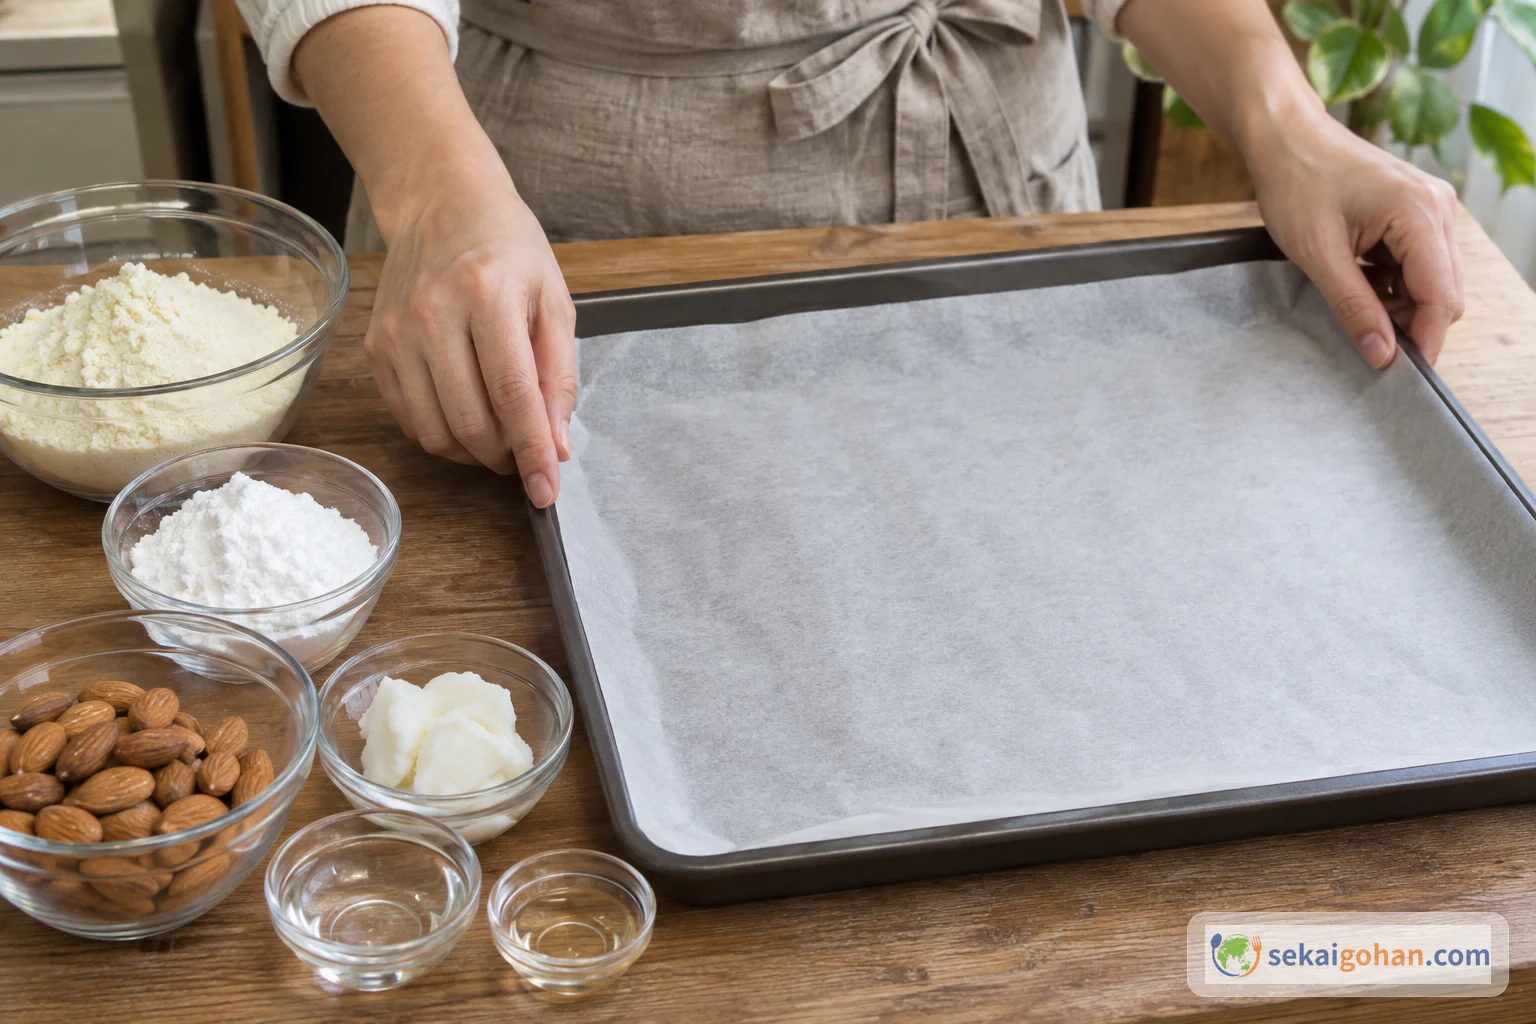
Set the oven to 300°F (150°C) so it heats while you make the mixture. Lay a sheet of baking parchment on a clean baking tray and press it flat into the corners. Keep the tray to hand near your molding space. The tray is ready when the paper lies flat with no curled edges.

Lining the baking tray with parchment
Flat paper gives each molded cookie a level base to sit on
STEP 22 / 17

Grind the almonds with the sugar

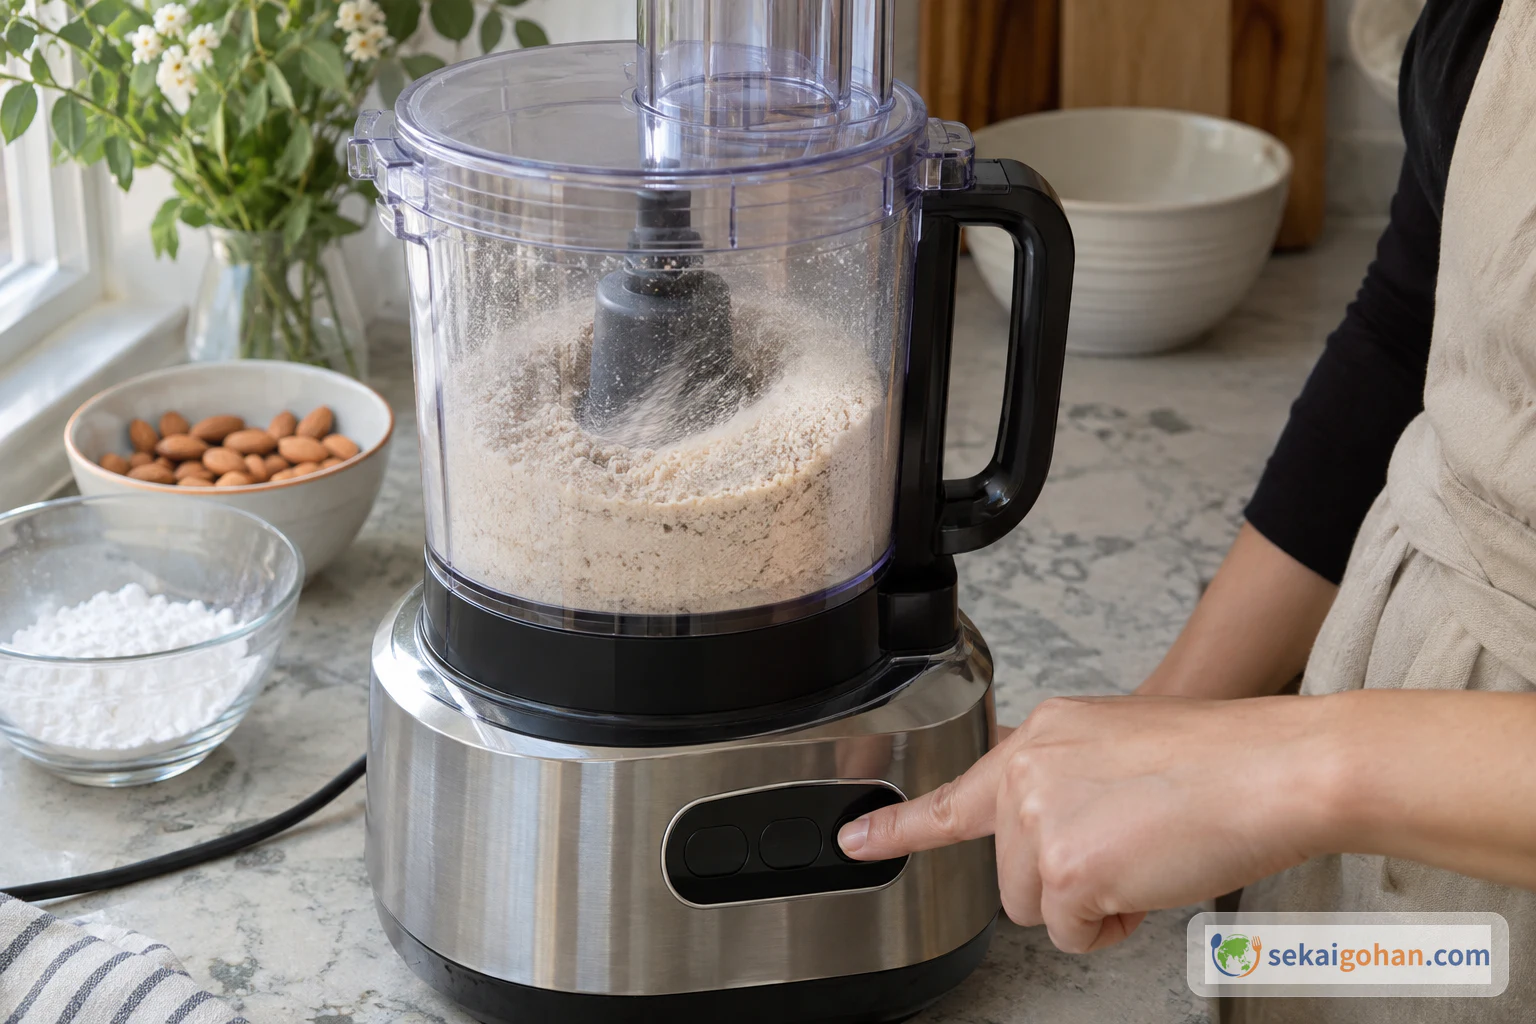
Grinding whole almonds and icing sugar into a fine powder in a closed food processor
Grinding the almonds with the sugar gives a fine, dry powder

Put the whole almonds and the icing sugar into the food processor together. Close the lid and pulse until the almonds break down. Keep going until the mixture is a fine, smooth powder. Stop when you see no visible chunks of almond and the powder looks like pale, even flour through the bowl.

STEP 33 / 17

Blend in the mung bean flour

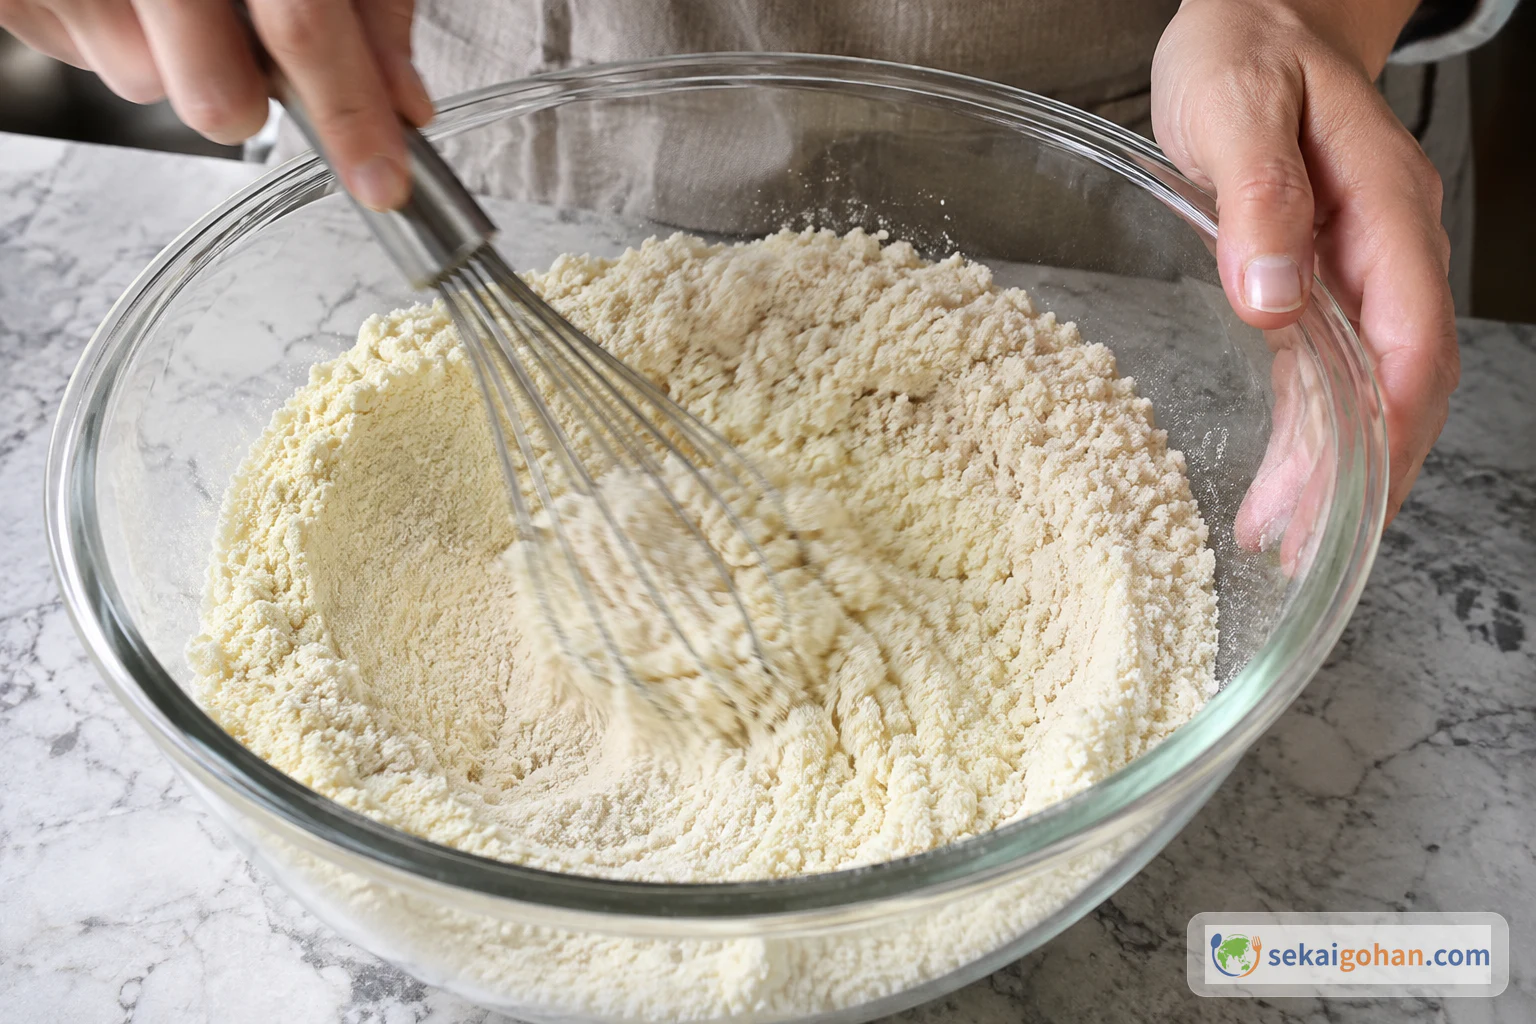
Whisking the almond-sugar powder with mung bean flour
Whisk until no pockets of plain flour show at the sides of the bowl

Tip the almond-sugar powder into a mixing bowl and add the mung bean flour. Whisk the two dry powders together thoroughly, reaching the bottom of the bowl. They are easy to blend because both are pale and fine. Stop when the color is completely even and no streaks of white flour remain.

STEP 44 / 17

Cut the lard and add it to the flour

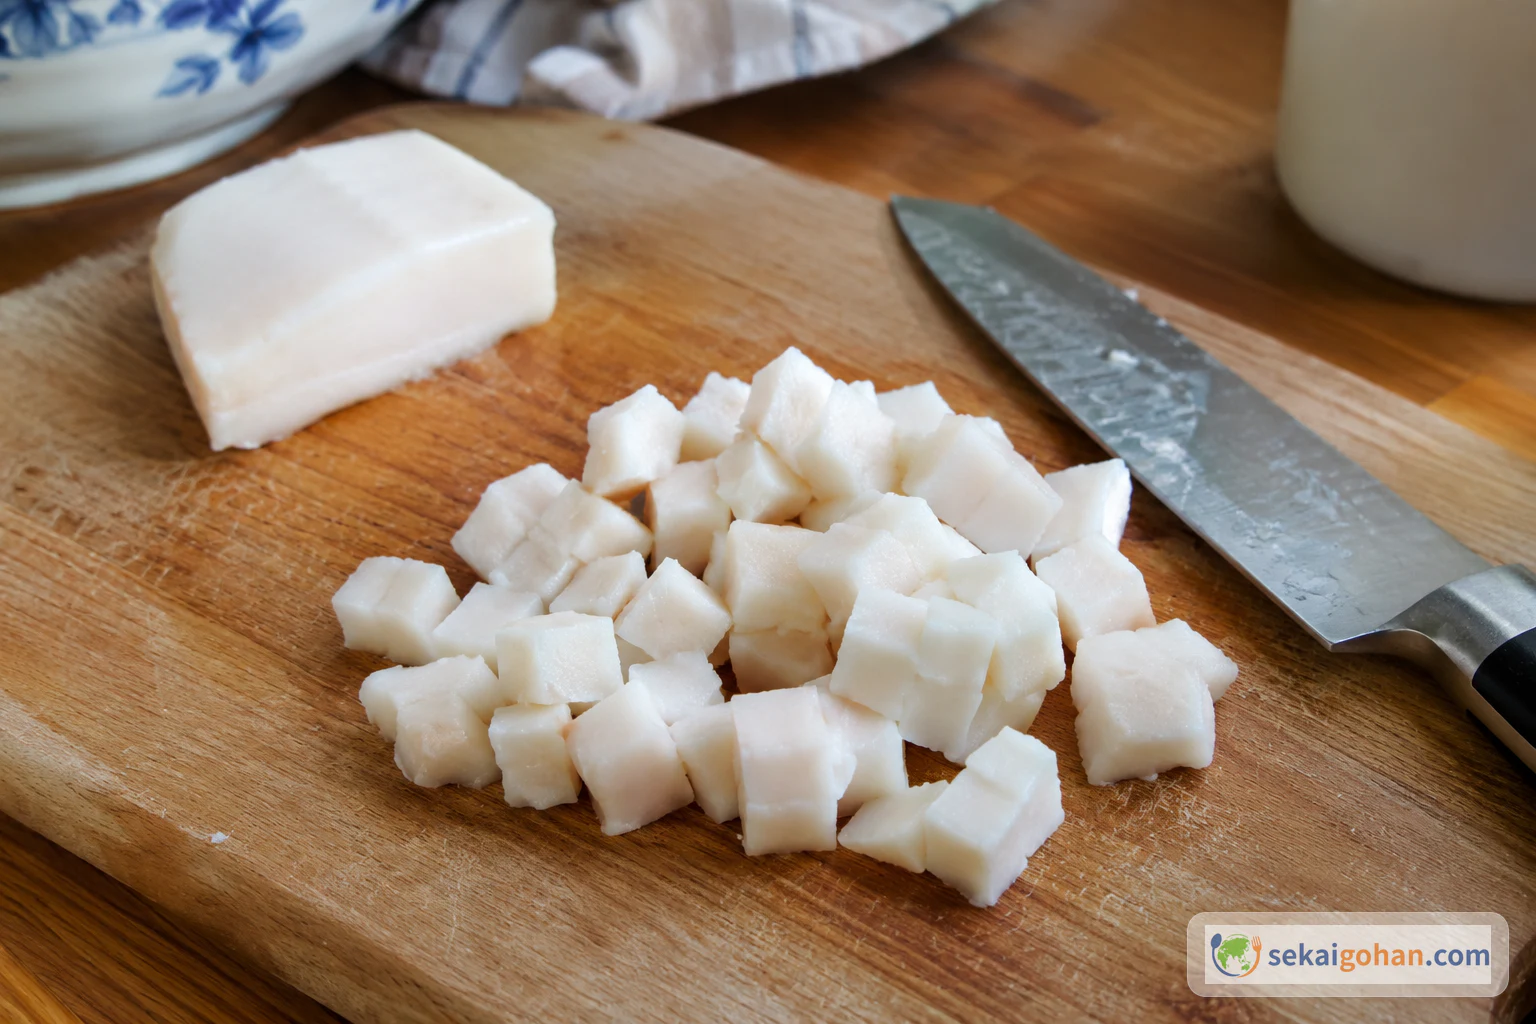
Cutting 70 g of lard into small cubes
Keep the cubes small so each one disappears into the flour with a few rubs

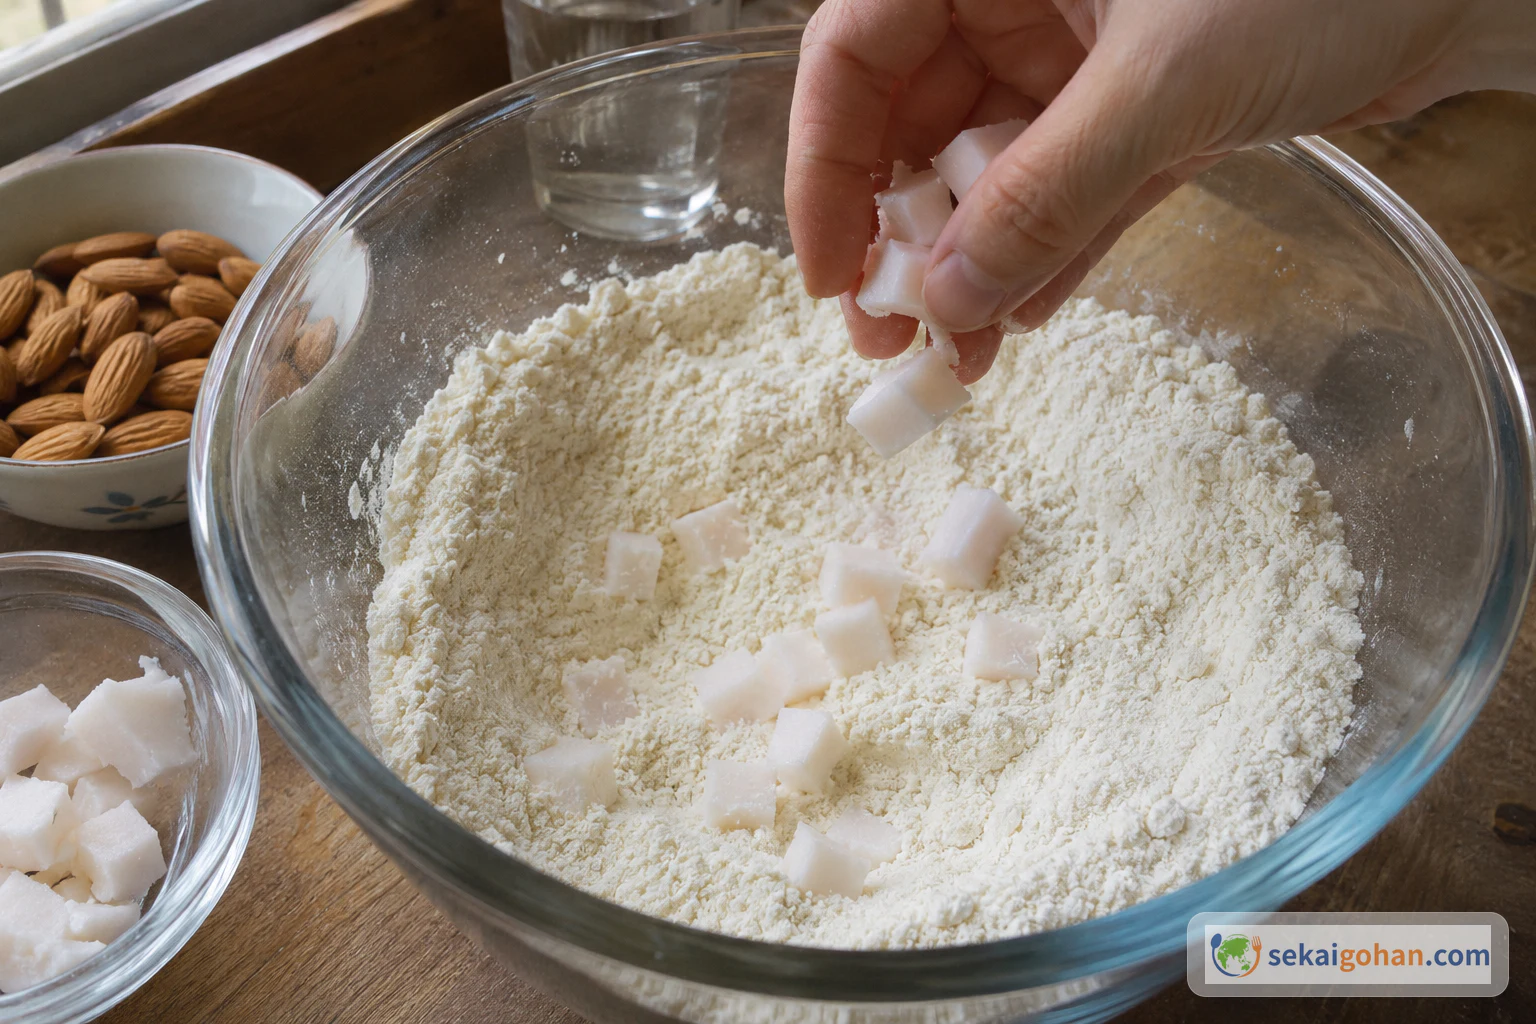
On a board, cut the lard into small cubes. Small pieces rub in quickly and evenly. Scatter the cubes over the flour mixture in the bowl. Leave them sitting on the surface for now. The lard is ready when the pieces are spread across the bowl rather than clumped together.

Adding the cut lard to the combined flours
Spread the cubes out so no corner of the bowl gets all the fat
STEP 55 / 17

Rub the lard into the flour

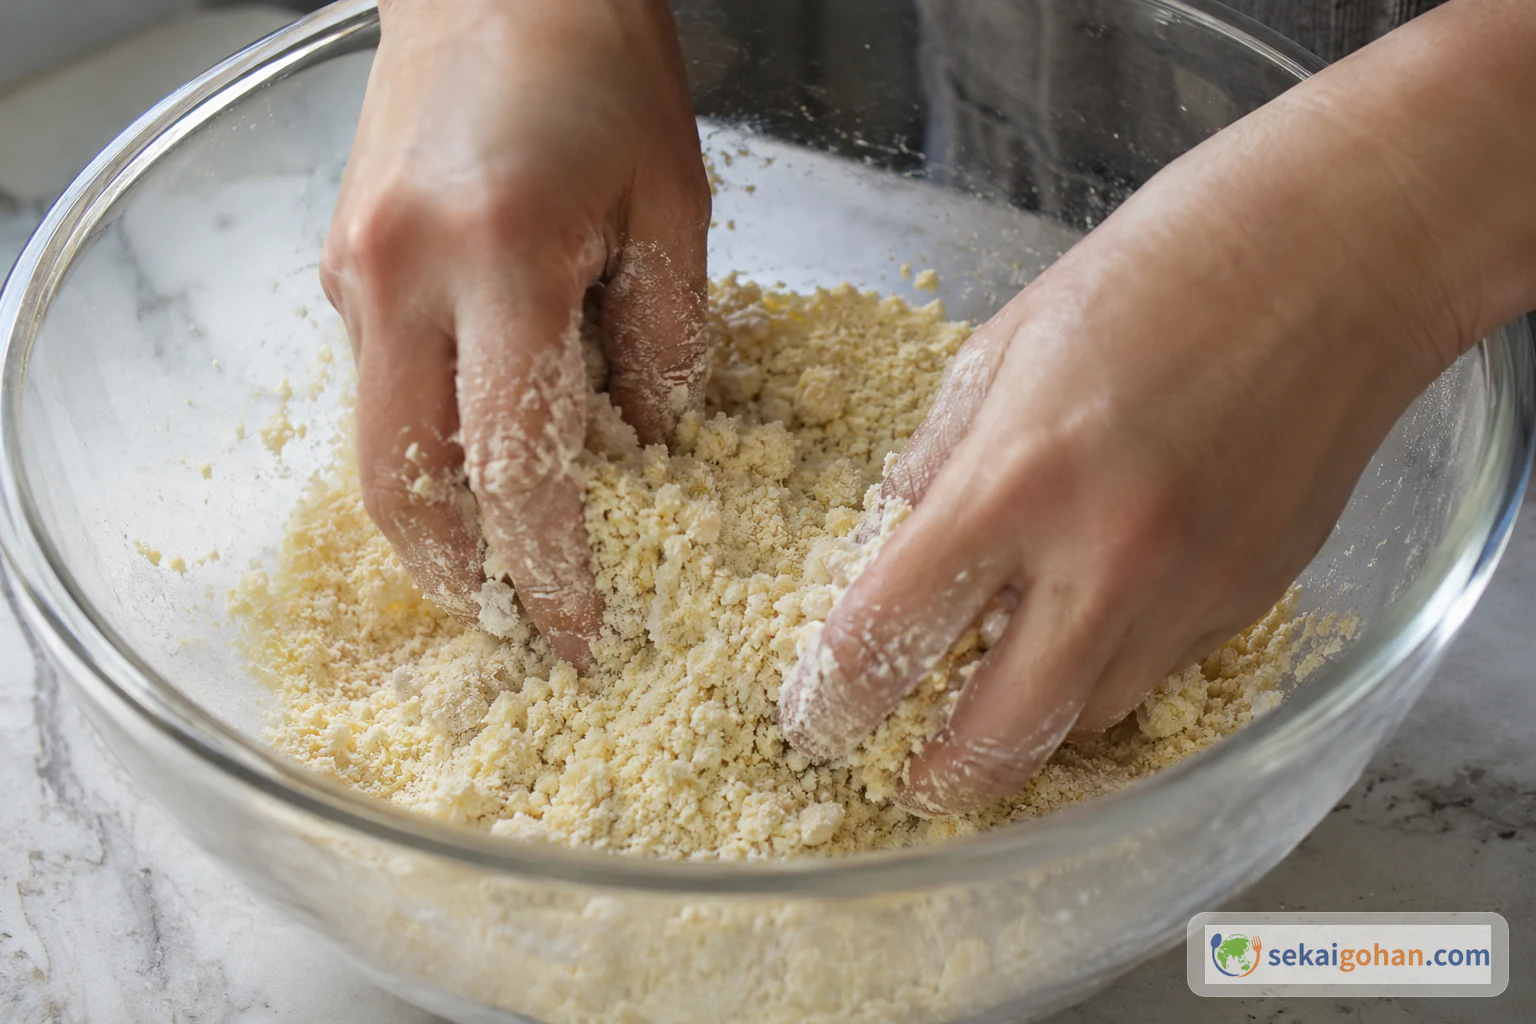
Rubbing the lard into the flour until it looks like fine breadcrumbs
Lift and rub with the fingertips; the crumbs should stay loose, not paste together

With your fingertips, pick up the lard and flour together and rub them between your fingers. Work around the bowl, lifting from the bottom, until no lumps of lard remain. The mixture is ready when it looks like fine breadcrumbs and still feels dry and loose.

STEP 66 / 17

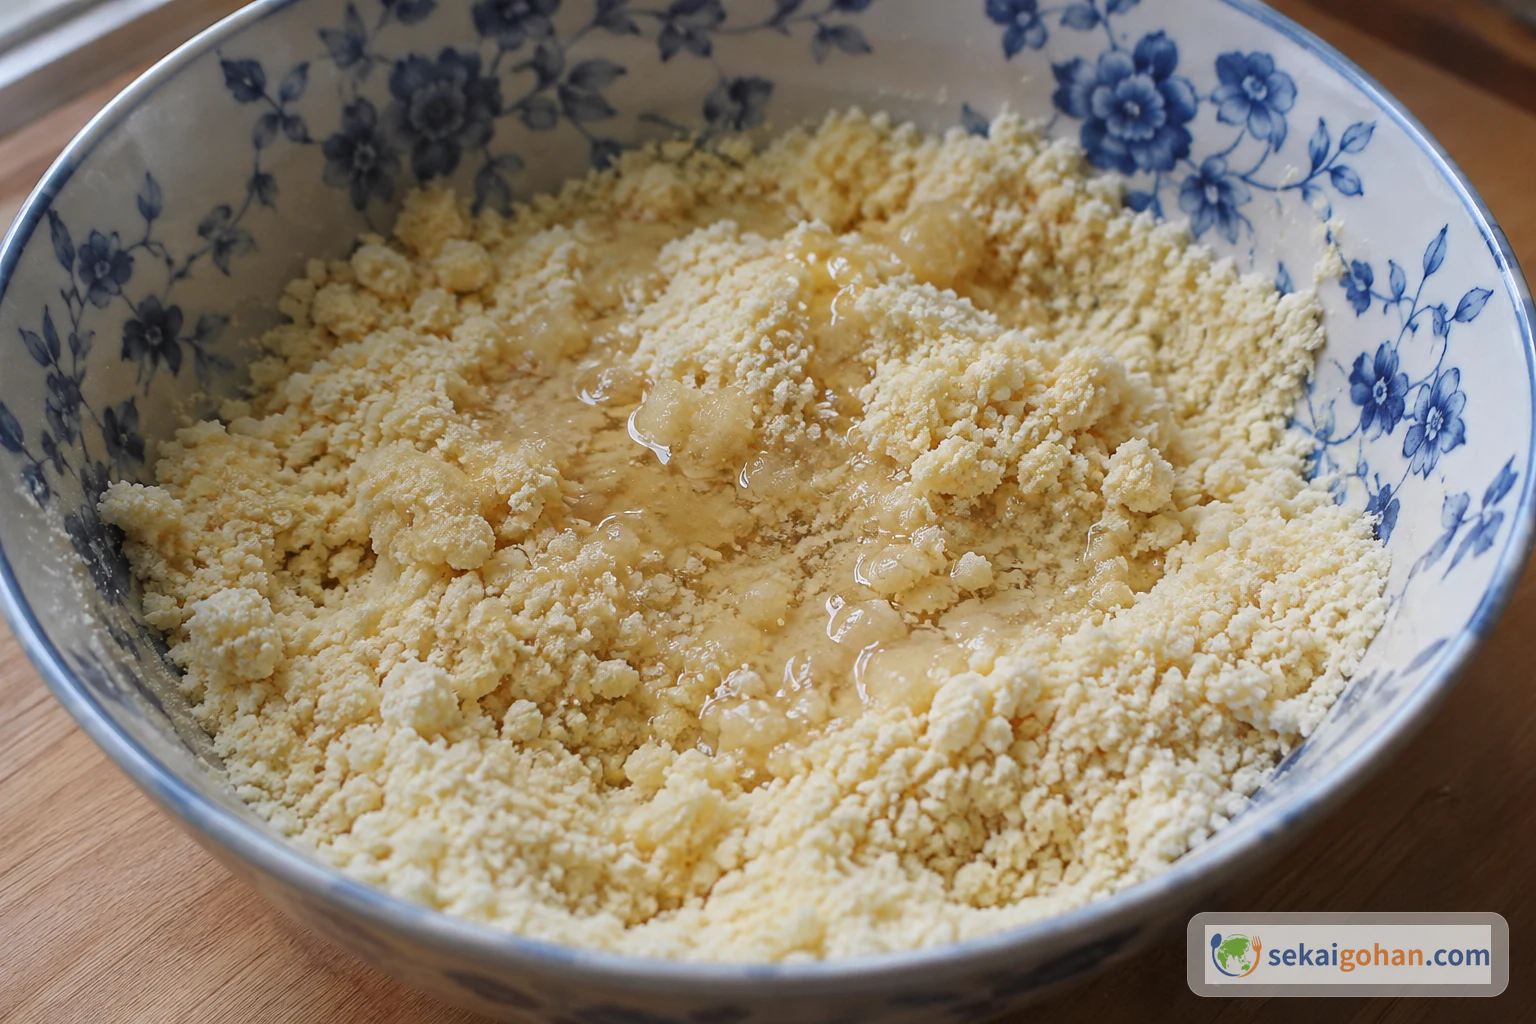
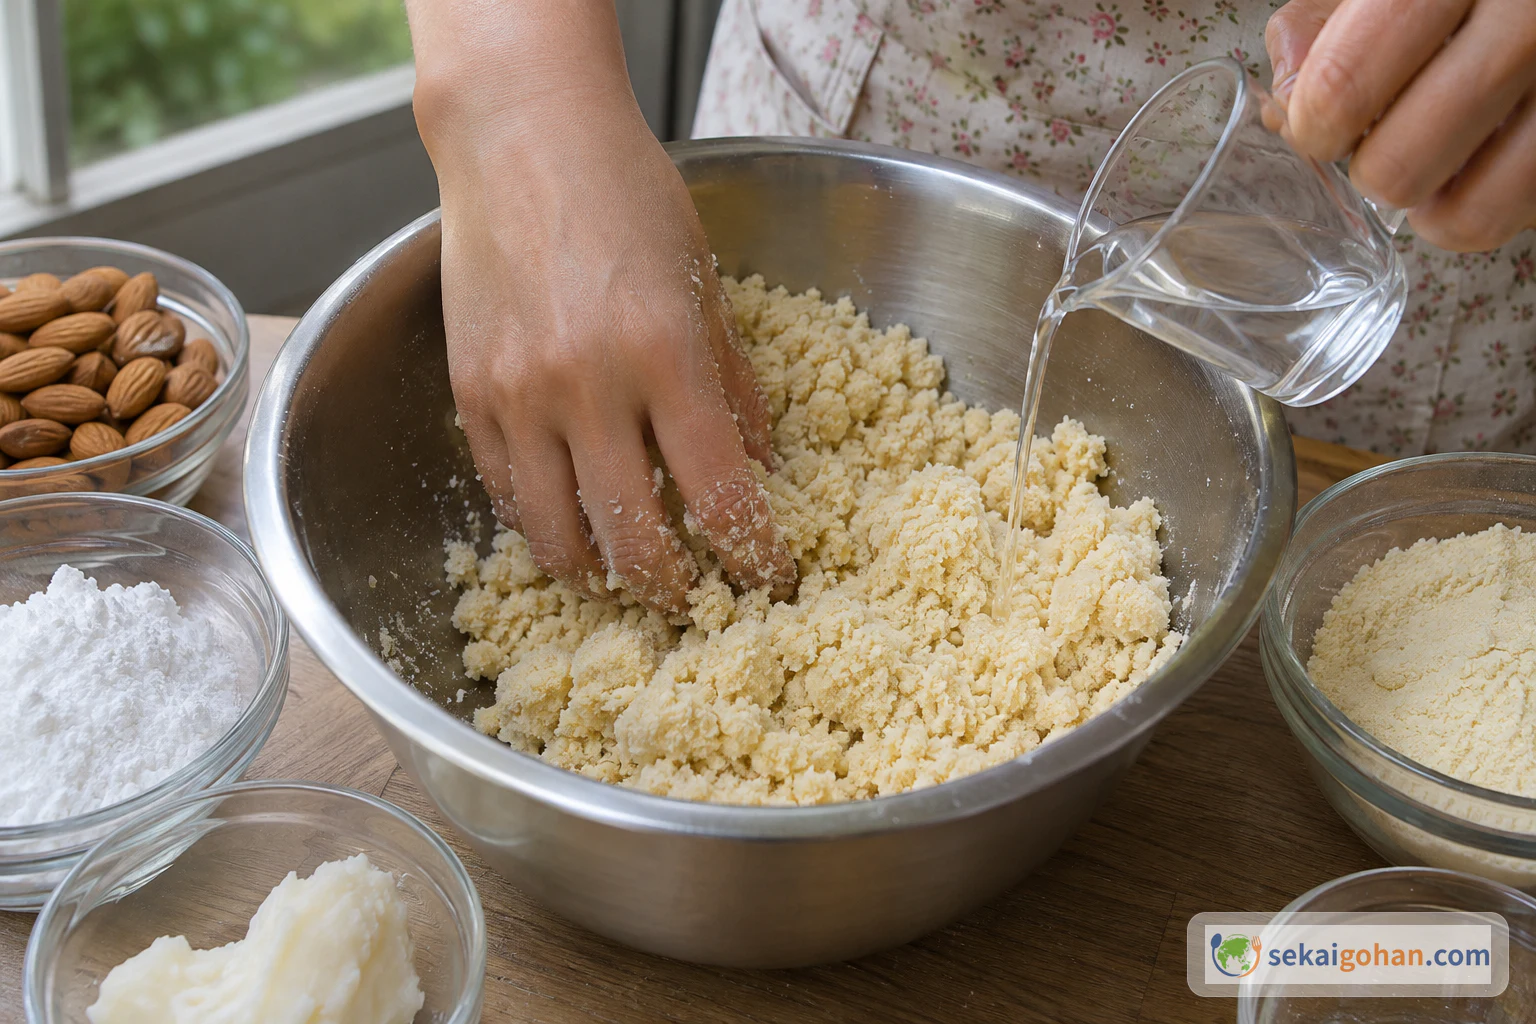
Add the extract, then the water bit by bit

Adding almond extract first to the fine lard-and-flour crumbs
The almond scent rises from the bowl as soon as the extract goes in

Pour all of the almond extract over the crumbs and mix it in. Then add the water a little at a time, tossing the crumbs with your fingers after each addition. Use about 1 tbsp, more or less, as the mixture asks. The crumbs are moving the right way when they look slightly damp and begin to clump in places.

Adding water little by little after the extract
Small splashes, mixed between each one, keep the crumbs from turning pasty
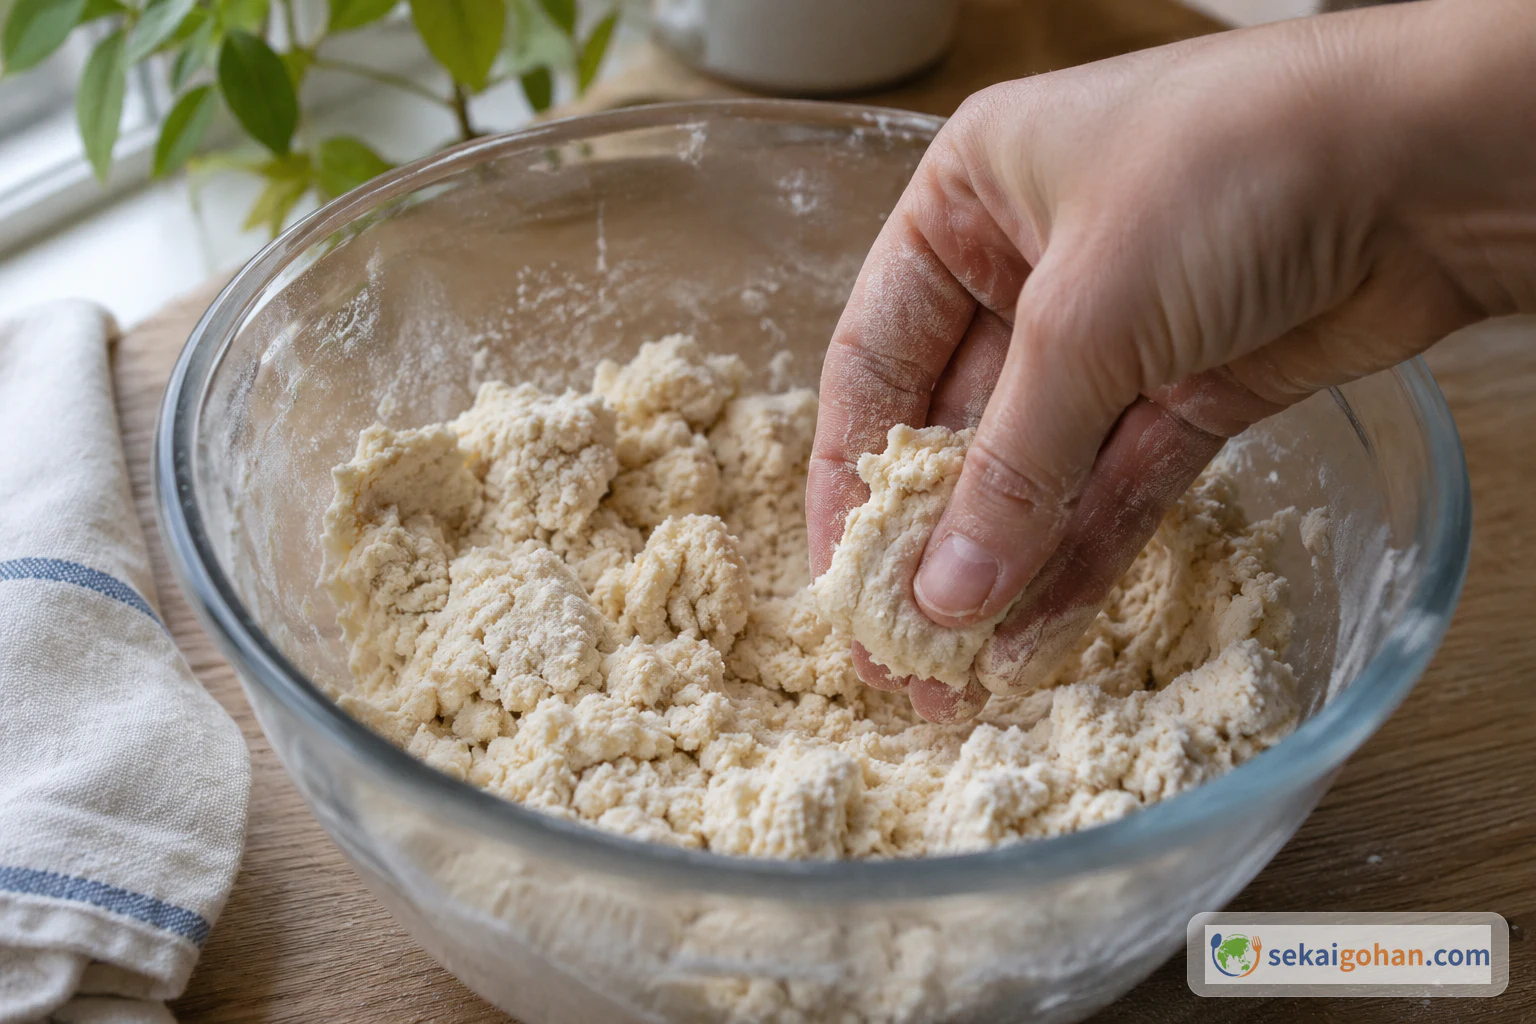
STEP 77 / 17

Press a pinch to test it

Pressing a small portion to check that it holds together
A squeezed pinch that keeps its edges means the water is done

Take a small amount of the mixture and squeeze it firmly between your fingers. If it falls apart into loose crumbs, add another small splash of water and test again. If it holds its shape when pressed, stop adding water. The mixture is right when it still looks crumbly in the bowl but sticks together firmly in your hand.

STEP 88 / 17

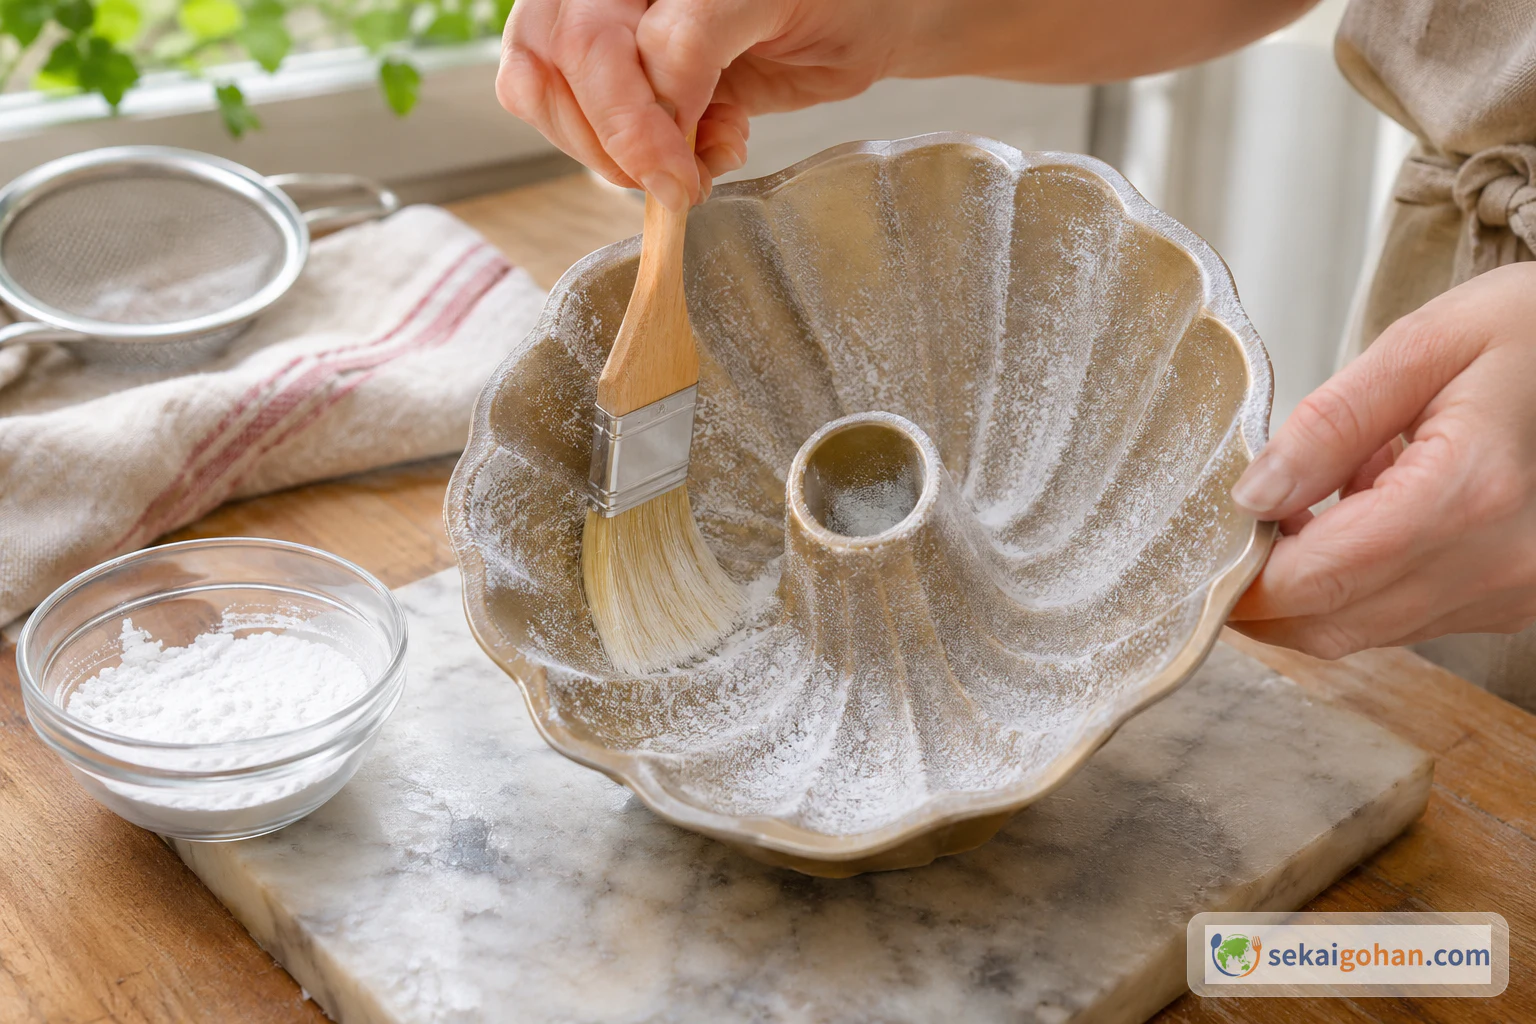
Dust the mold with icing sugar

Dusting the mold thinly with icing sugar using a clean food brush
A light, even coat in the deepest carving is what lets the pattern release cleanly

Dip the clean food brush in the separate icing sugar for the mold. Brush a thin coat over the inside of the mold, working into every carved line and corner. Tap out any loose excess. The mold is ready when the pattern looks lightly frosted all over, with no bare wood showing in the deep cuts.

STEP 99 / 17

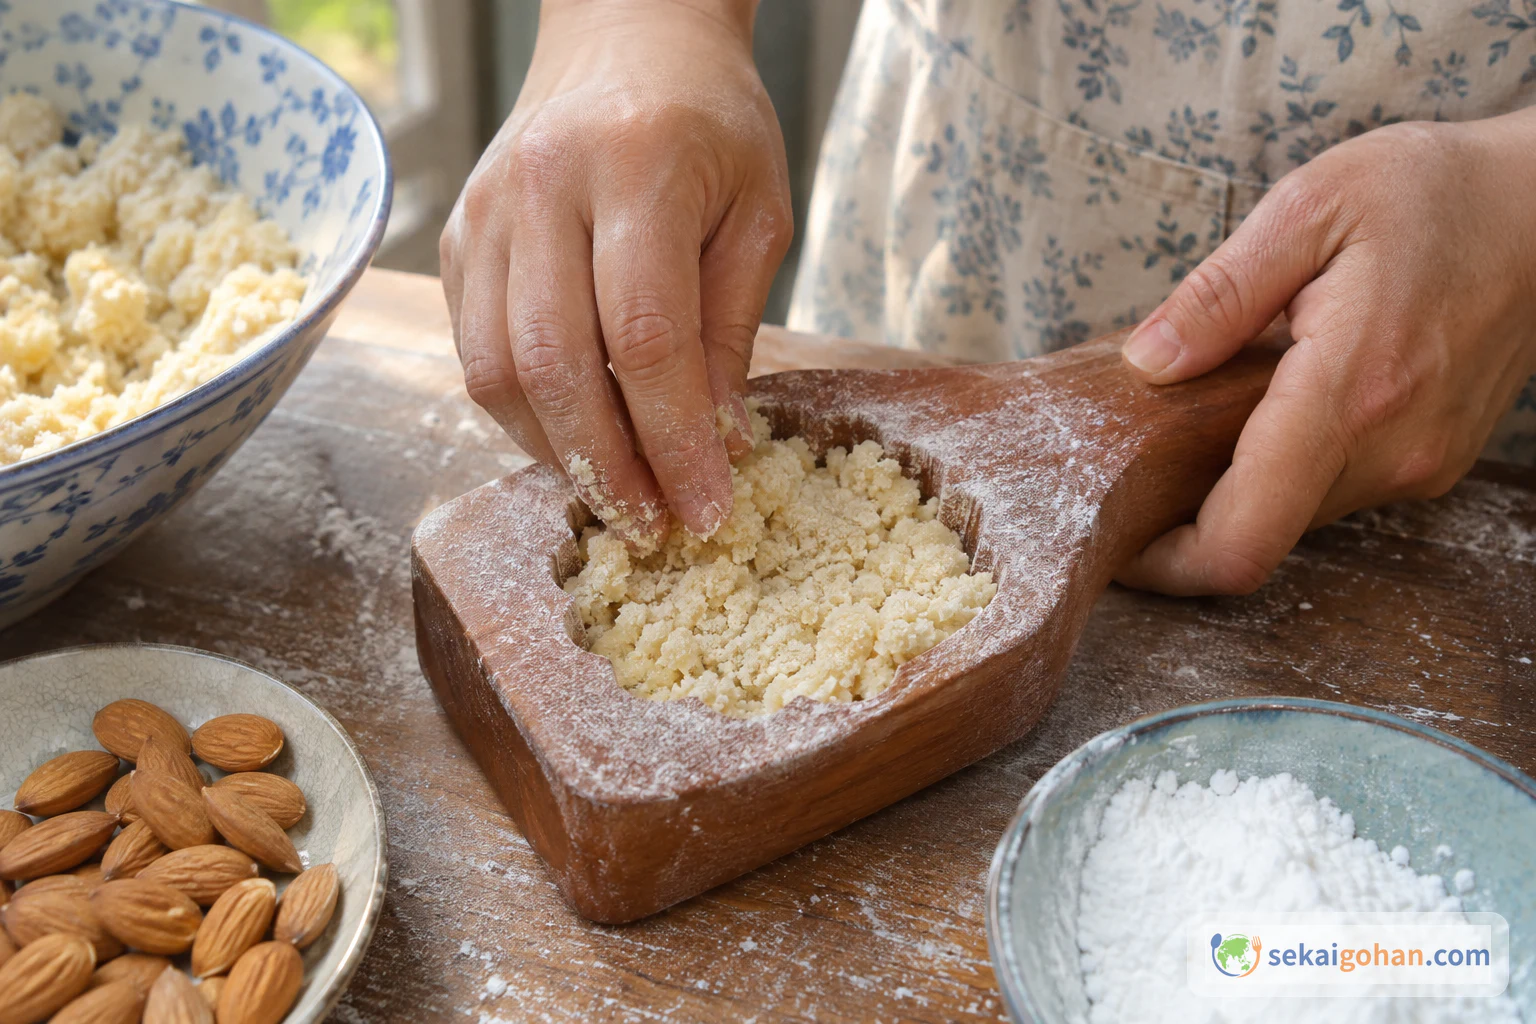
Fill the mold to the corners

Filling the icing-sugar-dusted mold with the mixture, working it into the corners
Work the crumbs into the edges first; gaps there become missing pattern later

Spoon or scatter the crumbly mixture loosely into the dusted mold. Push it with your fingertips into the carved corners and the edges of the pattern. Add more mixture until the mold is heaped slightly above the rim. It is ready to press when every part of the carving is covered.

STEP 1010 / 17

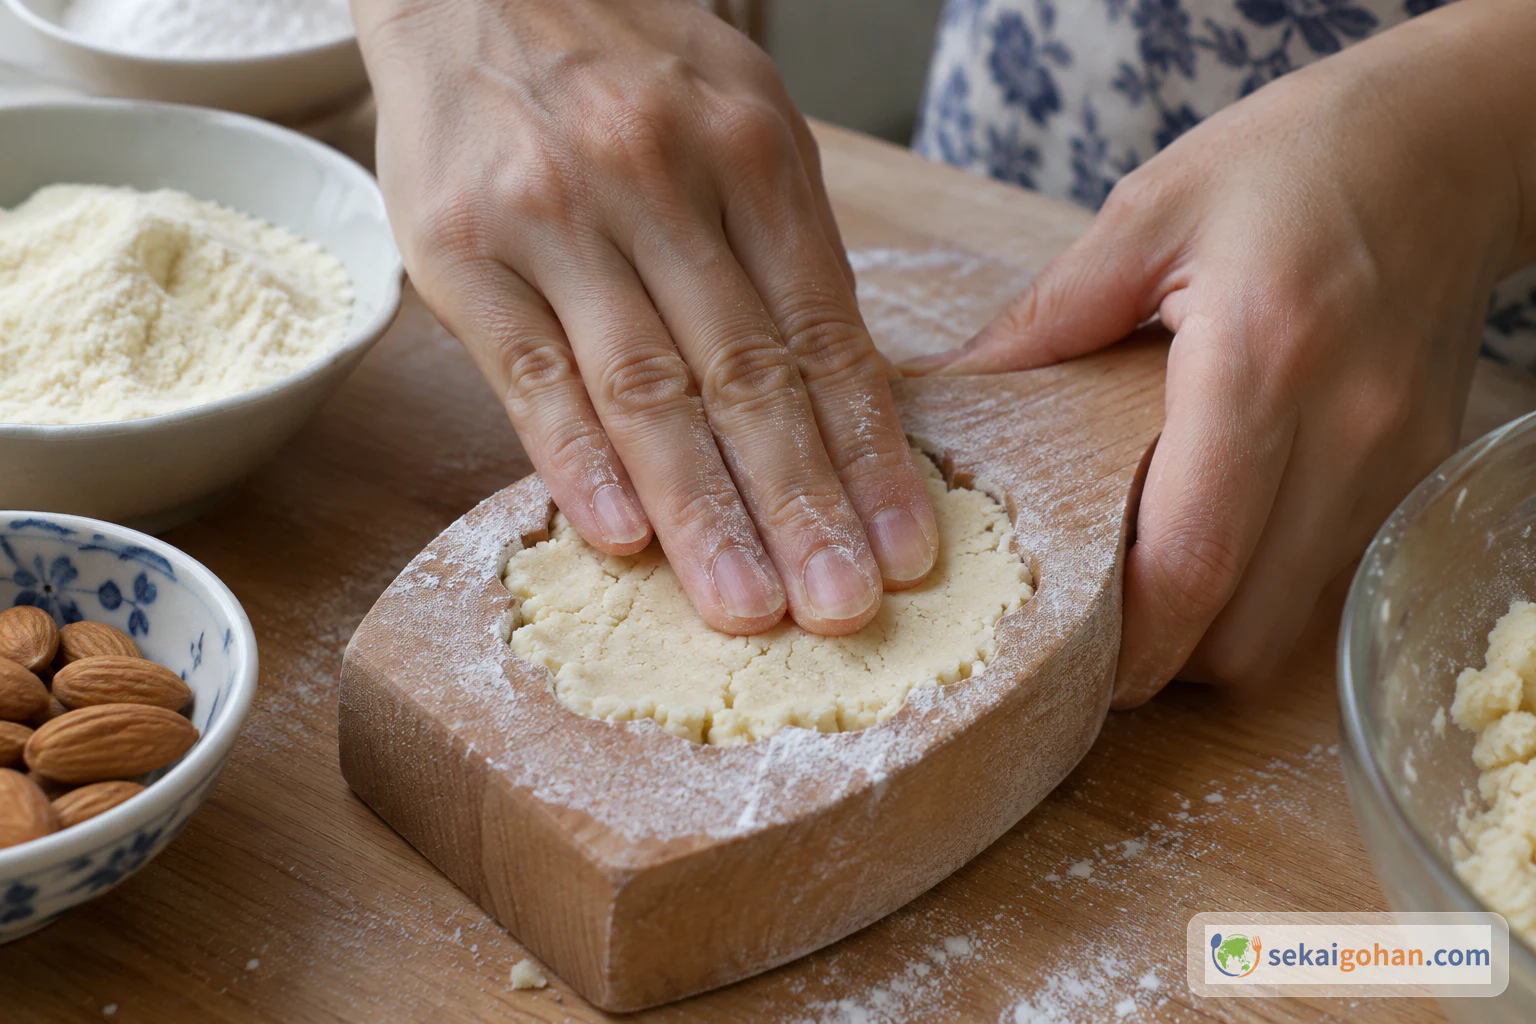
Press firmly and level the bottom

Pressing the corner-filled mixture firmly into the mold
Press until the crumbs stop giving way under your fingers

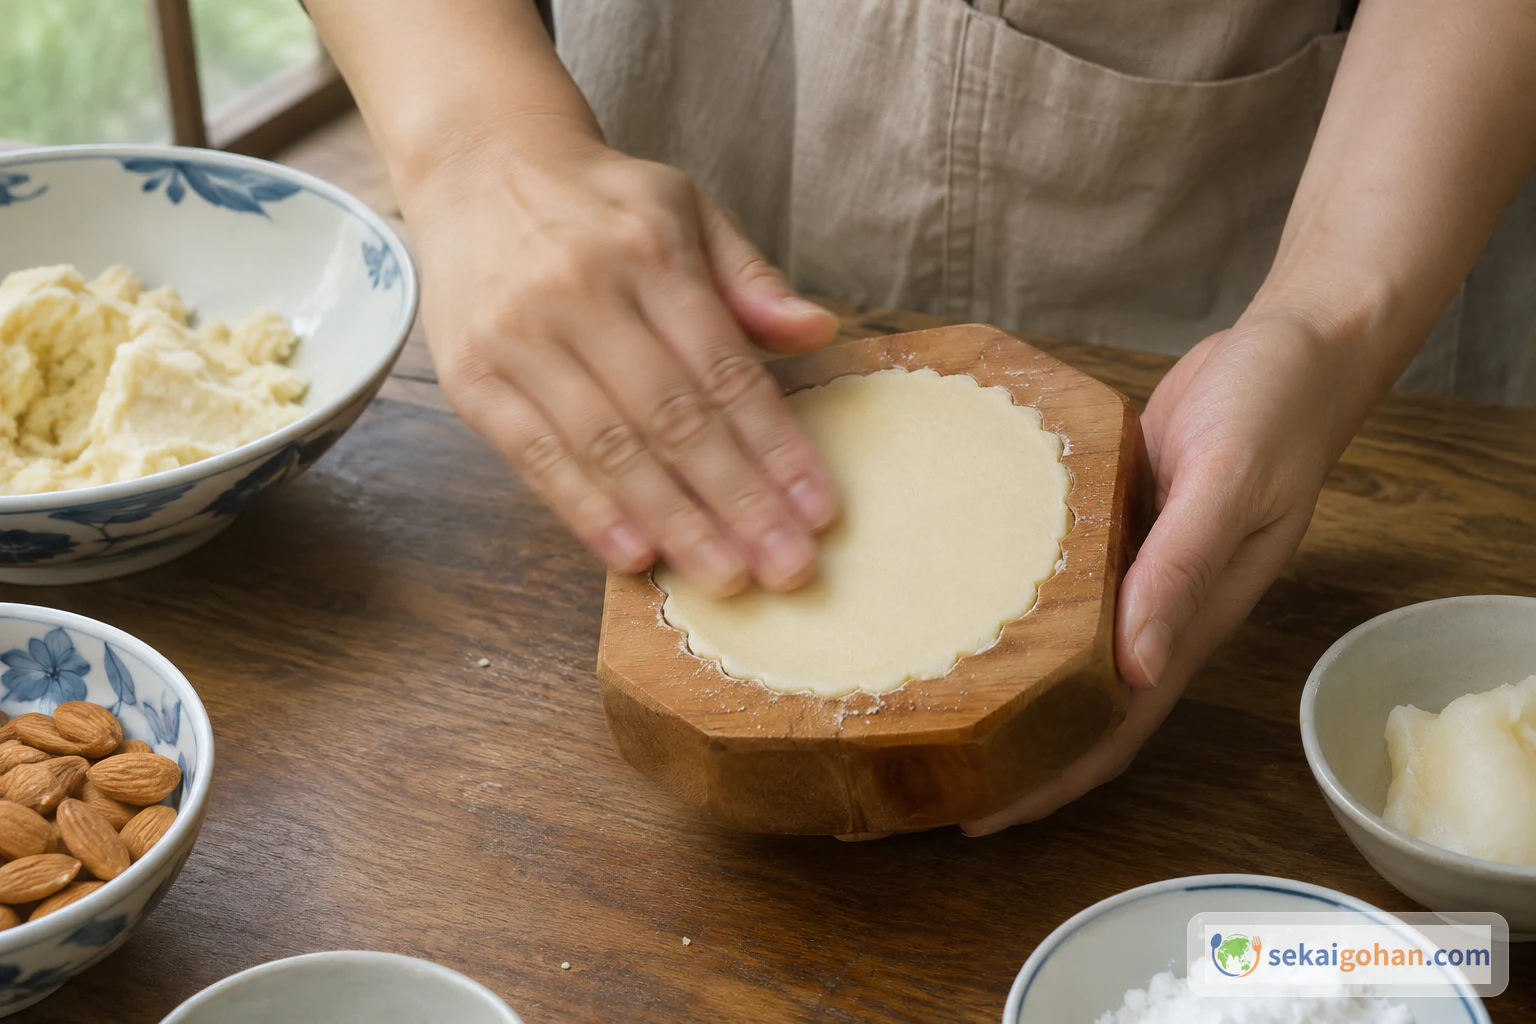
Press down hard on the mixture with your fingers or the heel of your hand. Pack it tight into the mold. Then rub across the exposed surface to smooth it flat, because this becomes the bottom of the cookie. Brush the excess off the rim. The cookie is packed when the surface is flat and firm under your finger, with clean mold edges around it.

Smoothing the bottom of the pressed cookie and clearing away the excess
A level bottom lets the cookie sit flat on the tray
STEP 1111 / 17

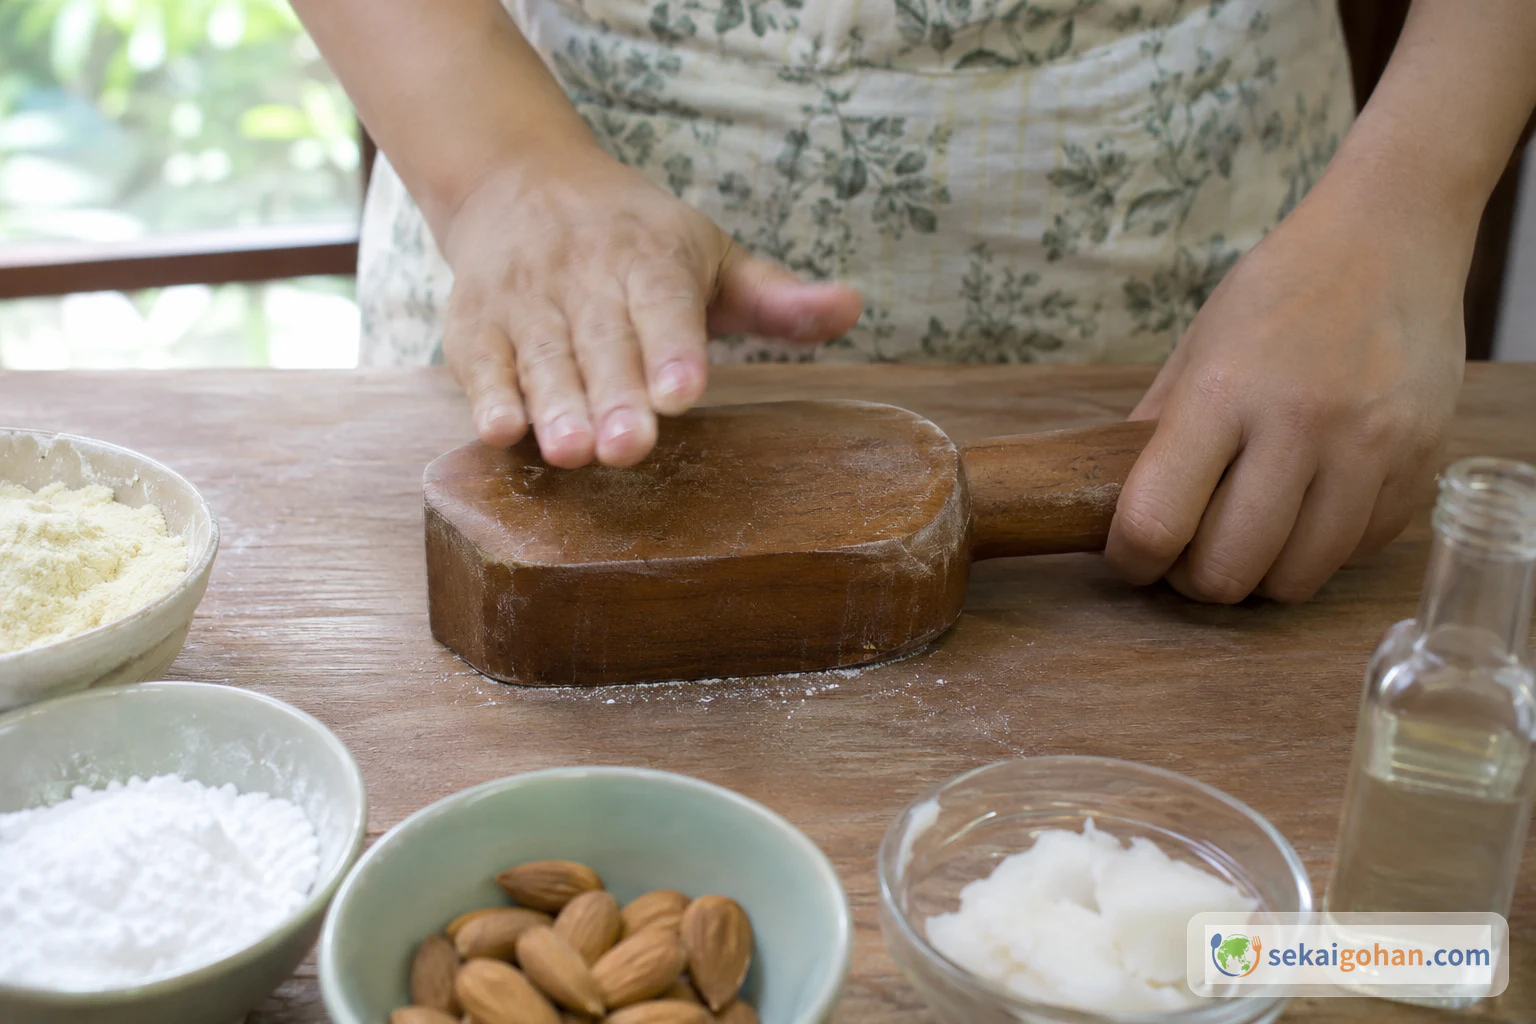
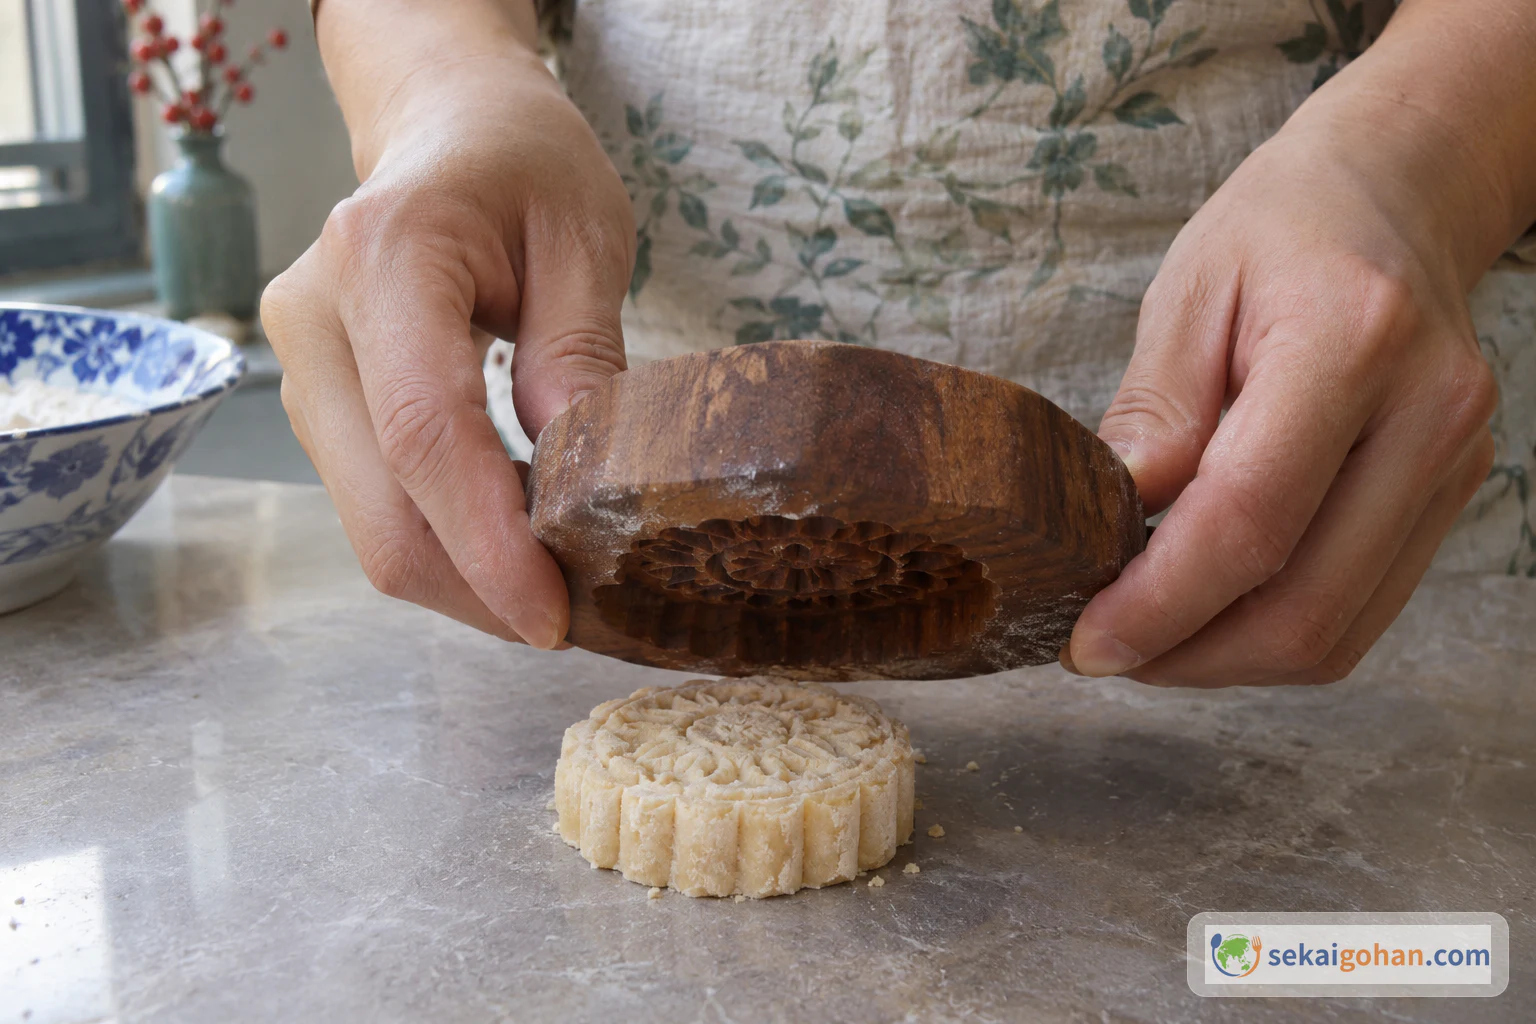
Tap the mold flat and lift to check

Tapping the mold flat against the table, cookie side down
Bring the whole face of the mold down level so the cookie loosens evenly

Turn the mold cookie-side down and bring it flat against a sturdy, clean tabletop with one firm tap. Lift the mold carefully, keeping it level. Look at the cookie. If it has released, it is sitting on the table, and if it has started to drop, you will see it moving down out of the carving.

Lifting the mold to check whether the cookie has released
Lift straight up and look; a cookie already on the table needs nothing more
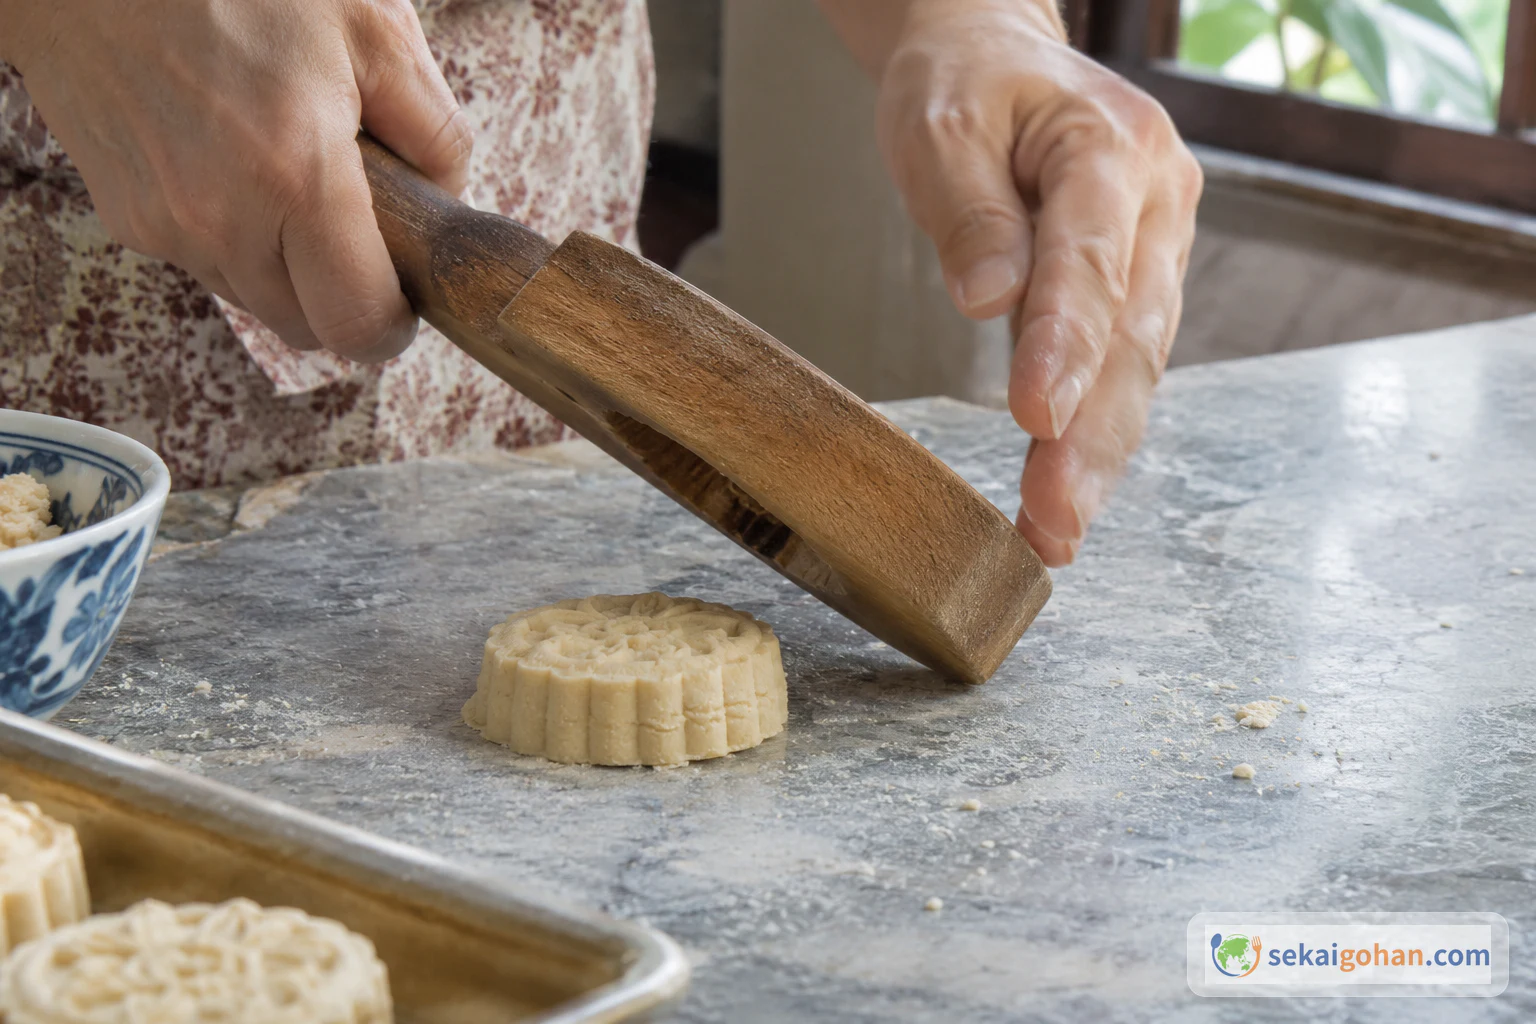
STEP 1212 / 17

Wait, or tap the end

Holding the mold still while a loosening cookie drops out
Keep your hands still; a cookie that is already moving comes out cleanest on its own

If the cookie has started to move, hold the mold still just above the table and let it drop out by itself. If it has not moved after about 10 seconds, tilt the mold so only one end touches the table and tap that end once, quickly. Use each move only when the cookie needs it. The cookie is free when it lies on the table with the pattern sharp.

Tapping the tilted end of the mold when the cookie has not moved
A single quick knock on one end, not a hard slam
STEP 1313 / 17

Unmold and set the cookies on the tray

Taking the unbaked cookie out of the mold
Handle the raw cookie as little as possible; it holds by pressure alone

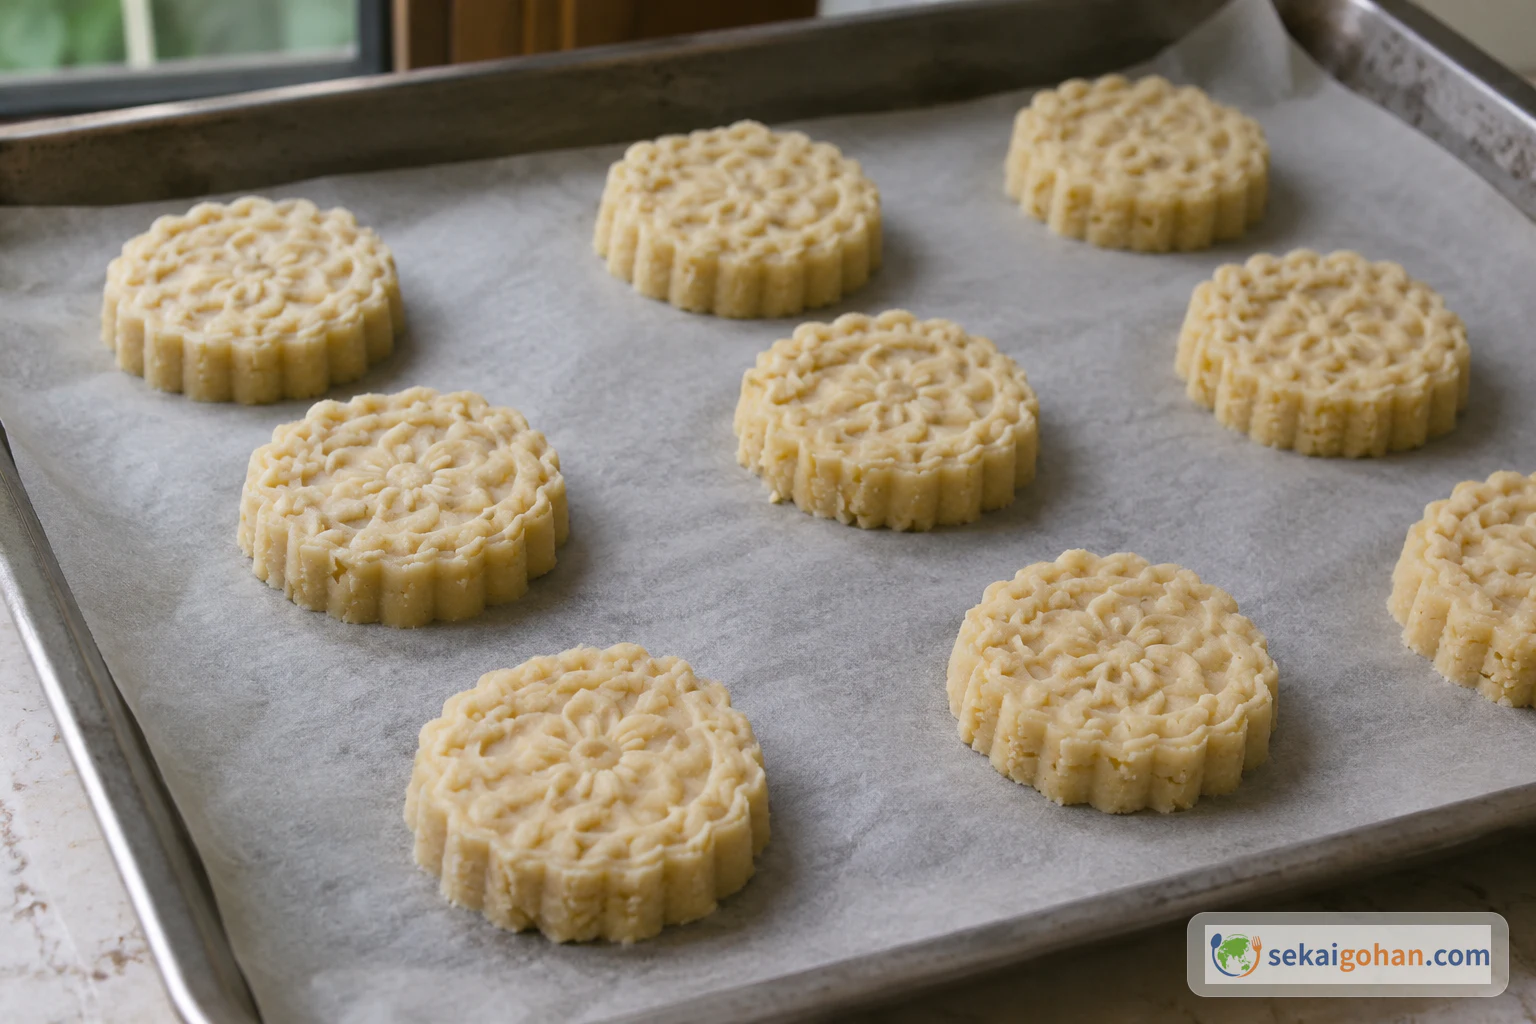
Ease the cookie out of the mold if it is still resting there. Move it gently onto the lined tray. If a cookie cracks or the pattern smears, break it back into crumbs, pack it into the mold again and remold it. Repeat the dusting, filling, pressing and release with the rest of the mixture. The tray is ready when it is filled with pale, sharply stamped rounds sitting flat on the paper.

Placing the molded cookies on the parchment-lined tray
Lay them in rows with a little space between each
STEP 1414 / 17

Bake with the door slightly open

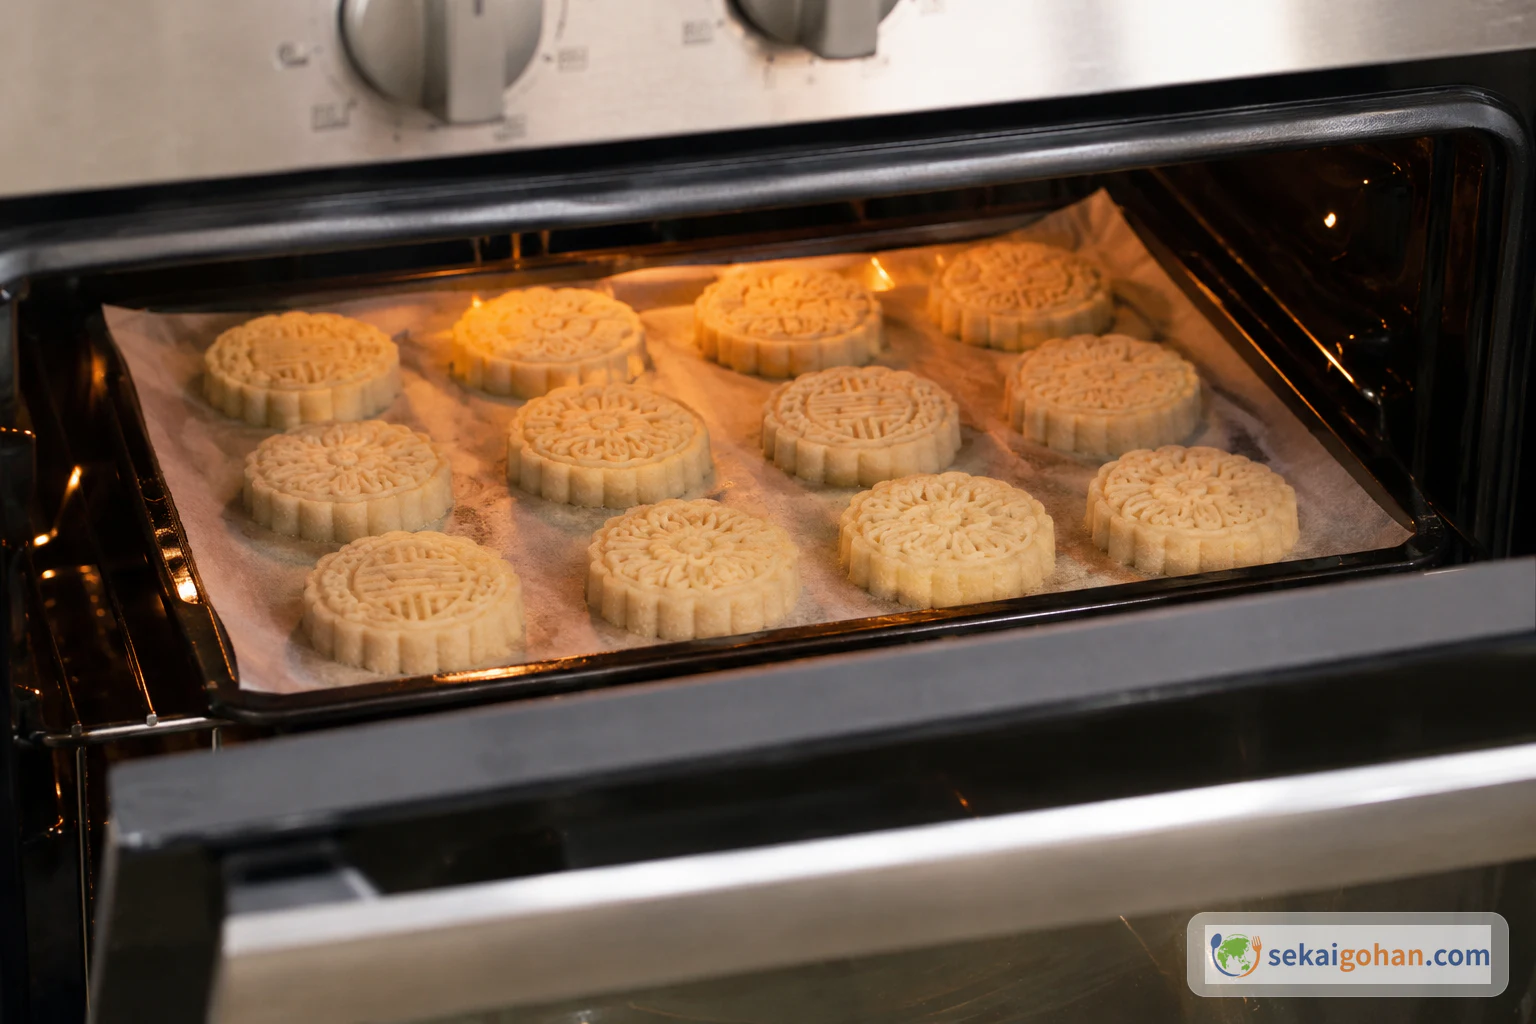
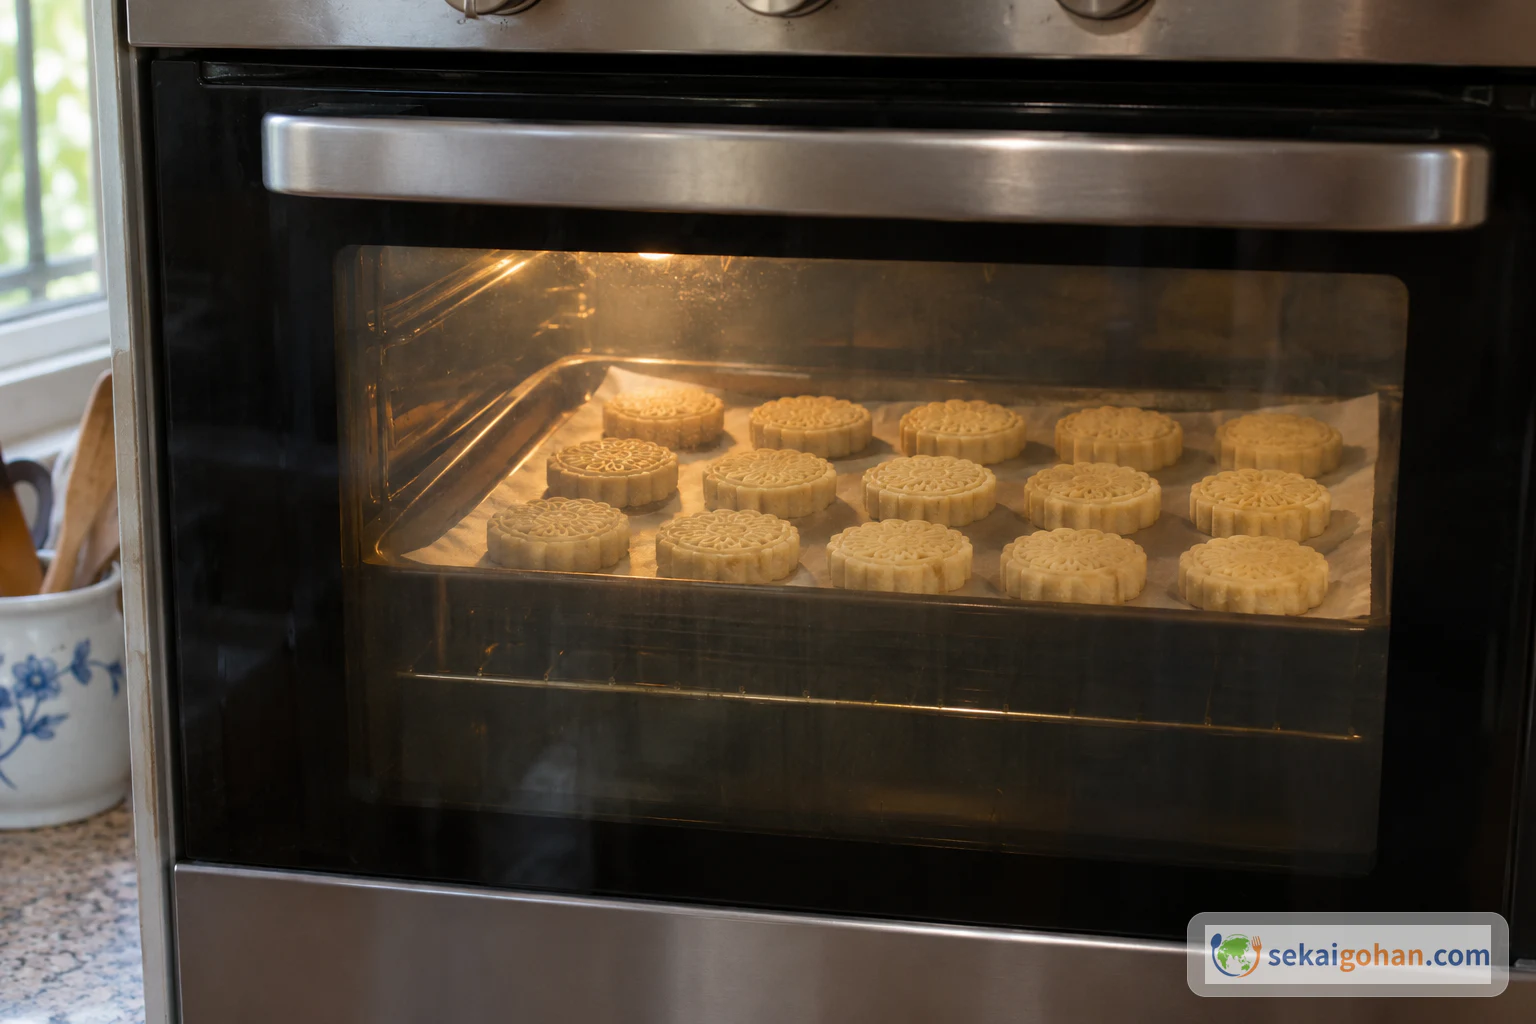
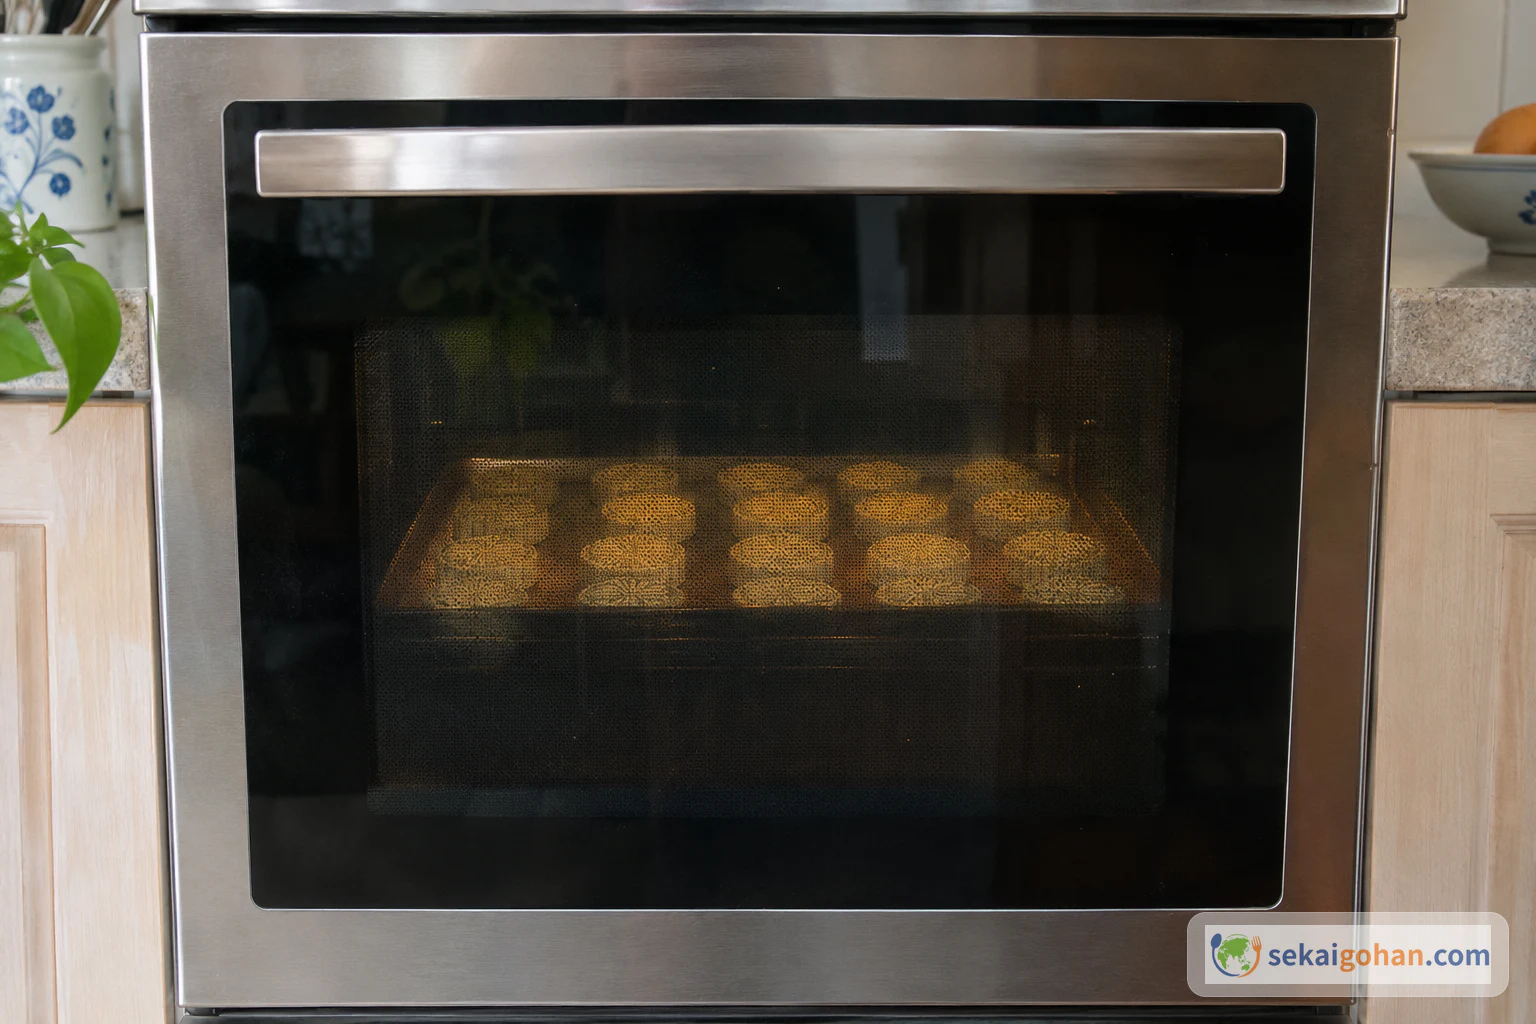
Baking the molded cookies with the oven door slightly open
The tops should go from chalk-white to the palest gold, nothing darker

Slide the tray into the oven at 300°F (150°C) and leave the door open just a little. Bake for 25 minutes, or until just golden brown. Watch the edges and the raised parts of the pattern for the first color. Stay with the oven while the door is open. The cookies are done when they have only a faint golden tint.

STEP 1515 / 17

Close the door, switch off and rest inside

Closing the oven door after baking
Close the door fully, with the tray still on its shelf

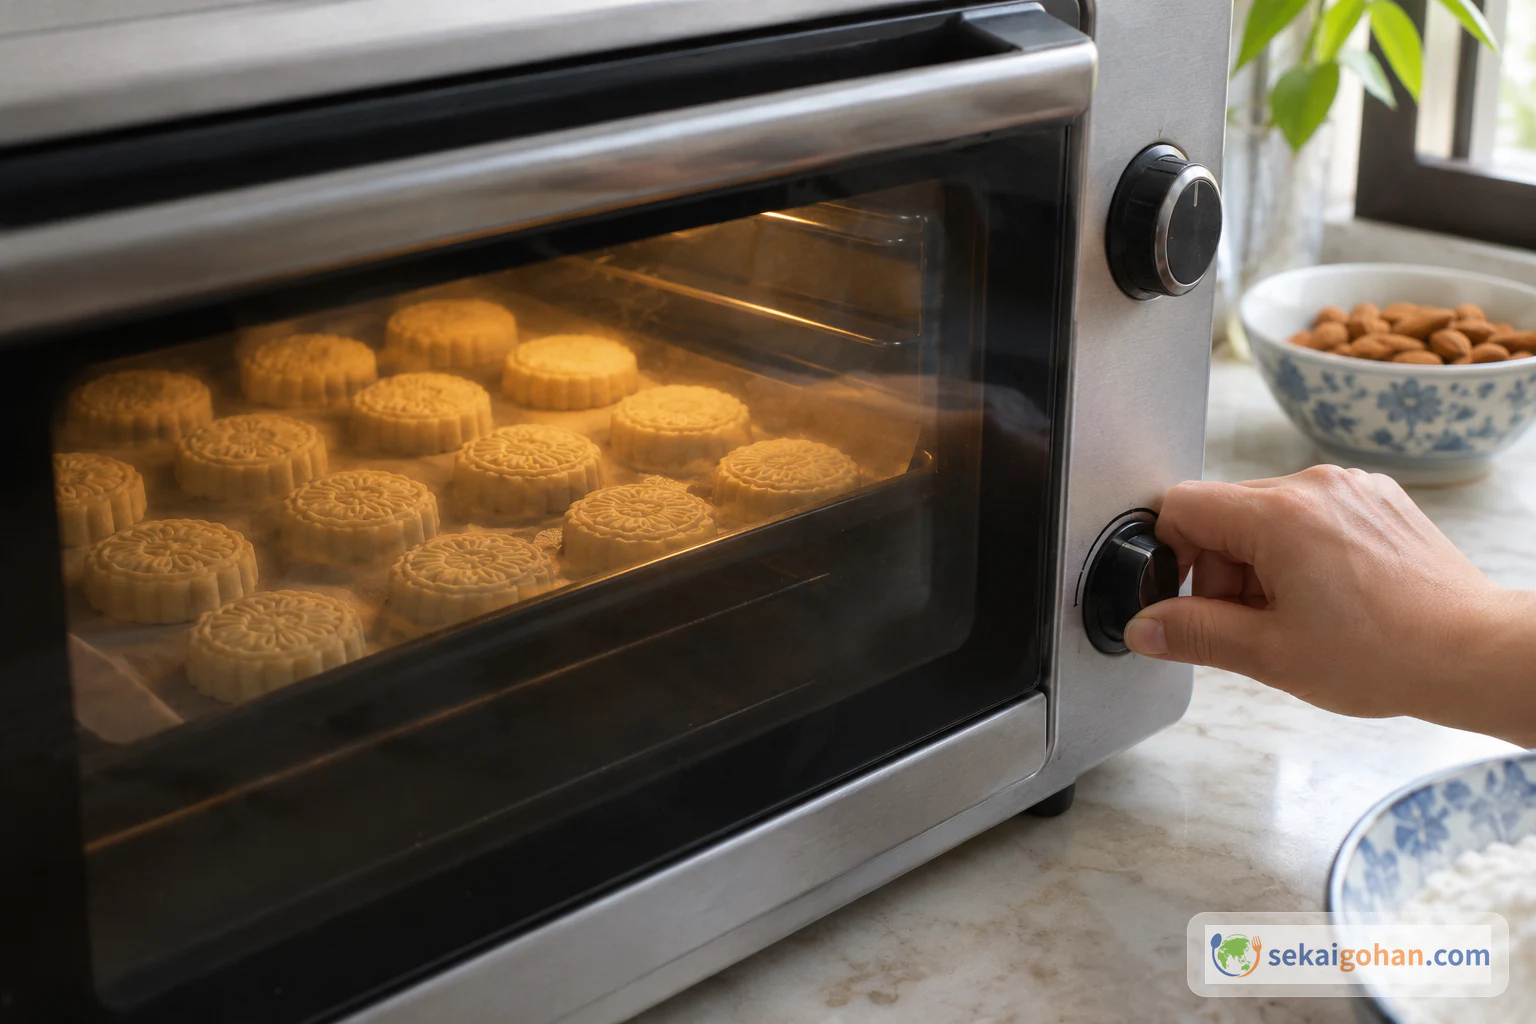
Close the oven door fully. Switch off the heat and leave the tray where it is. Let the cookies sit in the closed oven for 5 more minutes. They finish setting in the remaining heat and are ready to come out when the 5 minutes are up.

Switching off the heat after closing the door
Heat off, door shut, tray left inside
Leaving the cookies inside the closed oven for 5 minutes
Leave the door closed for the full rest
STEP 1616 / 17

Move to the rack and cool completely

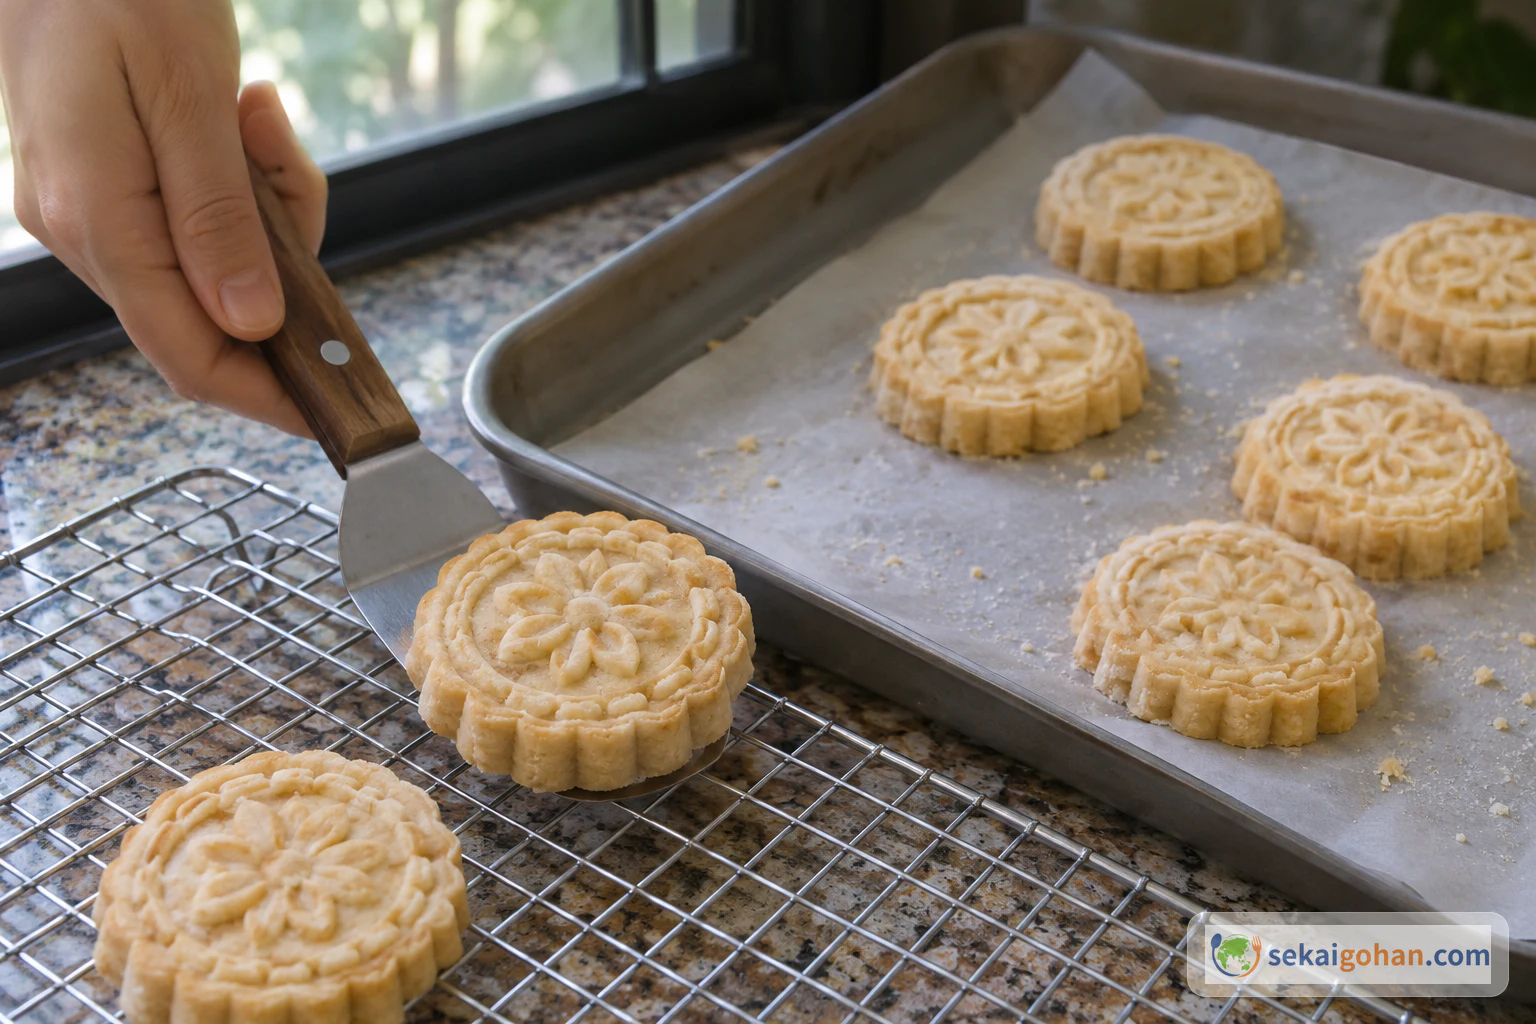
Moving the cookies from the tray to a wire rack after the rest in the oven
Lift each cookie from underneath so the warm edges do not crack

Take the tray out. Lift the cookies one at a time onto a wire rack with a thin spatula or your fingers. Let them cool on the rack untouched. They are ready when they are cool all the way through and feel firm and dry.

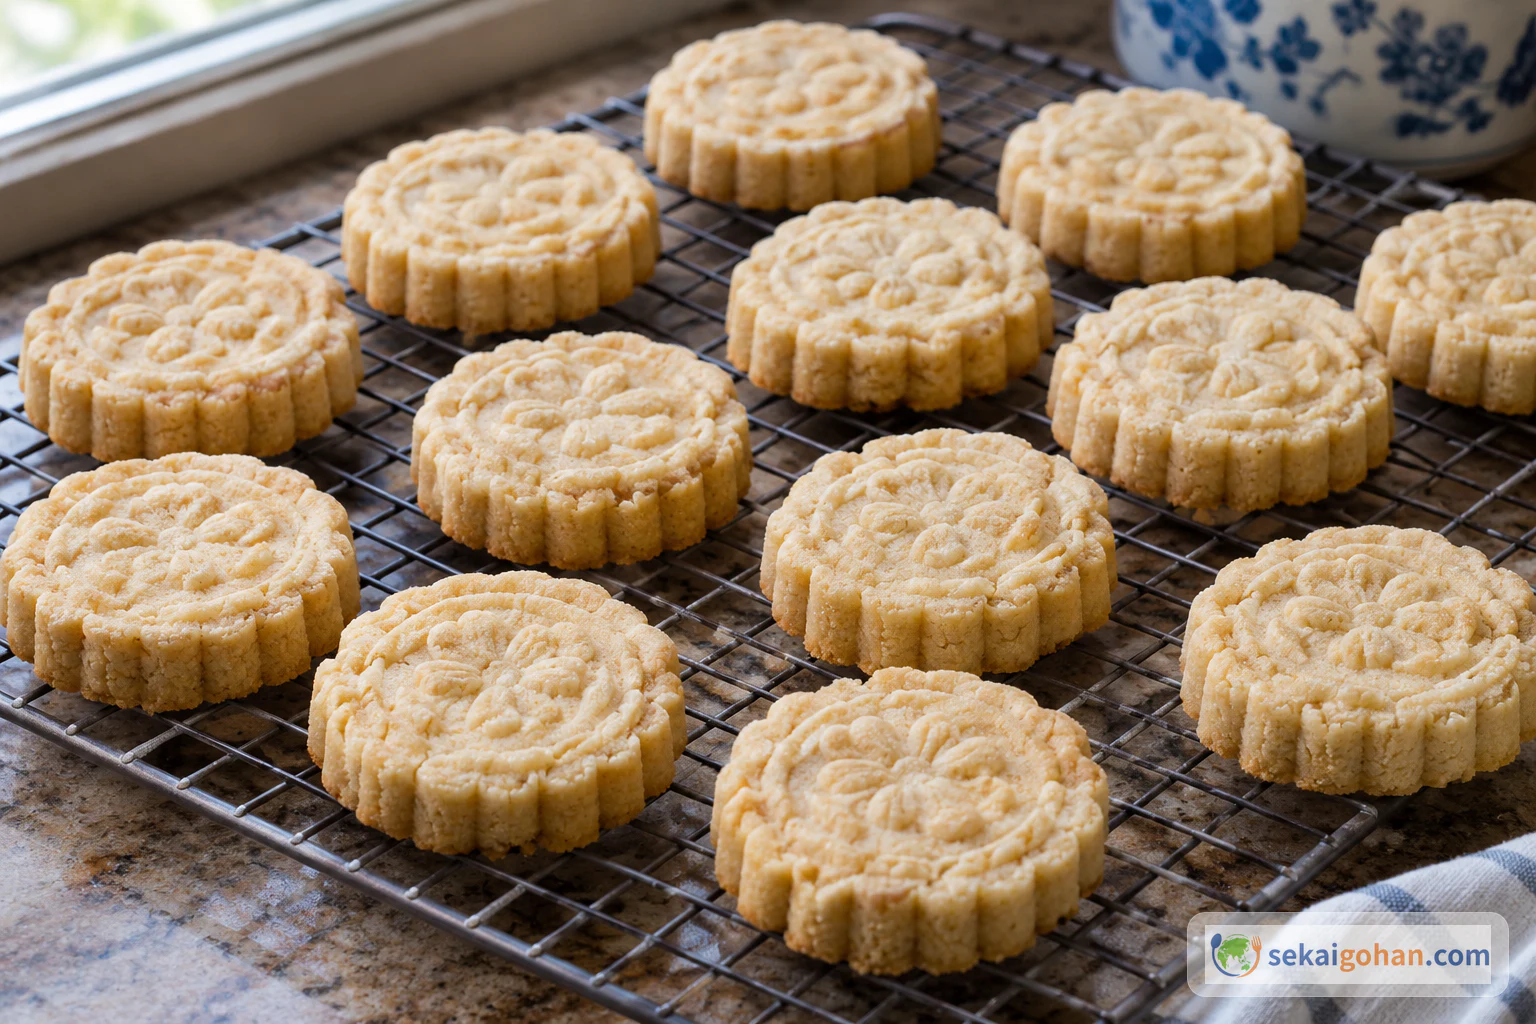
Letting the cookies cool completely on the rack
Cool cookies feel dry all over and no longer warm at the center
STEP 1717 / 17

Serve with a drink

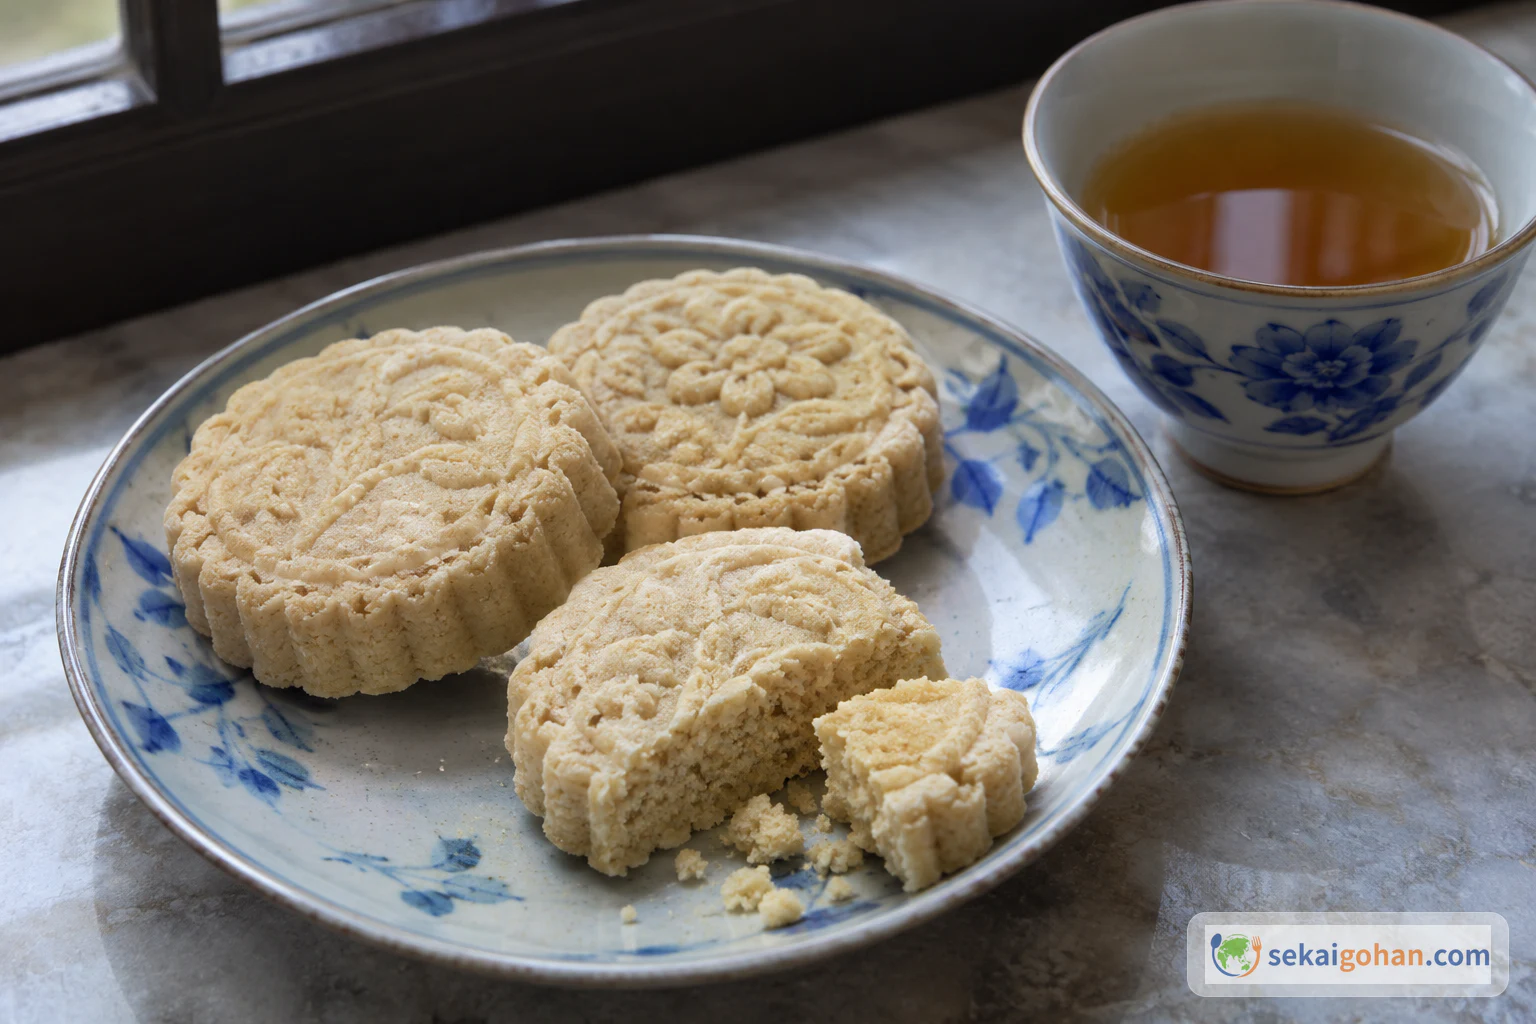
Fully cooled almond cookies served with tea
Serve them plain; the pattern and the tea are all the plate needs

Arrange the cooled cookies on a small plate. Put a cup of unsweetened tea or another drink beside them. Take a bite and follow it with a sip, so the cookie softens into sweet almond crumbs. The cookies are at their best once they are fully cool and crumble cleanly when broken.

0 / 0
Ingredients

Ingredients

1 / 1

Ingredients

Ingredient Amount Role
Whole almonds, unsalted, edible sweet almonds 3.4 oz (96 g) Body and flavor; ground with the sugar
Icing sugar (powdered sugar) 3.4 oz (94 g) Sweetness; ground with the almonds into a fine flour
Mung bean flour (綠豆粉) 3.5 oz (100 g) Binds the cookie and gives the sandy texture
Lard (豬油) 2.5 oz (70 g) Fat that holds the crumbs together in the mold
Almond extract 1 tsp Aroma; goes in before the water
Water 1 tbsp, more or less as needed Just enough for a pinch to hold its shape
Icing sugar for the mold as needed A thin coat inside the mold so the cookie releases
0 / 0

You turn the carved mold face-down, knock it flat against the table, and lift it. A pale disc with a crisp pattern sits on the counter, smelling of ground almonds and almond extract, so fragile it looks like it might fall back into crumbs. In the oven it sets into a cookie that is dry, sandy and short, and it breaks apart on the tongue rather than chewing. Macao almond cookies (澳門杏仁餅) are one of the city's traditional and best-loved sweets. They are so dry that you eat them with a drink in hand, and a plain cup of tea is the natural partner.

The whole character of the cookie comes from what it leaves out. There is no egg, no wheat flour and no butter. Ground almonds and icing sugar make up most of the body. Mung bean flour holds it together, and lard binds it just enough to keep the stamped shape. The result is closer to a pressed sweet powder than to a biscuit. That is why it crumbles so readily, and why it asks for a drink alongside.

In Macao, almond cookies are a bakery trade as much as a home sweet. Some long-running shops still pack the mixture into molds by hand and bake over charcoal, setting the cookies out on bamboo trays. Accounts of what goes into those bakery cookies differ from one telling to the next. One describes American almonds, mung bean flour, sugar, vegetable oil and peanut butter. Another describes whole almonds, vegetable oil, white sugar and mung bean flour, with a version that hides a pork filling inside. Those are shop recipes built around charcoal and a bakery's own methods. The cookie here is a home kitchen batch: lard, an electric or gas oven, and one carved mold on the counter.

Where the cookie first began is not settled, and each old shop tells its own story. What everyone agrees on is the shape and the eating: small rounds stamped with a pattern, sold in stacks, bought by visitors to carry home and eaten by locals with tea. For more of the city's food, see the Macau country page.

The name on the box

餅 covers a wide family of cakes and biscuits in Chinese, and 杏仁 means almond. On Chinese shop shelves, the same characters can also appear on apricot kernels and on sweetened almond-drink powder. This cookie uses ordinary eating almonds.


Ingredients
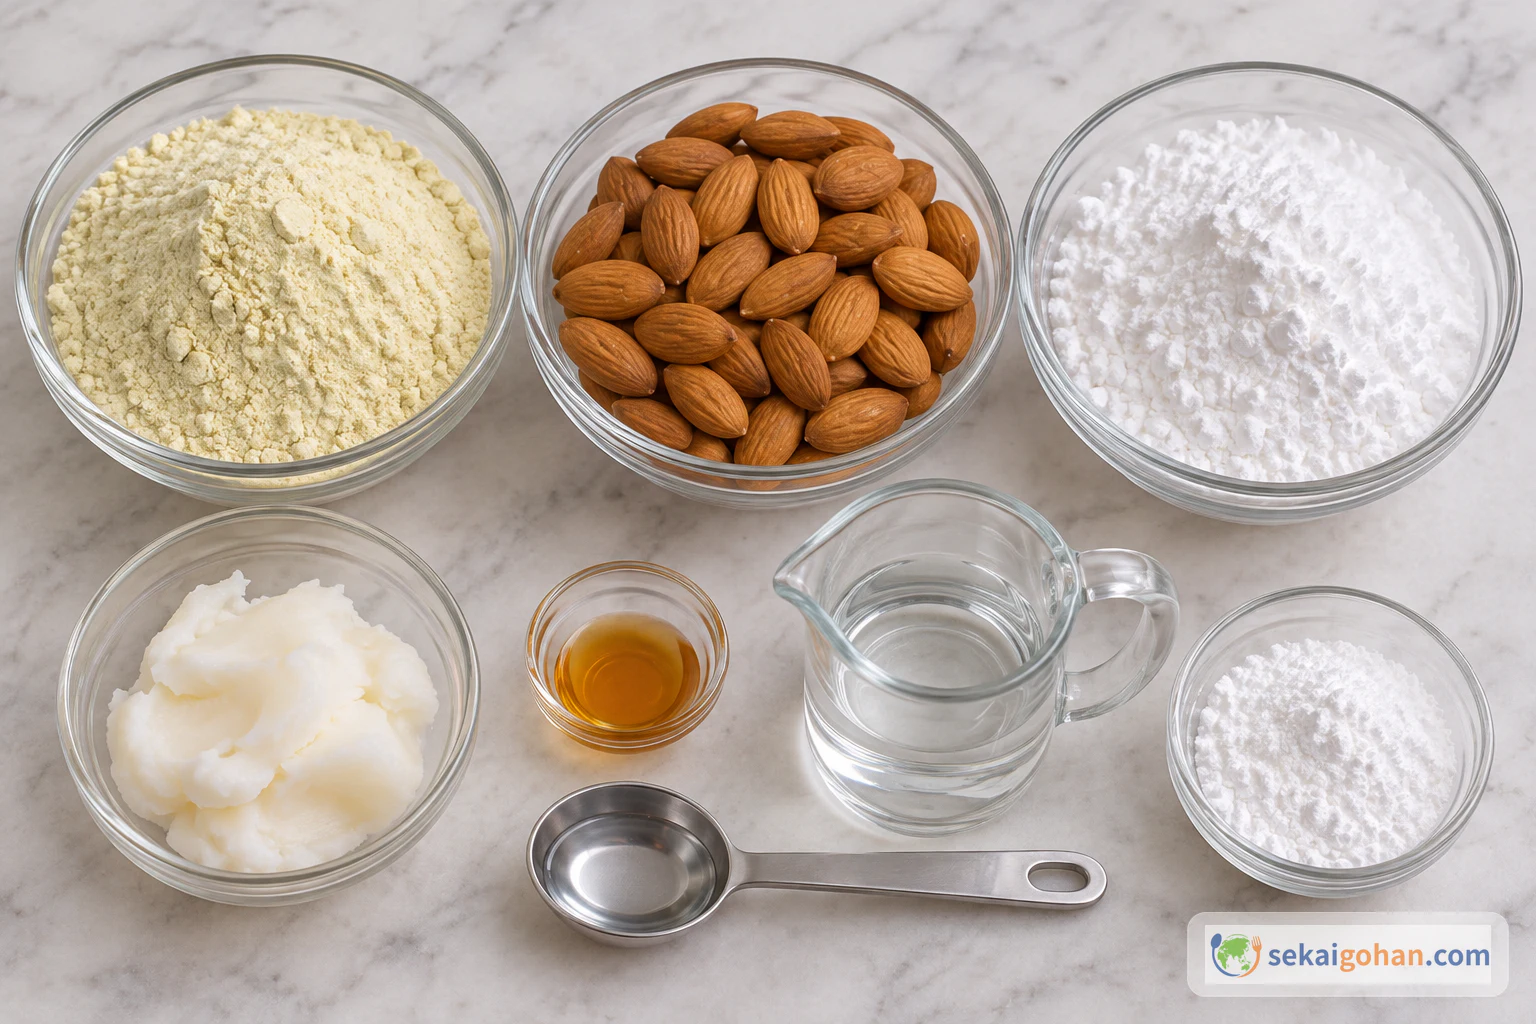
The ingredients: whole edible almonds, mung bean flour, icing sugar, lard, almond extract, water and separate icing sugar for the mold
Keep the icing sugar for the mold apart from the sugar that goes into the mixture

The batch makes about 30 cookies, depending on the size of your mold. Every dry ingredient is given by weight, so use a kitchen scale.

Weigh, don't scoop

Mung bean flour, ground almonds and icing sugar pack very differently in a cup. The cookie only holds together and crumbles correctly when the three are in balance, so weigh them every time.

Allergen information

This recipe contains tree nuts (almonds) and pork fat (lard). Bakery almond cookies bought in Macao can also contain peanut butter or a pork filling, so check the label before buying them for someone with an allergy or dietary rule.

Equipment

  • Kitchen scale and measuring spoons
  • Food processor
  • Mixing bowl and whisk
  • Cutting board and small knife
  • Carved cookie mold (wooden molds are traditional)
  • Clean brush kept for food use, for dusting the mold
  • Baking tray and baking parchment
  • Wire cooling rack
  • Oven

Buying the Almonds, Flour and Lard

Mung bean flour is the item to hunt for. Look in Chinese and other Asian grocers or online for a bag sold as food and labeled mung bean flour (綠豆粉). Mung bean starch sits on the same shelves and looks just as white, but it is a different product and will not give the same texture. Buy only food-grade flour. Store-bought mung bean flour goes into the bowl straight from the bag.

The almonds are ordinary edible sweet almonds, whole and unsalted, from any supermarket. Use them as you bought them, raw or roasted. Apricot kernels, bitter almonds and sweetened almond-drink powder are separate products, often sold under the same Chinese characters. They do not belong here. Pre-ground almond flour also changes the grind, because the almonds should be broken down together with the sugar.

Lard comes from a butcher or the fat section of a supermarket. Bakeries in Macao use vegetable oil in their own recipes, but this batch is built around lard. Keep lard for the shape and short bite. The icing sugar is ordinary powdered sugar. Keep a little extra in a separate bowl for the mold.


Method

Line the tray and heat the oven first. After that, the mixture comes together in one bowl in a few minutes. Most of your time goes into the molding, one cookie at a time, so set up a clean, sturdy patch of table for tapping. The baking itself is a short stretch at the oven, followed by a rest inside it with the heat off and a full cooling on the rack.

Extract first, then water a little at a time

Pour in all the almond extract before any water touches the crumbs. Then add water in small splashes, and stop at the first pinch that holds when squeezed. Too much water makes a pasty mixture that clings to the mold.

Read the mold before you tap again

After the first flat tap, lift the mold and look before you do anything else. If the cookie is already sliding, let it come. Only a cookie that has not moved after about 10 seconds gets the quick tap on the mold's end.

Baking with the door ajar
  • These cookies bake with the oven door open a little. Do this only in an oven whose manual allows running with the door open, never in a microwave-combination mode, and keep the gap small. Heat escaping through the gap can damage the cabinets and furniture in front of the oven.
  • Never hold the door with a utensil, towel or wedge, and never cook with anything caught in the door or bypass a door switch.
  • Stay with the oven the whole time the door is open, and keep children and pets clear of the oven front.

When It Goes Wrong

What you see Why What to do
A squeezed pinch crumbles straight back into sand Not enough water yet Add another small splash, toss, and test again until it holds
The mixture feels pasty and clings to the mold Too much water went in at once Add water in smaller amounts next batch and stop at the first pinch that holds
The pattern has gaps or soft, rounded edges The crumbs were not worked into the carved corners or not pressed hard enough Break the cookie up, repack the corners first, then press firmly before tapping
The cookie stays in the mold after the flat tap The cookie needs more time or a sharper knock Wait if it is moving; after about 10 seconds without movement, tap the tilted end once
The cookie comes out torn or the pattern sticks The mold was dusted unevenly Brush icing sugar thinly into every line, then repack and remold the broken cookie

Serving and Roasted-Almond Variation

At the table

These are cookies for a cup of something. Put a plate out with tea in the afternoon, or wrap a few in paper for a visitor, the way boxes of almond cookies leave Macao in travelers' bags. Because they are so dry, the drink matters as much as the cookie. A bite dissolves into sweet almond crumbs with a sip, and they fall apart in the mouth rather than in the fingers.

Roasted almonds

Roasting the whole almonds before grinding them gives a deeper, toastier almond flavor. Let them cool completely, then grind them with the icing sugar exactly as in step 2. Everything else stays the same. The finished cookie has a warmer taste and a slightly darker crumb.

Frequently asked questions

Does the lard need to be cold?

No particular temperature is needed. Cut it into small cubes and rub it in with your fingertips until the mixture looks like fine breadcrumbs. Small pieces disappear into the flour quickly whatever their temperature.

Do I have to toast store-bought mung bean flour first?

No. Food-grade mung bean flour from the shop goes into the bowl straight from the bag. Toasting belongs only to recipes that start with whole beans and mill them at home.

What size mold should I use?

Any carved cookie mold works. Wooden ones are traditional, and the size of the mold sets how many cookies you get, about 30 from this batch. Smaller cookies pack and release more easily on a first try. Larger ones need firmer pressing to hold the pattern.
Sources