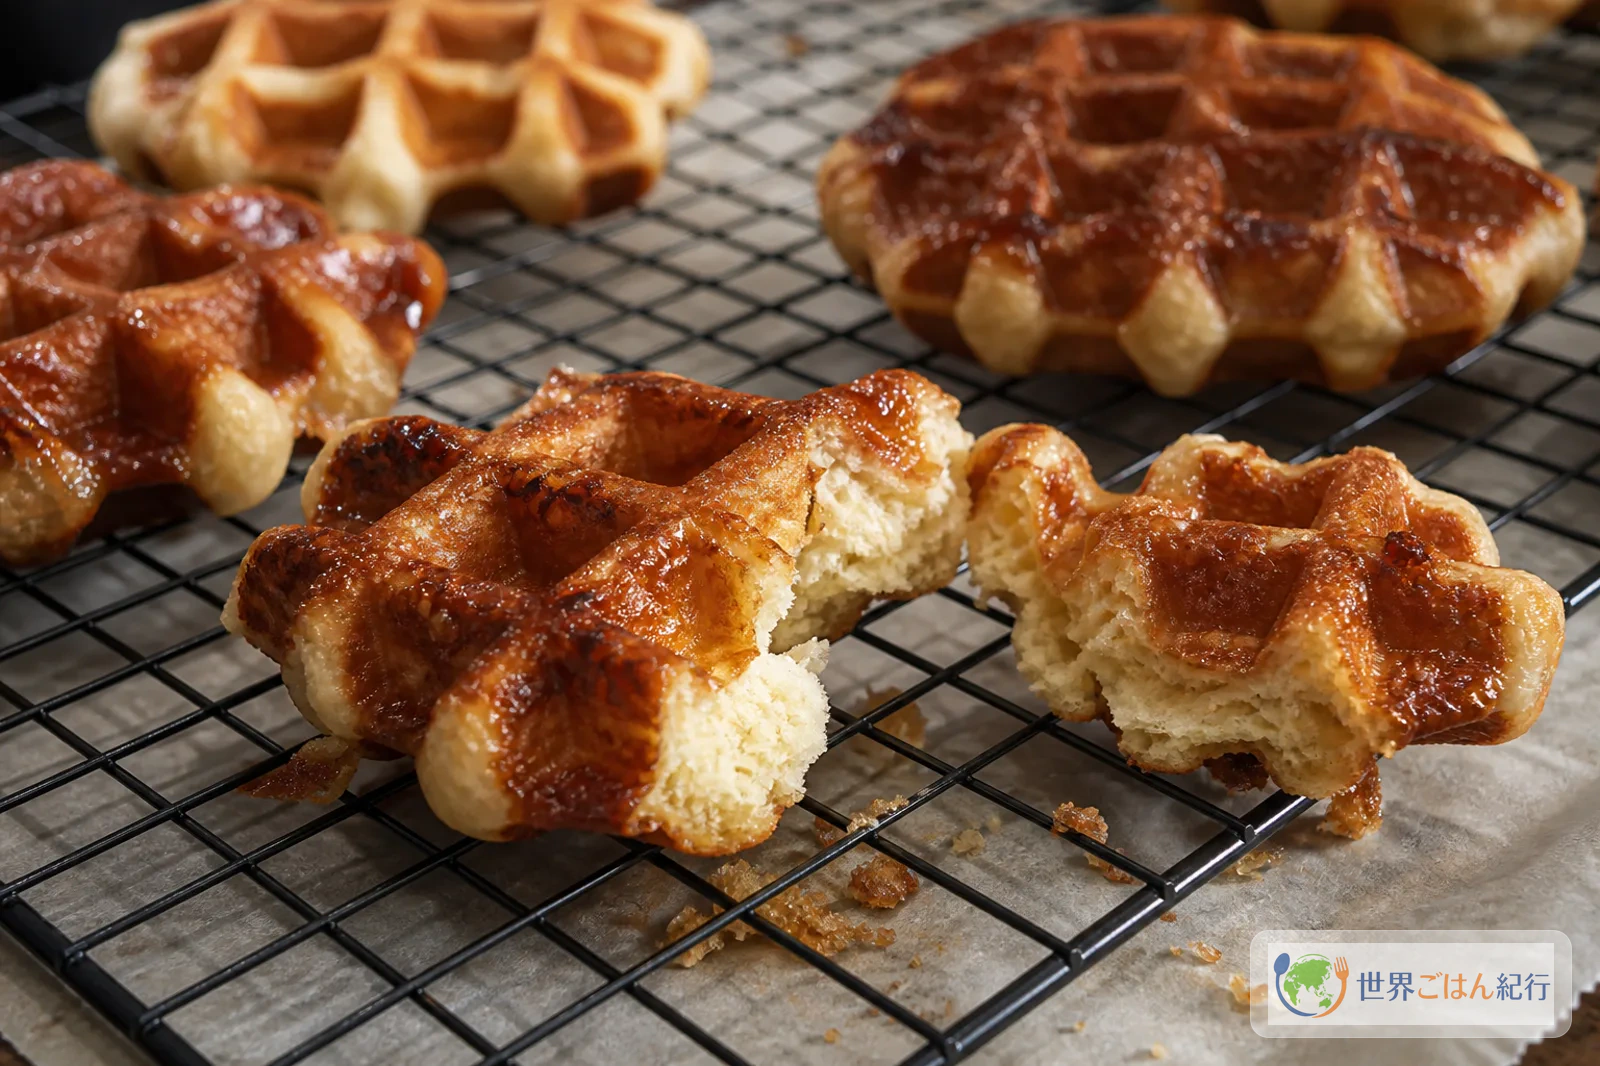
More than a sweet smell: Belgium's two waffles
The moment you open the waffle iron, butter and sugar hit the hot plate and the kitchen fills with the smell of caramel. Hear "Belgian waffle" and you may picture a round, sweet baked treat, but in Belgium the same words cover more ground. The Liège and Brussels waffles differ in shape, in dough and in the way they are eaten.
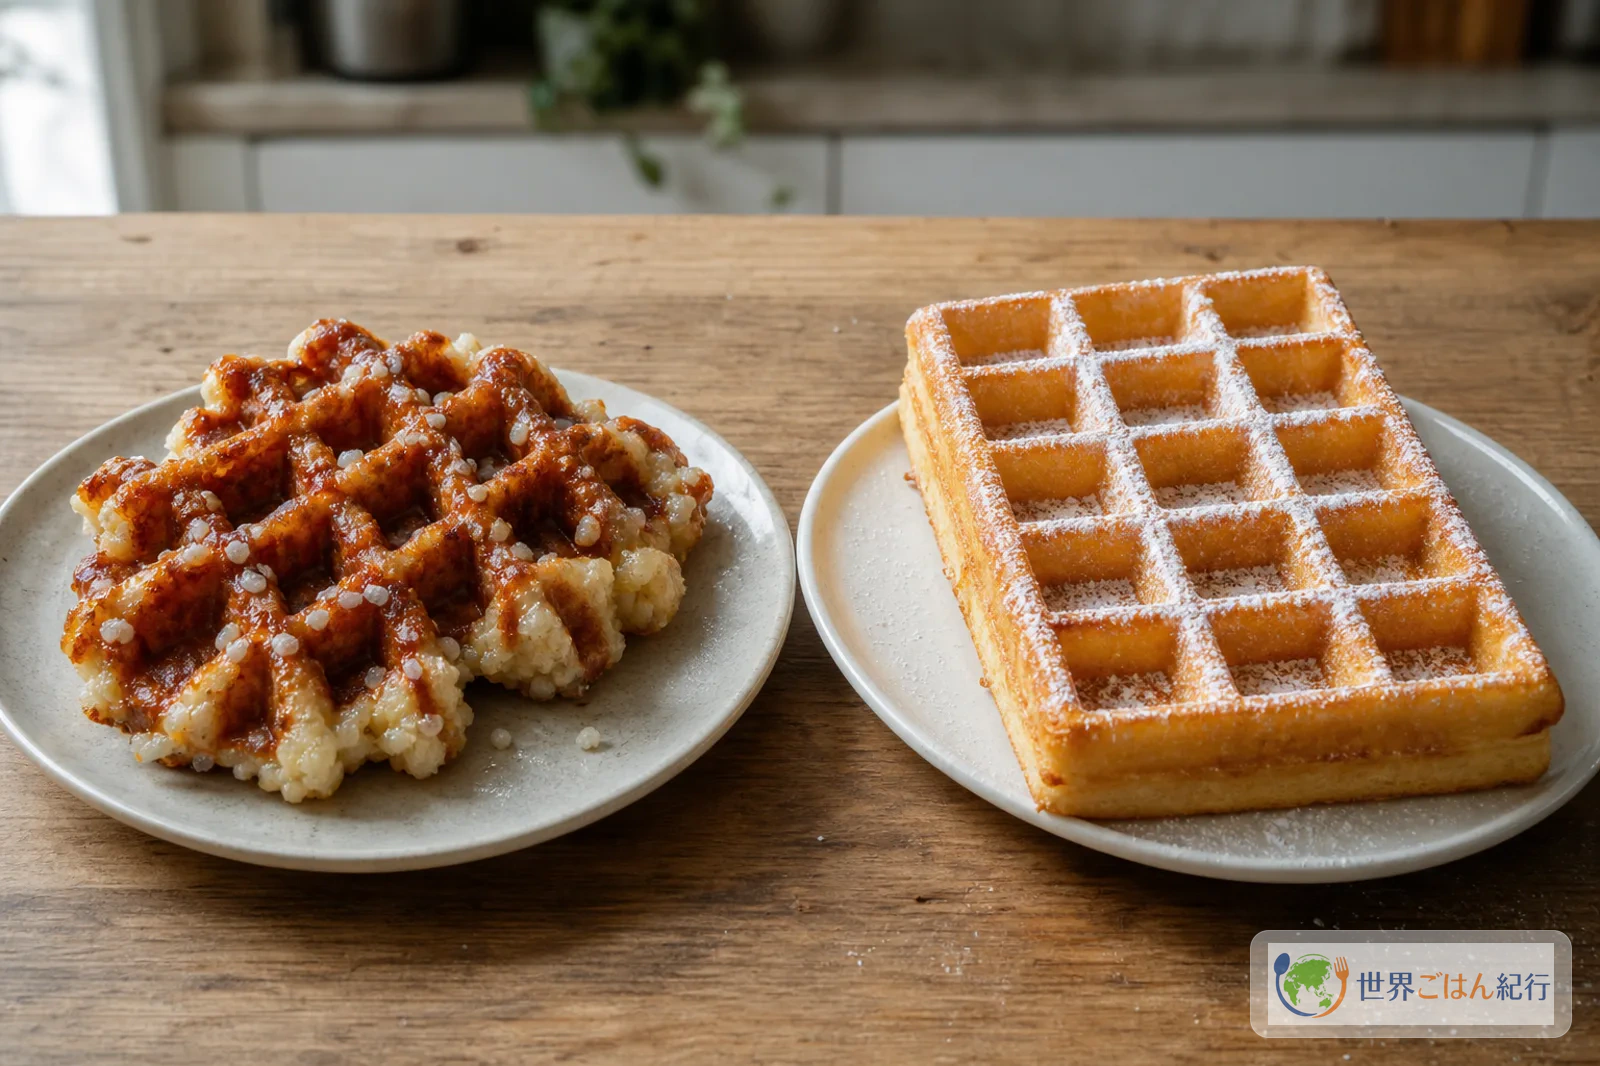
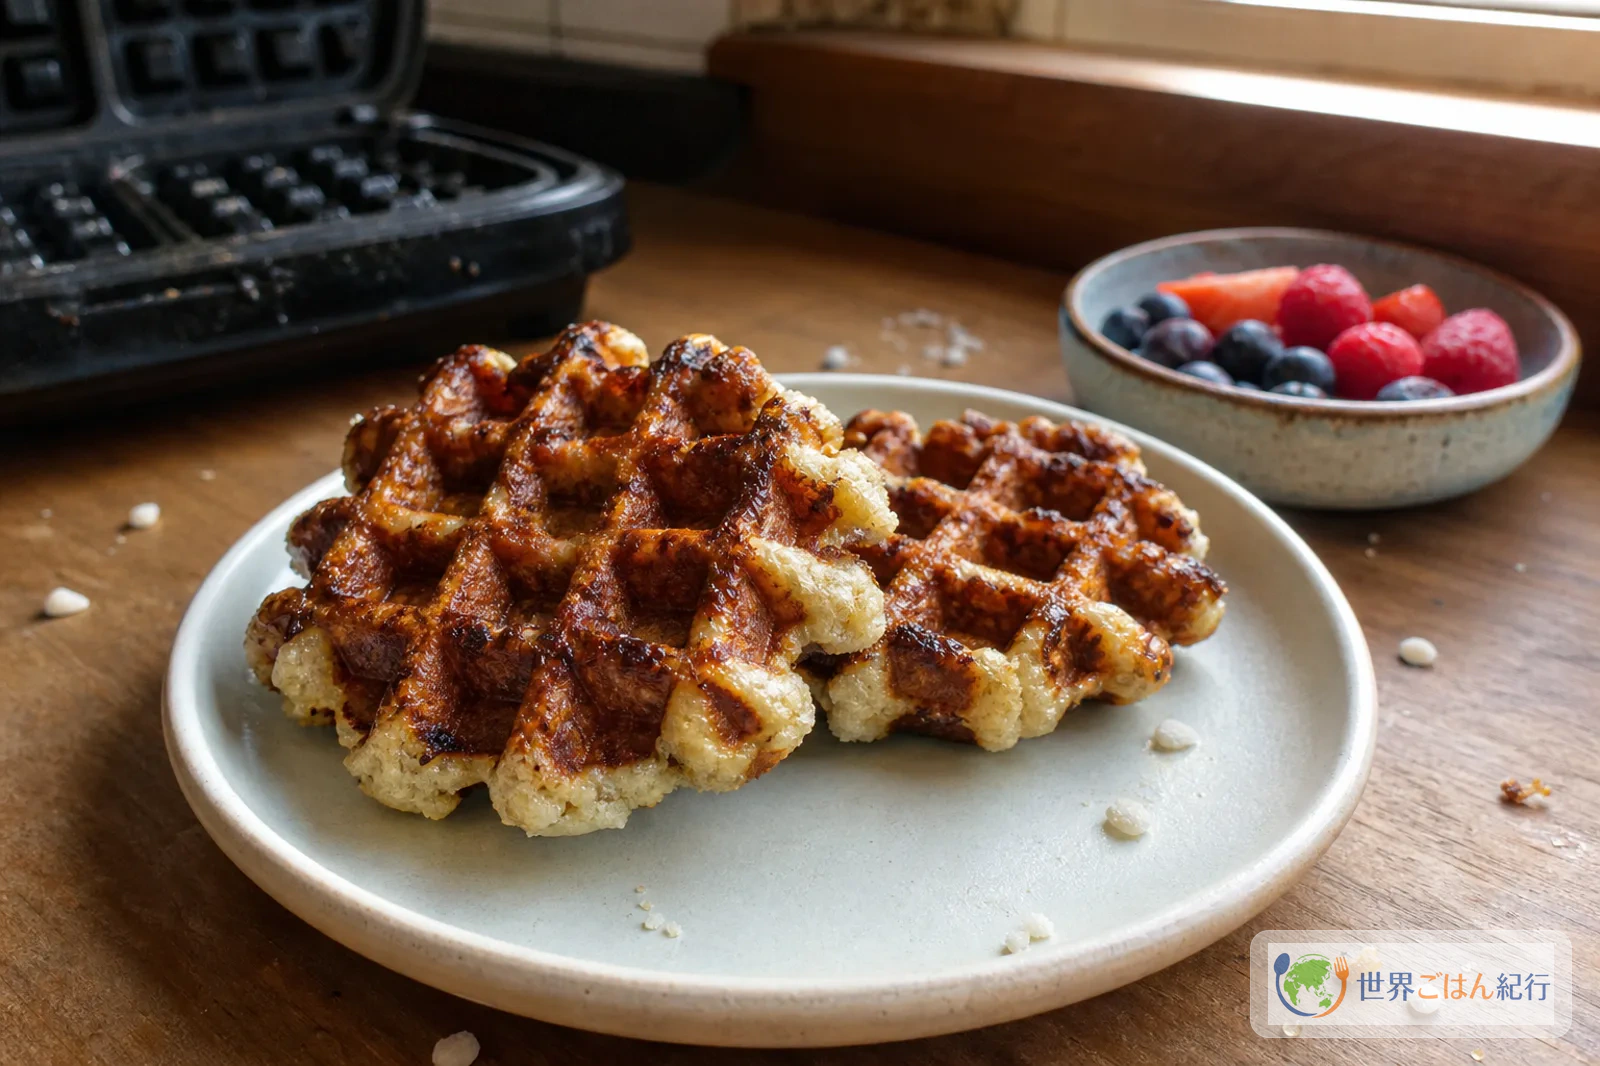
The Liège waffle, gaufre de Liège in French, is made from a yeasted dough close to brioche, with pearl sugar folded in before baking. Its shape is round and irregular, and the sugar grains melt on the iron into hard amber patches on the surface. The Brussels waffle, gaufre de Bruxelles, is large and rectangular, with deep grids, a light interior and a crisp outside.
This article makes the Liège style the main recipe, since it is easier to reproduce at home and is the one most often confused in searches. The mix for a more Brussels-style waffle comes later. The points to get right are how far to stay true to the pearl sugar, what temperature to heat the waffle iron to, and how to avoid scorching the sugar by baking too long.
If carbonnade flamande and waterzooi (in Japanese) are Belgium's food for the table, the Belgian waffle is its food for strolling. Think of it less as an after-dinner sweet and more as something wrapped in paper at a station or market, whose aroma stops people in their tracks, and the key points of the method become clear.
Regional differences between Liège and Brussels
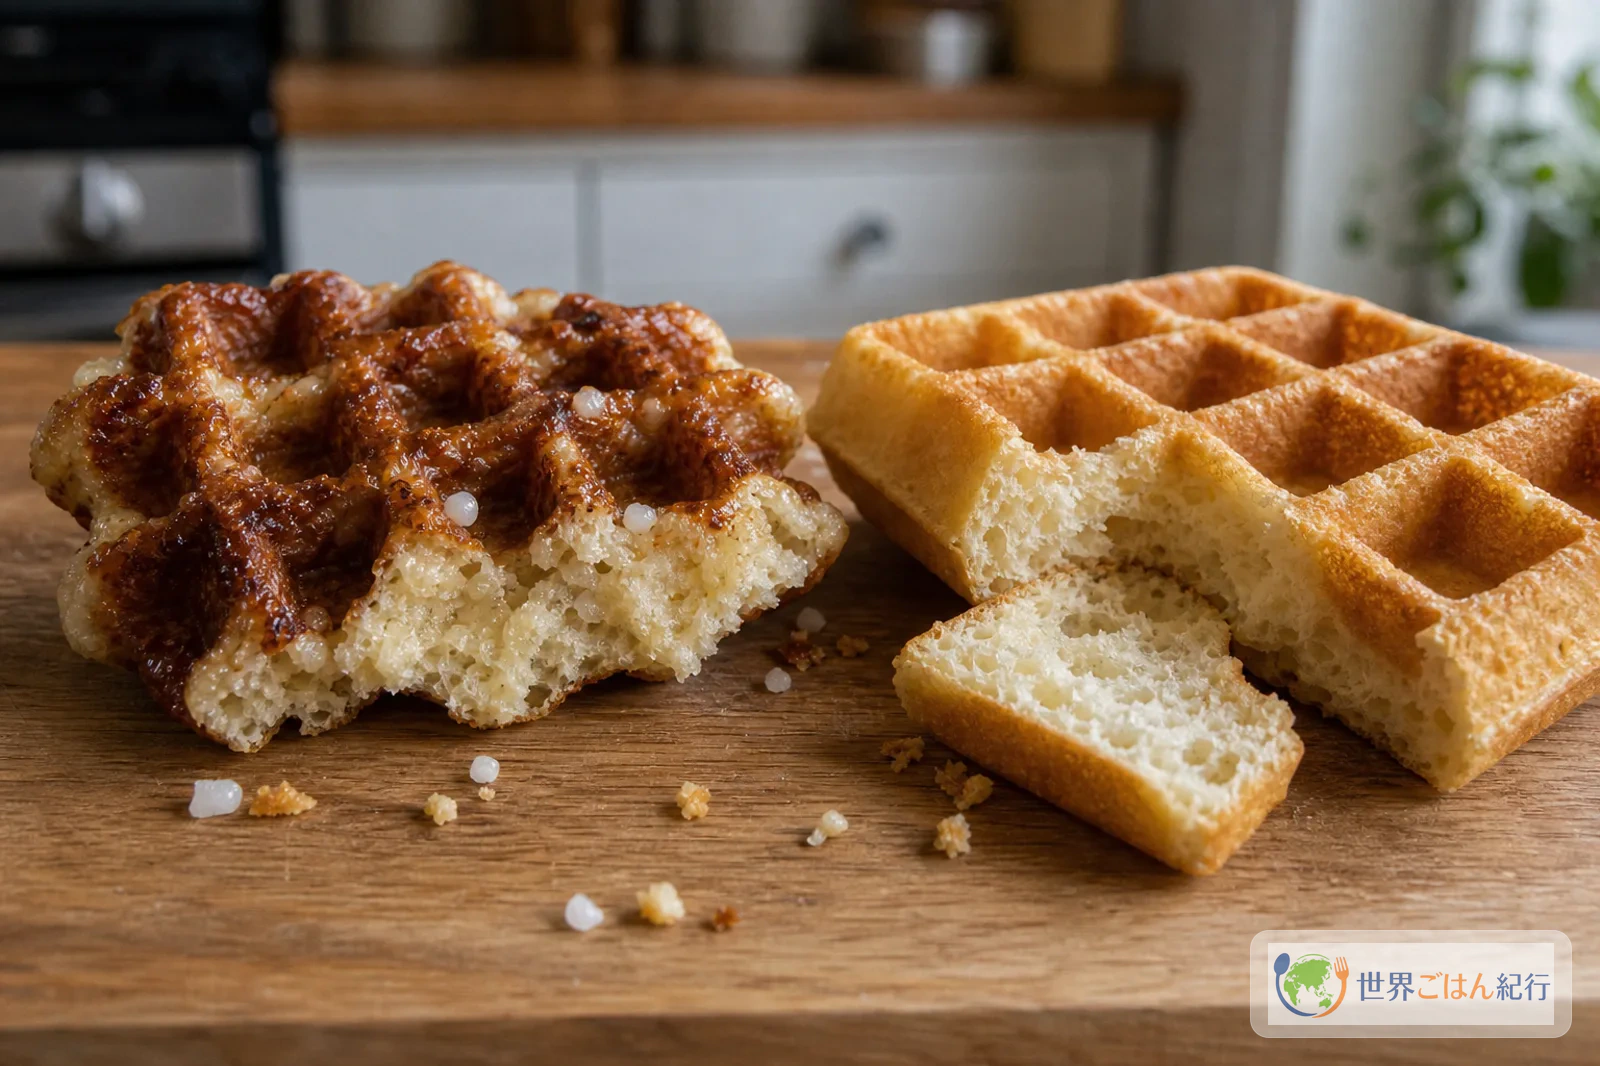
Focus on Belgium, a site backed by the Belgian federal government, also describes the Liège waffle as small with rounded edges and the Brussels waffle as large and rectangular. In Ampi's breakdown, the Liège waffle is baked from a stiffer dough with pearl sugar worked in, and the Brussels waffle from a liquid batter baked light. What gets lumped together as "Belgian waffle" abroad is treated as two separate things locally.
| What to look at | Liège style | Brussels style |
|---|---|---|
| Local name | gaufre de Liège | gaufre de Bruxelles |
| Dough | Stiff, yeasted dough | Light, liquid batter |
| Sugar | Pearl sugar mixed into the dough | Powdered sugar or toppings added on top |
| Shape | Smaller, round edges, irregular | Larger, rectangular, deep grids |
| How it is eaten | As is, warm or cooled | Warm, with powdered sugar, fruit, cream and so on |
| Hard part at home | Scorched sugar, fermentation, dough stiffness | Lightness, pouring into the iron, sogginess once cool |
This regional difference shows up in the design of the dough itself before it shows up in what goes on top. In Liège, a yeasted dough that holds sweet grains becomes a snack you can hold in your hand; in Brussels, a light, airy batter is baked large and leaves room to take powdered sugar and fruit. The names are not interchangeable labels for one thing, so pouring one dough into the other's iron will not give you the other's texture.
At home, the Liège style puts less pressure on you to eat it fresh, and it keeps its flavor when cool. The Brussels style, on the other hand, owes its charm to the lightness right out of the iron, so you need to bake the whole batch in a row and have the table ready to serve at once.
Why we do not simply scale down the local recipe
The "Authentique Gaufre de Liège" recipe presented by the Liège tourist office is a very rich dough, with 500 g butter and 600 g pearl sugar to 1 kg flour. Ampi's home recipe also uses 400 g butter per 1 kg flour with the pearl sugar added at the end, and assumes a stiff yeasted dough baked in a thick, near-professional iron.
Scale that straight down to 8 waffles and you get about 180 g pearl sugar for 300 g flour. In a thick Belgian iron it caramelizes boldly, but in a home waffle iron the sugar left in the grooves scorches first, and the second and later waffles tend to turn bitter. So this article holds the pearl sugar to 110 g and the butter to 120 g, aiming to keep the sugar spots while keeping the baking surface from going too dark.
| How to read the mix | Rich local Liège style | This article, adapted for home |
|---|---|---|
| Butter relative to flour | About 40–50% of the flour | 120 g to 300 g flour, which is 40% |
| Pearl sugar relative to flour | Some mixes go up to about 60% of the flour | 110 g to 300 g flour, about 37% |
| Dough per waffle | 90–140 g depending on the iron | About 80 g, easy to handle at home |
| How to bake | Lower for a thick iron, higher for a shallow one | Test bake at 180–200°C and lower if too dark |
What matters is not cutting the sugar too much. Dissolving granulated sugar into the dough alone will not give the Liège style's "hard caramel in places." On the other hand, putting the local amount of sugar into a shallow home iron lets scorching win over texture. Bake the first time with the 110 g in this article; if your iron is deep and the heat steady, go up to 120 g next time, and if it is shallow, go back to 100 g. This adjustment is the most reproducible in a home kitchen.
Ingredients (serves 4, makes 8 waffles)
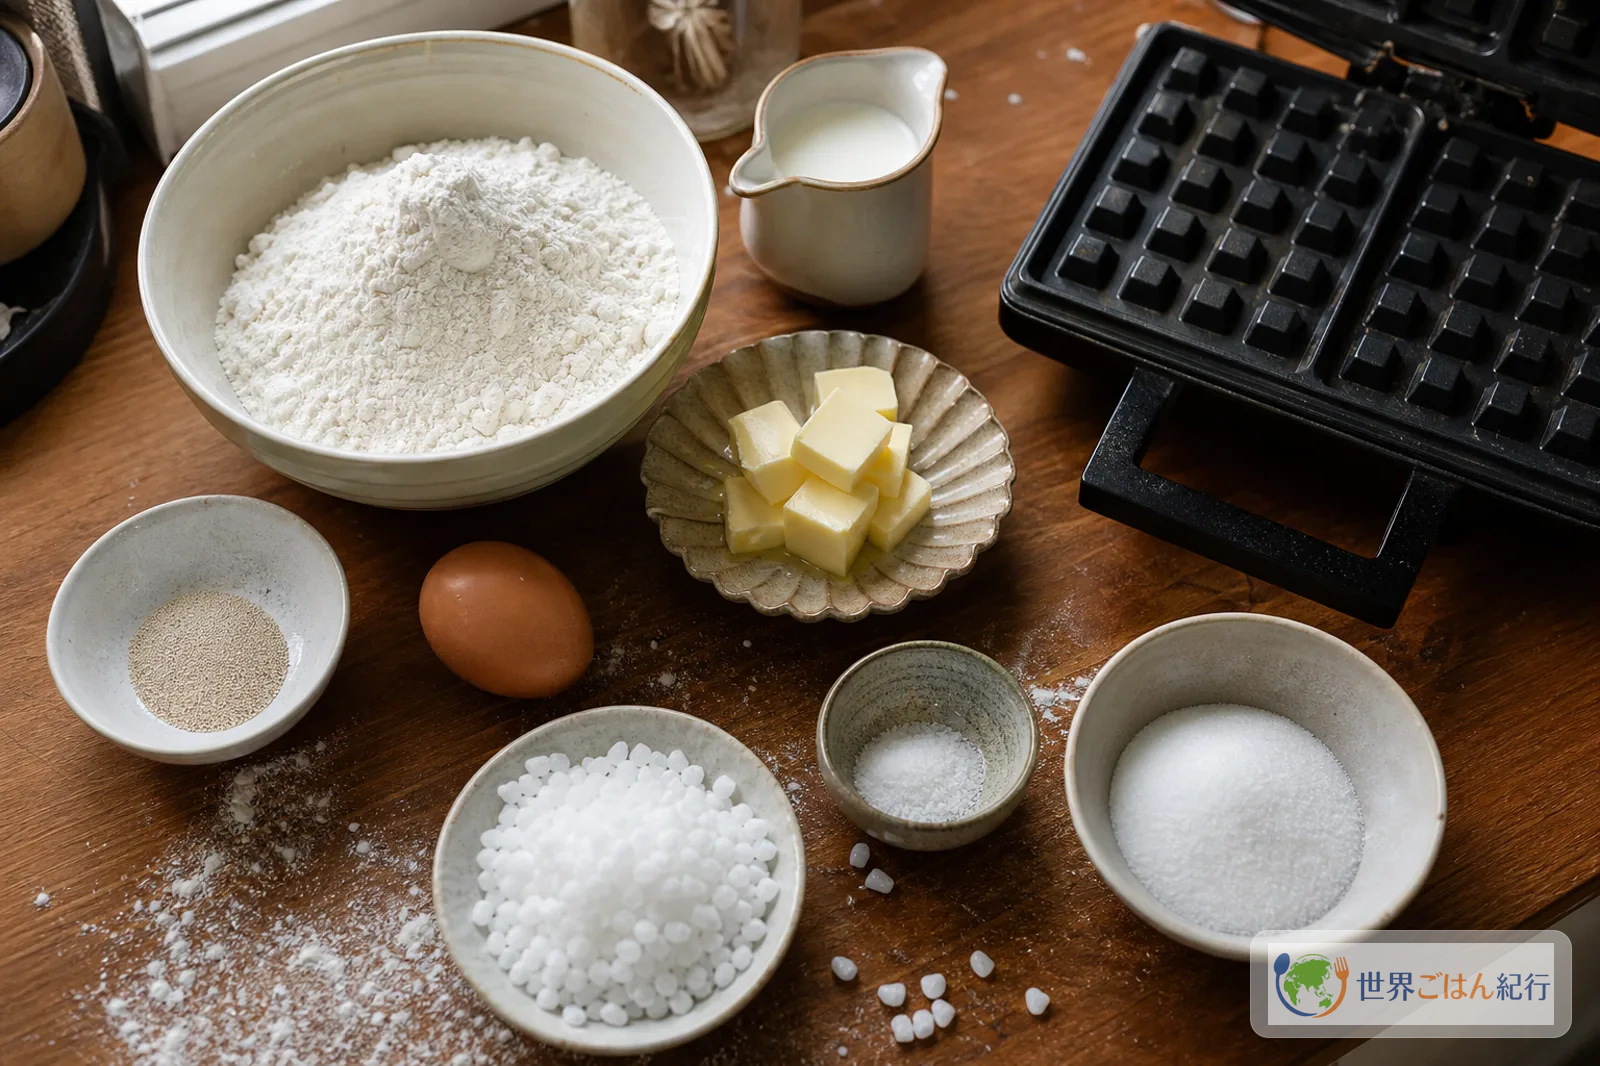
The main recipe is the Liège style. Home waffle irons have less heat than professional ones, so the butter and pearl sugar are slightly reduced from the local recipe, to cook the waffle through before the baking surface scorches.
This uses wheat, egg and milk. Melted sugar left on the waffle iron is extremely hot and will burn bare skin. After baking, switch it off, and wipe it with a damp cloth once it has cooled somewhat.
Ingredients that cause hesitation when shopping
Pearl sugar defines the outline of this dish. You can still make it without, but with granulated sugar alone the whole dough is evenly sweet and you lose the Liège feel of "crisp and sweet only where you bite." At baking supply stores, look under pearl sugar, waffle sugar or nib sugar.
For the waffle iron, choose one with deep grids and, if possible, temperature control. The grids of a thin sandwich press squash the dough and the center will not rise. An electric one that bakes at a medium-high 180–200°C is good, and for a stovetop iron, a thick one that can hold about 2 1/2 minutes per side over medium-low heat is easier to use.
Ordinary butter, eggs and milk from the supermarket are enough. Spending on premium versions here matters less than putting the budget into the pearl sugar and the depth of the iron, which move the result closer to the local one.
Shopping priorities: look at the sugar first, then the iron
By the ingredient count Belgian waffles look familiar, but a wrong purchase pushes the result toward an ordinary pancake in an instant. If you spend money the first time, spend it not on flour or dairy but on the sugar grains and the iron. If you get those right, domestic bread flour, ordinary eggs and supermarket unsalted butter make a perfectly good waffle.
If you plan to bake the Liège style several times, a 250 g to 1 kg baking pack is safer than a 100 g bag. This recipe uses 110 g at a time, so a small bag can run out between a test bake and the real thing. For the iron, choose a deep plate if you also want the light Brussels batter, and if it is only Liège, put ease of cleaning first. Cleaning the grooves after the pearl sugar has melted is more of a chore than you would imagine, so look for removable plates or a structure that lets you get a cloth into the grooves.
Below are the ingredients and tools that are hard to find at a neighborhood supermarket and that make the most difference in the result. Eggs, milk, butter and cake flour are fine from your usual shopping, so they get no extra priority. Think of pearl sugar as the sugar you bake in, and the waffle iron as the tool that creates the thickness, and the reasons to buy become clear.
For just the first batch, it is fine to try one bag of waffle sugar or nib sugar and a sandwich press you already own. If you find you want to bake it again, choosing a deep-plate waffle iron next is the order least likely to go wrong. Experiencing the caramel spots from the sugar first and then choosing the iron is less likely to leave an unused appliance in your kitchen than buying the equipment first.
| Priority | What to look for | What to check | If you compromise |
|---|---|---|---|
| High | Pearl sugar, waffle sugar, nib sugar | Large grains that do not melt away completely when baked, made for baking. The Liège style uses 110 g, so a 250 g bag is about two batches | Reduce coarse sugar crystals to 90 g. With granulated sugar only, the texture is a different thing |
| High | A waffle iron with deep grids | Grids deep enough not to squash the dough, heat for 180–200°C, plates that are easy to wipe of sugar | In a shallow sandwich press, make each waffle smaller at 60 g and bake briefly at about medium-low |
| Medium | Temperature or browning control | Pearl sugar scorches quickly once it starts, so a model that lets you drop the browning one step is easier | With a timer-only model, open it for the last minute to check the color |
| Low | Premium butter, special milk | Better aroma, but not the star that makes the Liège style | Ordinary unsalted butter and milk are fine |
Words to look for on product pages
The differences among pearl sugar, waffle sugar and nib sugar are what cause hesitation while shopping. All can be used as grain sugar to bake in, but avoid any that is crumbled to powder in the bag. With a lot of powder, the sweetness spreads through the whole dough as soon as it is mixed in, and it scorches early in the grooves of the iron.
| Term to look for | What to check | What to avoid |
|---|---|---|
| Pearl sugar | Whether white pebble-like grains remain. Whether it is labeled for baking, baking in or waffles | Powdered sugar, fine granulated sugar, icing sugar |
| Waffle sugar | Whether the product description mentions "Liège," "waffle" or "baked in" | Sugar meant only as a fine topping |
| Nib sugar | Whether the grains are angular and there is not too much powder at the bottom of the bag | Extremely large grains that scorch easily in a shallow iron |
| Waffle iron | Deep grids, browning control, plates that are easy to clean | Thin sandwich-only presses, or ones with no temperature control and strong heat |
If you pick only one sugar, look at the condition of the grains rather than the product name. One that leaves a few grains after baking and gives a crisp, sweet spot only where you bite is suitable. A bag whose photo shows grains fine as powder snow is closer to the powdered sugar you sprinkle on a Brussels waffle and does not suit mixing into Liège dough. When baking in a shallow home iron, grains that are too large also scorch easily, so the first time do not put in the full 110 g; bake with 100 g, look at the color, and increase next time to be safe.
If you use coarse sugar crystals, the grains are sharp and tend to stay on the tongue, so reduce the amount to 90 g and keep them from collecting at the surface of the dough. Adding sweetness with granulated sugar alone moves the whole waffle toward an evenly sweet bread. To get the Liège-style "hard caramel in places" you buy at a station, a small amount of a grain sugar that survives baking is more effective than more ordinary sugar.
For the waffle iron, deeper is not automatically better. A model with removable plates is easy to clean, but a very light model tends to lose temperature the moment dough goes onto the preheated plate. The Liège style is a butter-rich yeasted dough, so it cooks more slowly than thin pancake batter. A model that lets you adjust browning to low, medium or high, and not only a preheat light, makes it easier to stop the sugar from scorching.
For the Liège style alone, a deep home electric model is enough. If you also make the Brussels style often, a rotating iron that spreads the batter to all four corners, or a model that holds a higher temperature, suits better. But the closer you get to large professional equipment, the more the storage space, the weight and the cleaning of the plates become a daily burden. For a monthly treat, you will use it longer if you put three things first: deep grids, ease of wiping and a way to tell when preheating is done.
If you test the dough in a sandwich press you already own before buying a new iron, treat the first time as checking the flavor. With the full 80 g the center gets squashed, so divide into 60 g pieces and bake 2 to 2 1/2 minutes per side. Scorched sugar passes bitterness to the next dough, so rather than switching it off after each waffle, hold a wrung-out damp cloth with chopsticks and quickly wipe just the sugar from the grooves.
If you are unsure what to buy first, start with waffle sugar and then a deep waffle iron. Waffle sugar makes a difference in texture even in an existing sandwich press, but a shallow iron cannot be made deep. Conversely, even with a deep iron, baking with granulated sugar alone will not give the hard caramel spots of the Liège style. When both sugar and iron are in place, you come closest to the aroma of the one you buy at the station.
For a shopping list, check pearl sugar, waffle sugar and nib sugar on the same shelf at a baking supply store, and in the appliance section check three things: the depth of the waffle plate, temperature or browning control, and whether the plates come off for washing. Flour, eggs, milk and butter are fine from your usual supermarket. Putting the budget into the sugar grains and the depth of the iron, rather than special dairy, brings you closer to the Liège texture.
Small tools make temperature steady
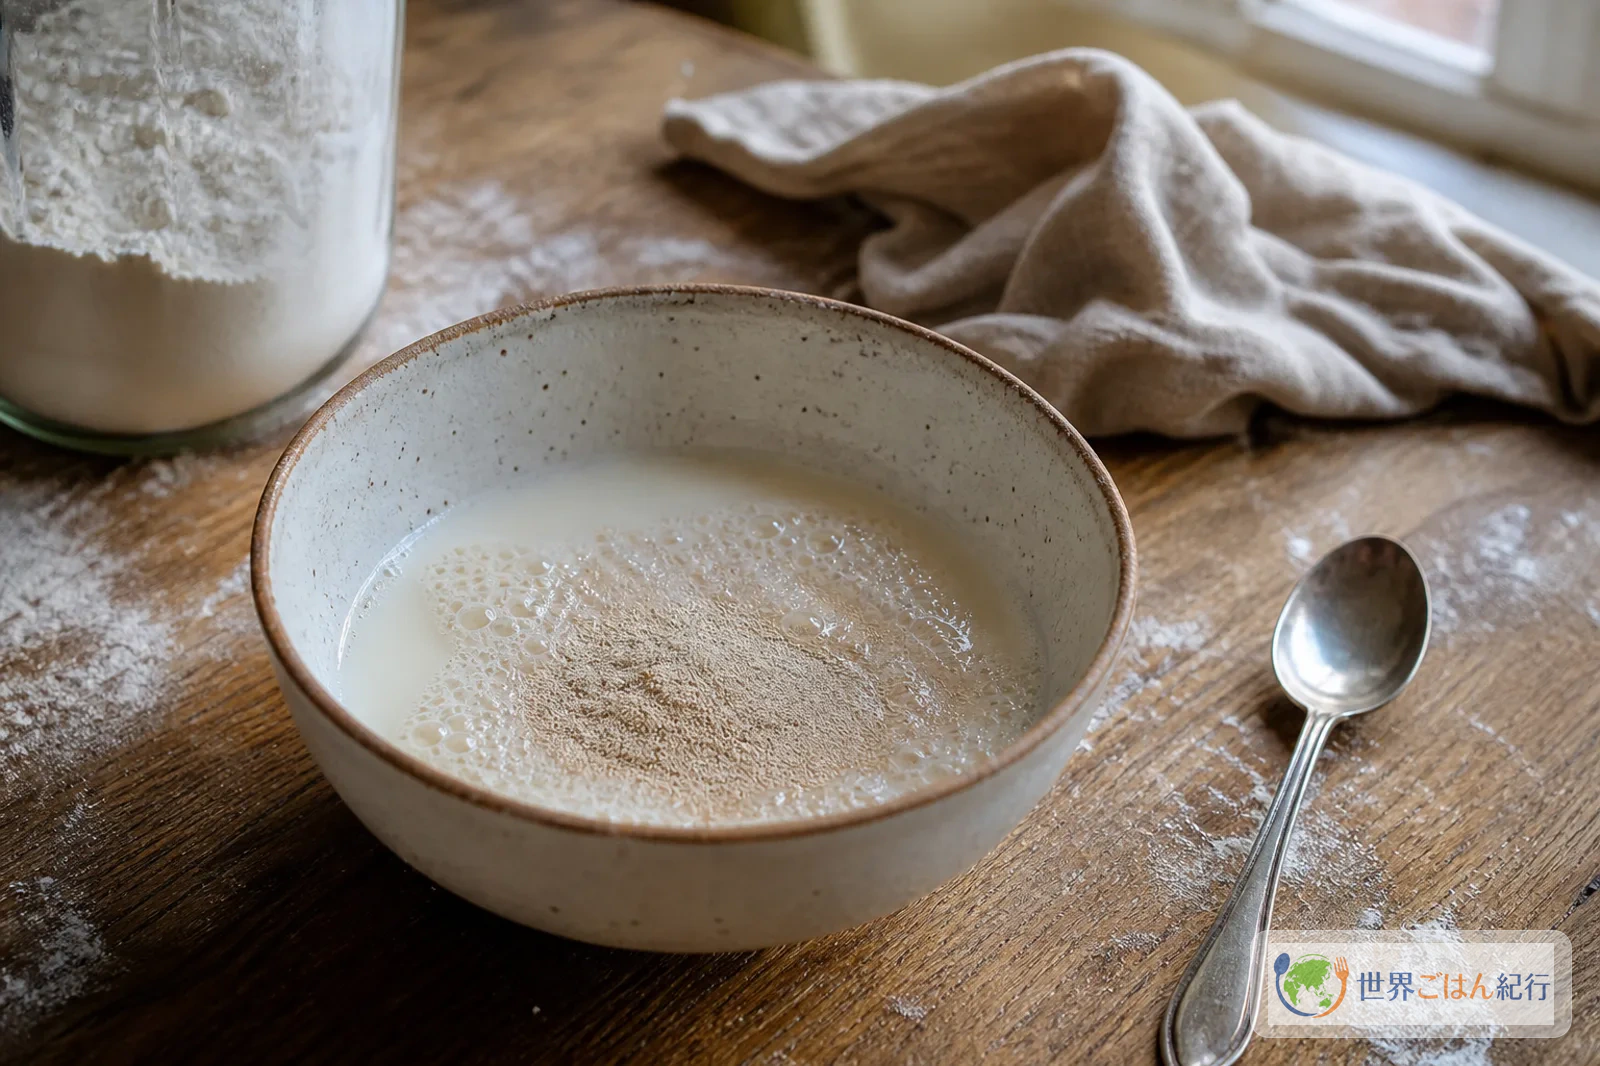
The Liège style uses 35–38°C milk to wake the yeast, ferments at 26–28°C, and bakes on a plate at 180–200°C. The numbers look fussy, but real failures happen when you drift out of these ranges. If the milk is too hot, the yeast weakens; if the proofing place is too warm, the butter seeps out; if the baking surface is too hot, only the pearl sugar goes black first.
A thermometer is not essential. But because this dish sits between a yeasted dough and a baked sweet, a slim digital thermometer that works for both bread and pastry cuts the first-time anxiety quite a bit. Especially in a winter kitchen, or if you warm milk in the microwave, it makes judgment steadier than finger feel alone.
A tool that can read both the milk temperature and the dough's proofing temperature in one go makes it easier to sort out the cause of failure before you buy more sugar or a new iron.
If buying for the first time, one slim type that makes milk or dough temperature easy to read is enough. If you already own a thermometer, there is no need to buy another.
If you have no thermometer, just make sure not to overheat the milk. After 20 seconds in a 600 W microwave, stir once, and if it is hot, always let it cool before adding the yeast. For proofing, set the bowl where the bottom does not feel cold to the touch, and keep it within a range where the butter does not seep to the surface. Treat the first waffle as a test bake, and if it gets too dark at 3 1/2 minutes, lower the temperature from the next one.
Change the bake time by iron
The same dough bakes quite differently depending on the depth of the iron. The Liège style is not a dish you pour as liquid; it is a dish where a fermented mass is pressed and baked between hot grids. A deep iron keeps swelling at the center; a shallow one flattens quickly. It is less error-prone to look at "color, thickness and how the sugar remains" on the first waffle and change the dough amount and temperature from the second.
| Iron | Dough amount | Heat and temperature | Bake time | Sugar adjustment |
|---|---|---|---|---|
| Deep electric waffle iron | 78–82 g | 180–200°C. Start the browning control at medium | 3–4 min | Keep the pearl sugar at 110 g |
| Shallow sandwich press | 58–62 g | About medium-low. Do not push it to high | 2 1/2–3 min | 100 g the first time. 90 g if it scorches easily |
| Stovetop waffle iron | 65–75 g | Medium-low on the burner. Check the color one side at a time | 2 min on the first side, then 2–2 1/2 min after flipping | Start at 100 g and adjust from the second waffle |
| Large rectangular iron meant for Brussels style | About 70 g for the Liège dough | Around 190°C. Do not force it into the corners | 3–3 1/2 min | 110 g tends to stay in the grooves, so use 100 g |
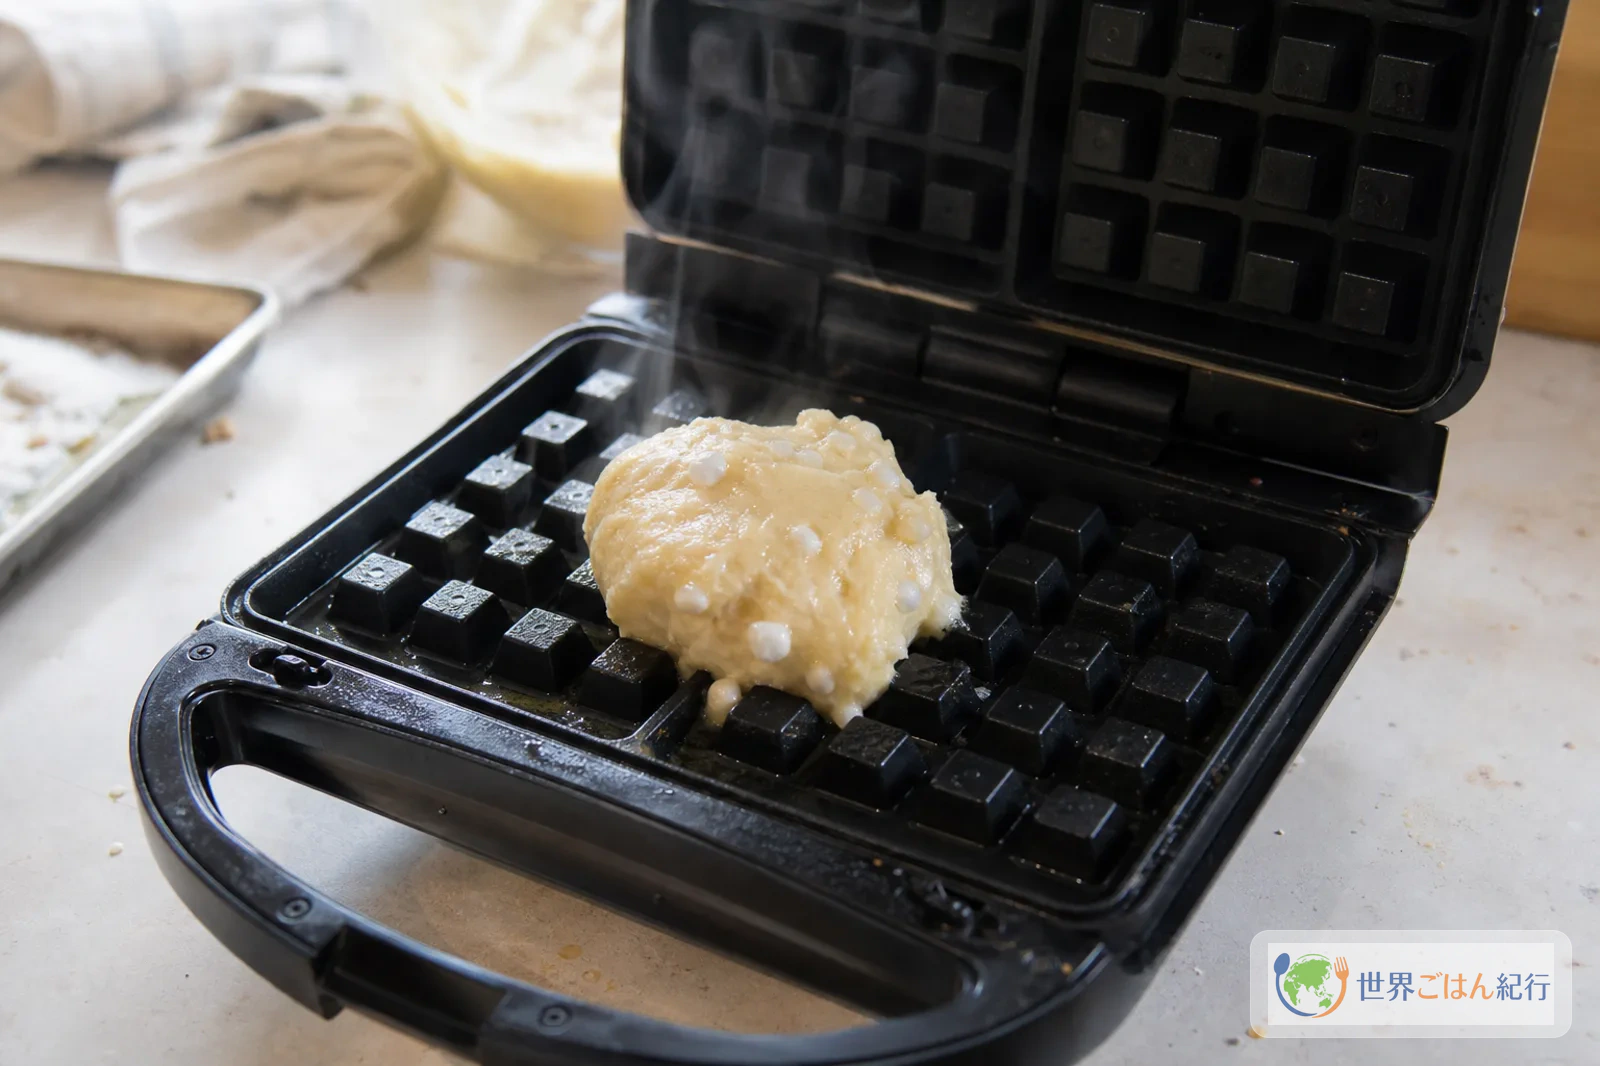
Closing 80 g of dough in a shallow iron pushes the sugar grains to the surface the moment you shut the lid, and they scorch easily on the bottom of the plate. Making the dough smaller looks a little skimpy, but it makes an underbaked center less likely and holds down the bitterness of the caramel. With a deep iron, the opposite holds: if the dough is too small, the peaks of the grid do not form. Placing about 78 g in the center and letting the weight of the lid spread it slowly is easy to manage.
A stovetop iron lets you create the color yourself, but the heat tends to hit one spot. Open it after 2 minutes on the first side, flip it for 2 minutes if it is a light golden brown, and lower the heat one notch if it is dark brown. If you keep strong heat on the melted pearl sugar, you get a result that is black outside and heavy only in the center. Right after buying an iron, a shortcut is to treat the first waffle as a note on the heat rather than aiming for one beautiful waffle.
Decide the baking-day schedule first
A Belgian waffle is a dish where you wait longer than you bake. What flusters you in the kitchen is searching for the waffle iron after fermentation is done, or starting to prepare the table after the sugar is folded in. On baking day, work backward from when you will eat before you mix the flour, and you will not miss the best aroma.
| Timing | What to do | Guide for judging |
|---|---|---|
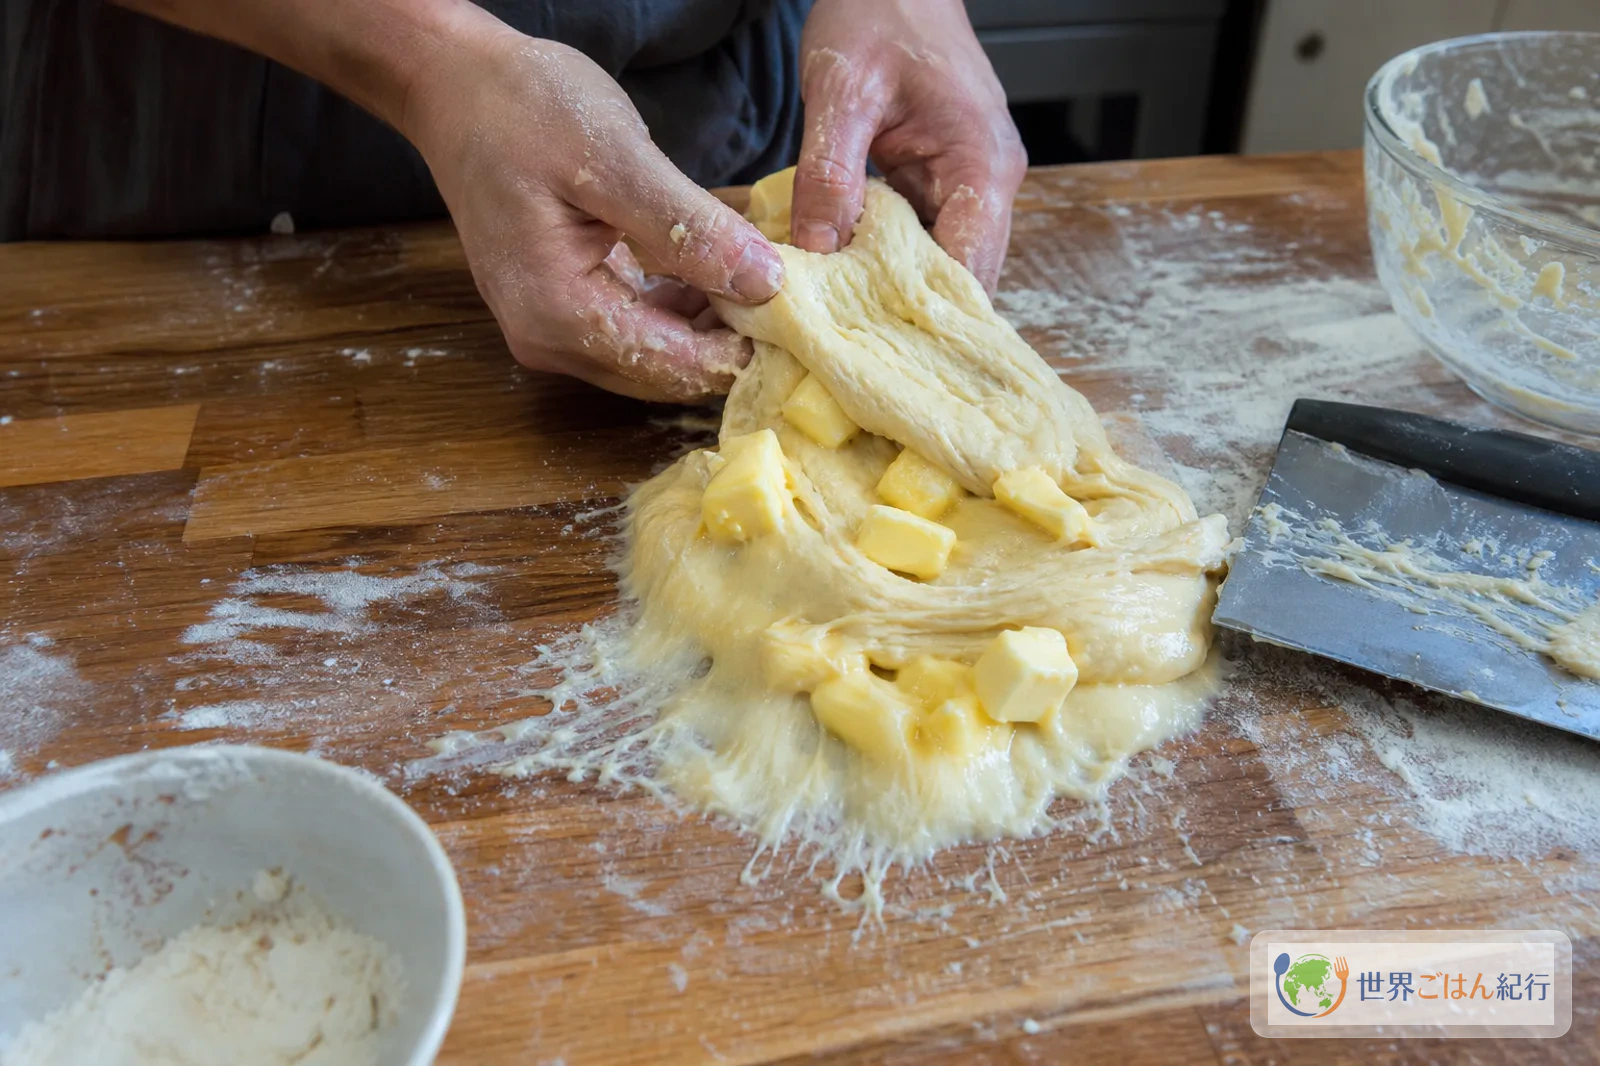
| The night before or before starting | Weigh the flour, sugar and salt and cut the butter into 1.5 cm cubes | Do not take the butter out of the fridge too early; soften it on the day until it yields to a finger |
| 2 hours before eating | Warm the milk, wake the yeast and knead the dough | Milk at 35–38°C. If hot, cool it before use |
| 1 hour before eating | Watch the first rise and get out the waffle iron | The dough at 1.7 to 2 times its size. Have a cloth ready to wipe the iron |
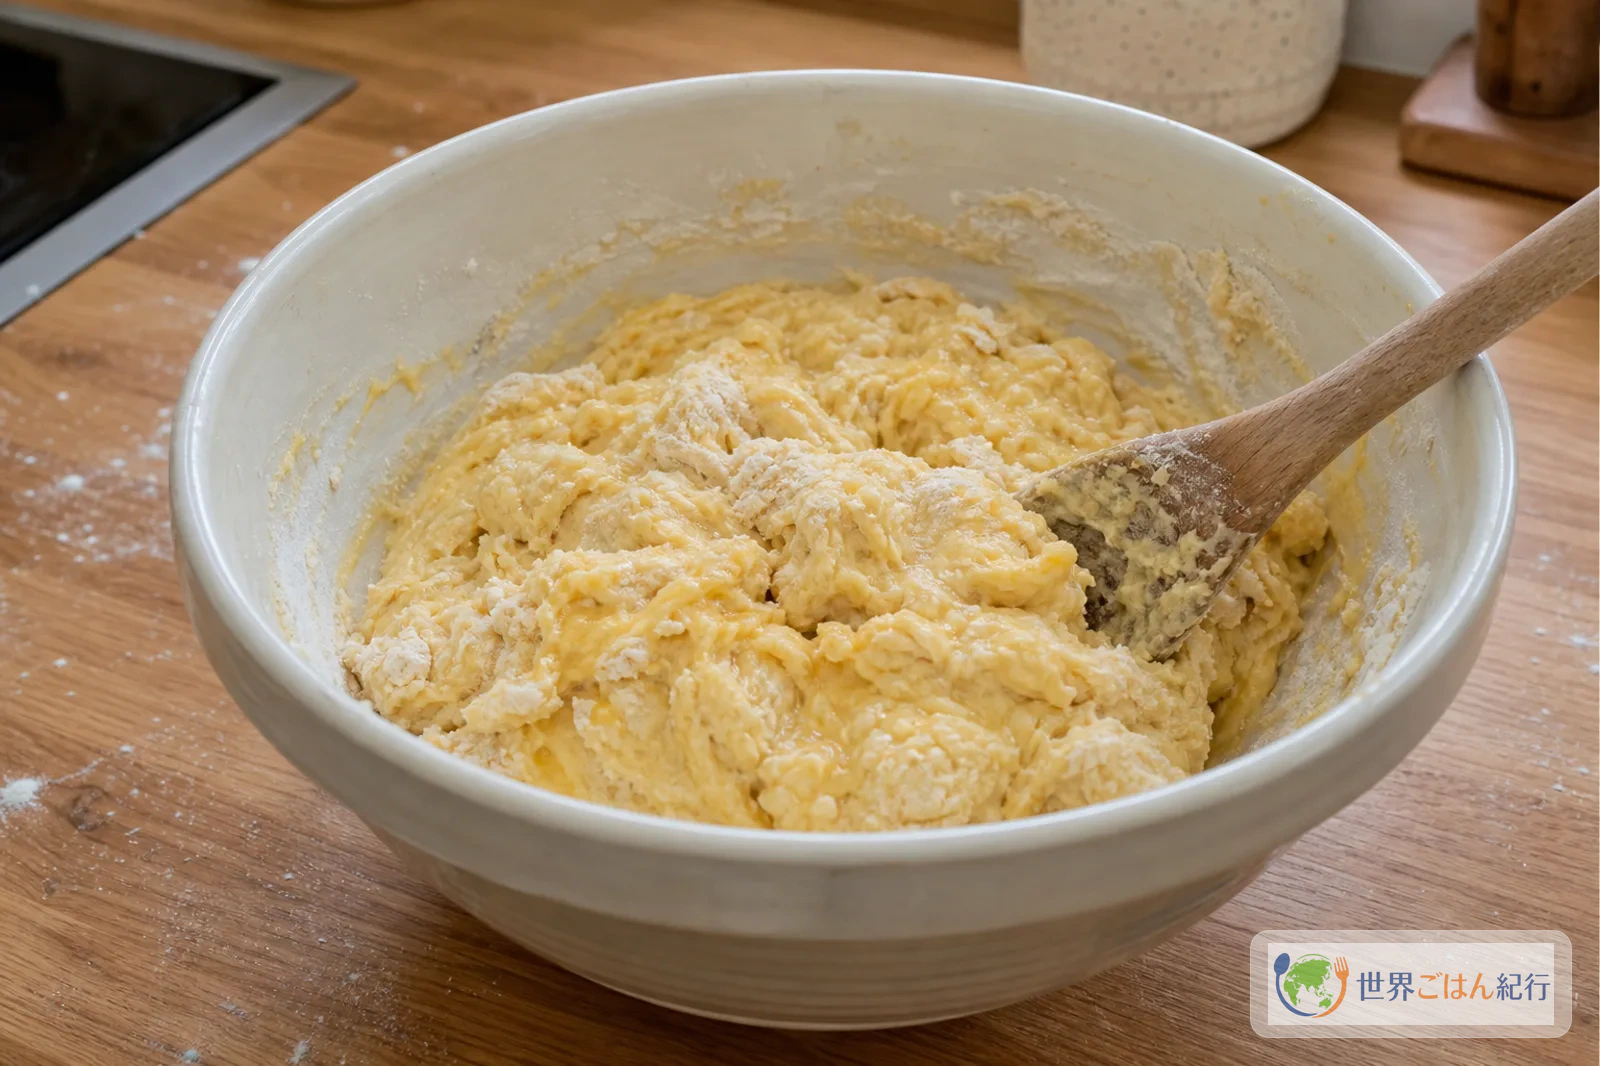
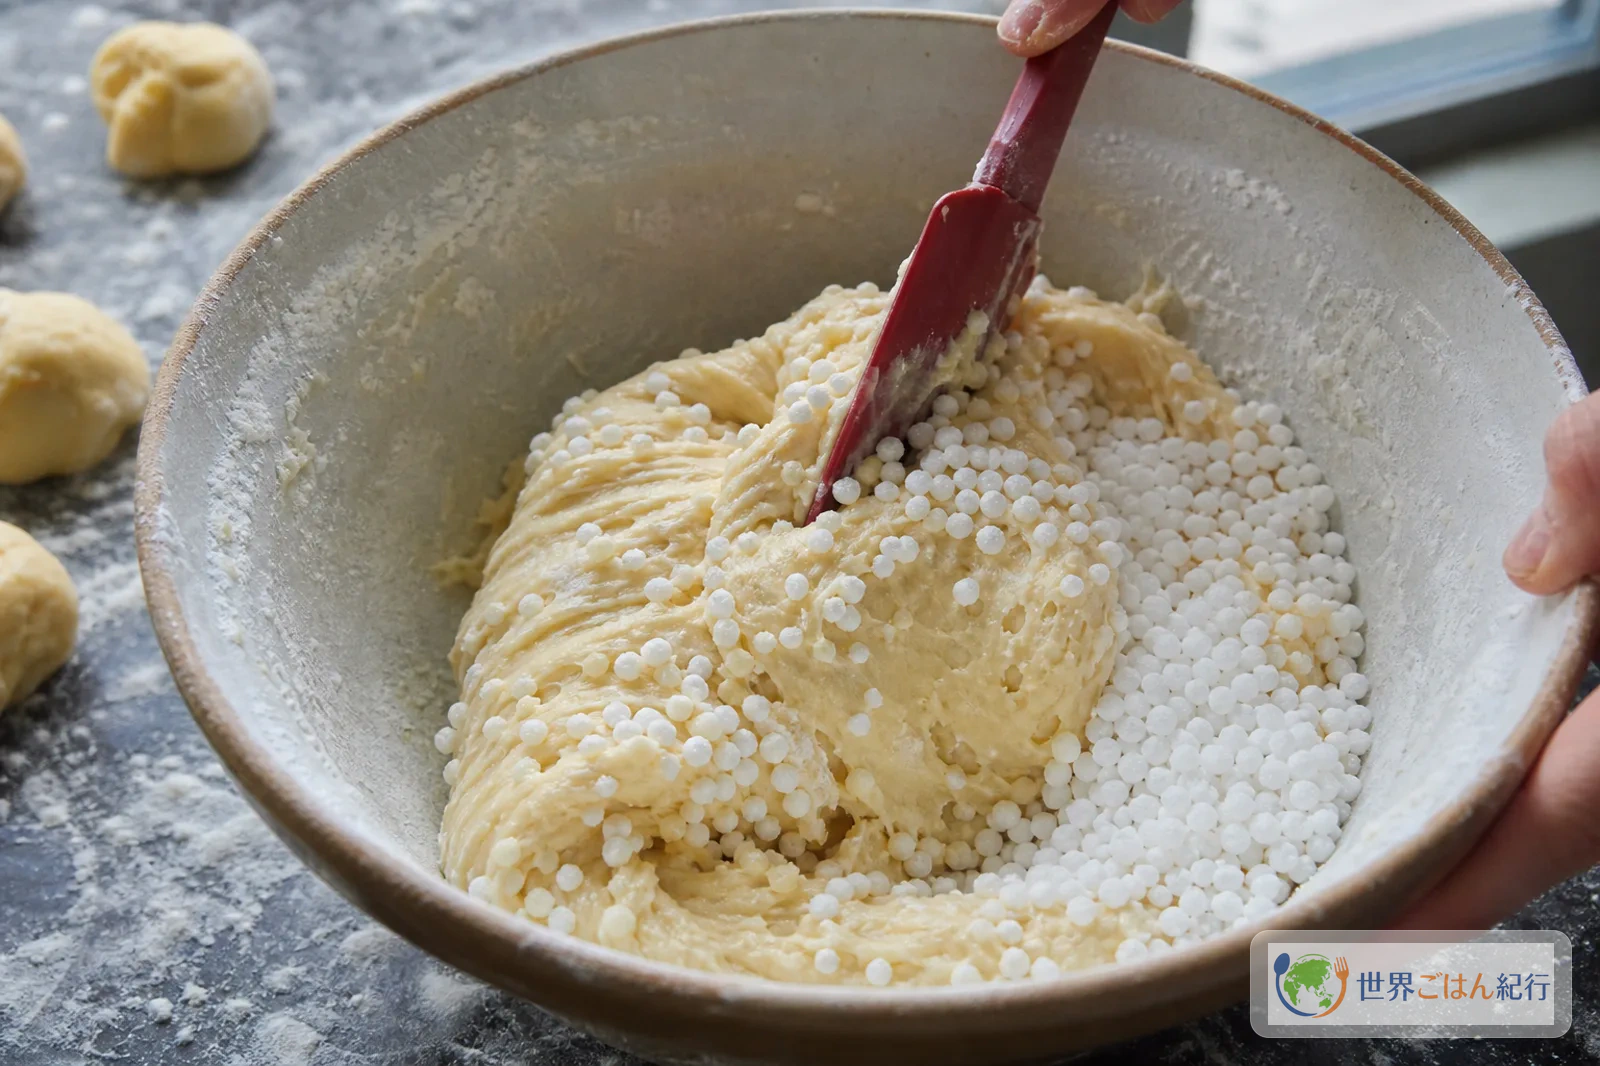
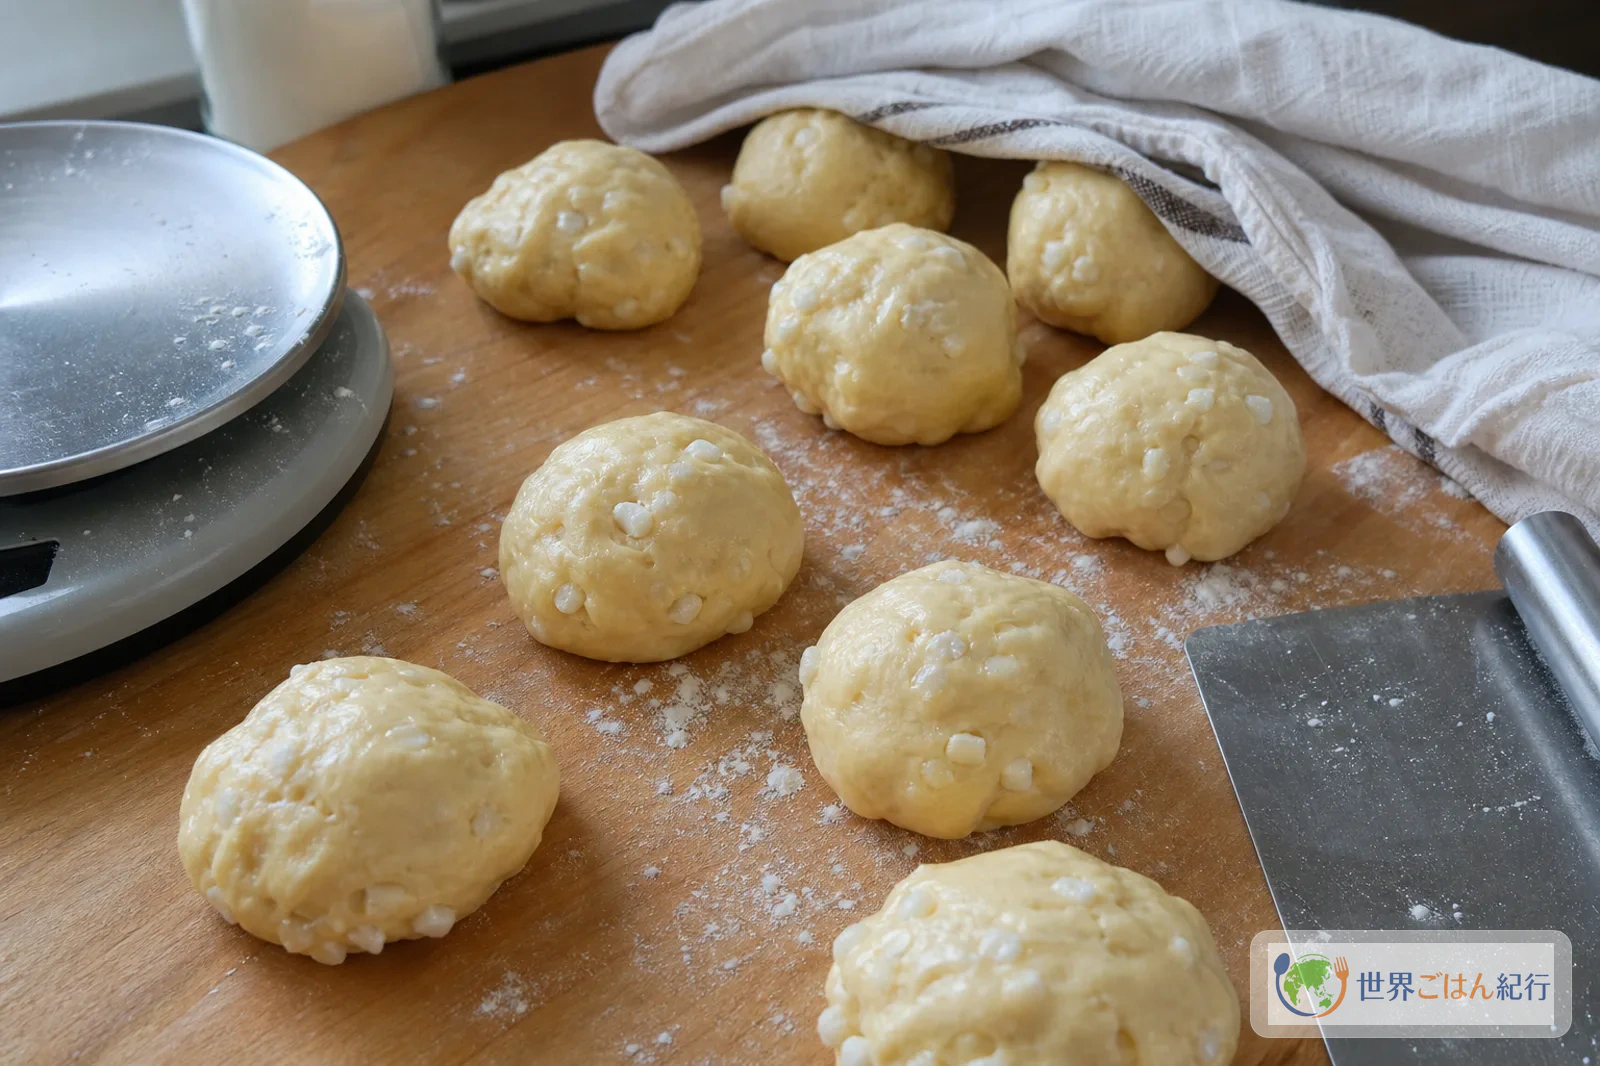
| 30 minutes before eating | Fold in the pearl sugar, divide into 8 and rest | Do not make the dough wait long once the sugar is in. Bake before it turns damp |
| Just before eating | Test bake the first waffle to settle the temperature | If pale at 3 minutes, add 30 seconds; if too dark at 3 1/2 minutes, lower the temperature from the next |
When serving guests, it is less error-prone to use the first waffle as a taste test and bring the second and later to the table. The Liège style can be eaten cool, but the aroma is best about 5 minutes after baking, at the moment the surface sets. Set the plates, brew the drinks and put out a rack before you bake, and you can bake calmly to the last waffle.
If you prepare the night before
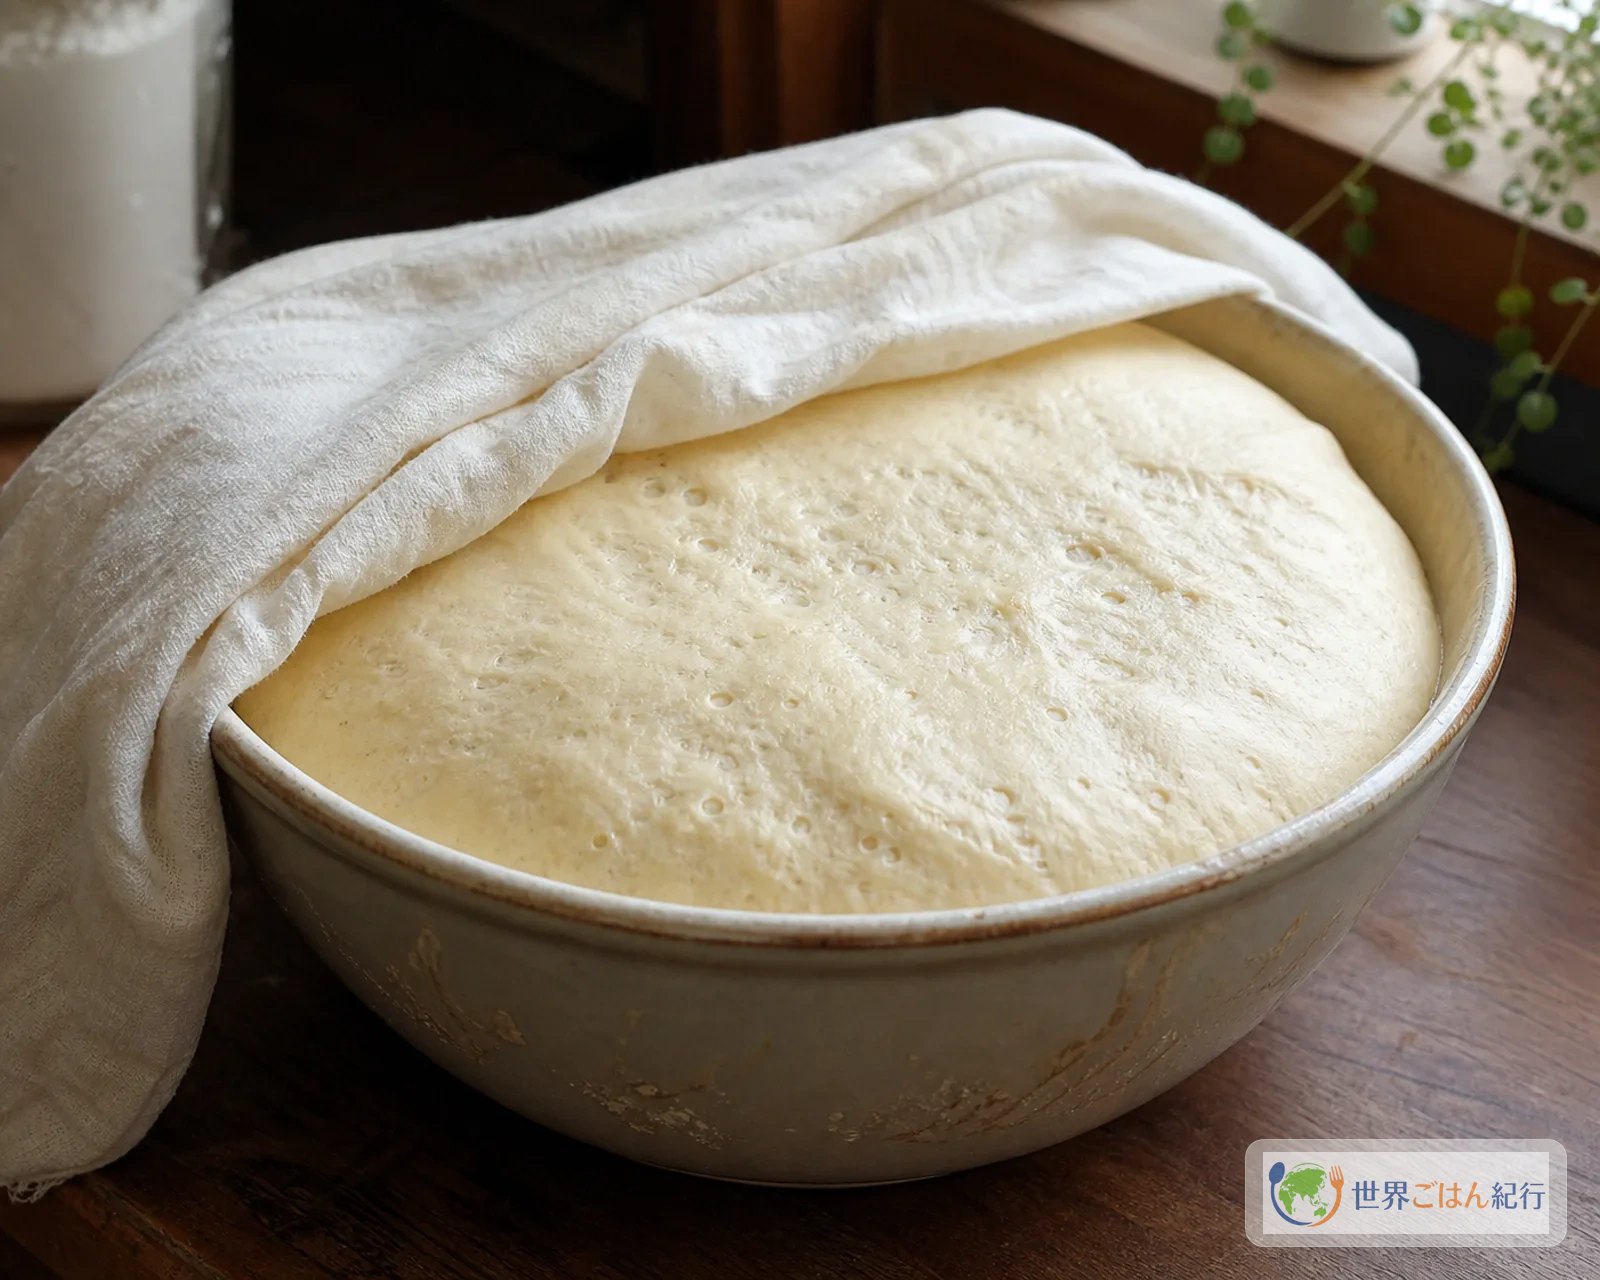
If you want to bake in the morning, stop the first rise in step 4 short. Leave it at room temperature for about 30 minutes, and when the dough has swelled to about 1.3 times, press plastic wrap right onto the surface so it does not dry out, and rest it in the refrigerator for 8–12 hours. The next morning, take it out and leave it for 30 minutes, and fold in the pearl sugar once the dough is no longer too cold. If you mix the sugar in while cold, the butter is firm and the dough tears easily, so wait until a finger press leaves a slight dent.
Dough with the pearl sugar in it is easier to handle if not refrigerated for long. The sugar draws water from the dough and the surface turns damp and sticks to the iron. If you must have it wait after dividing, divide the sugar-folded dough into 8, place on baking parchment and start baking within 1 hour. If you want to make things easy the night before, finish weighing the flour, cutting the butter and deciding where the waffle iron goes, and leave only the sugar folding for the day; this order is least error-prone.
Toward the Brussels style
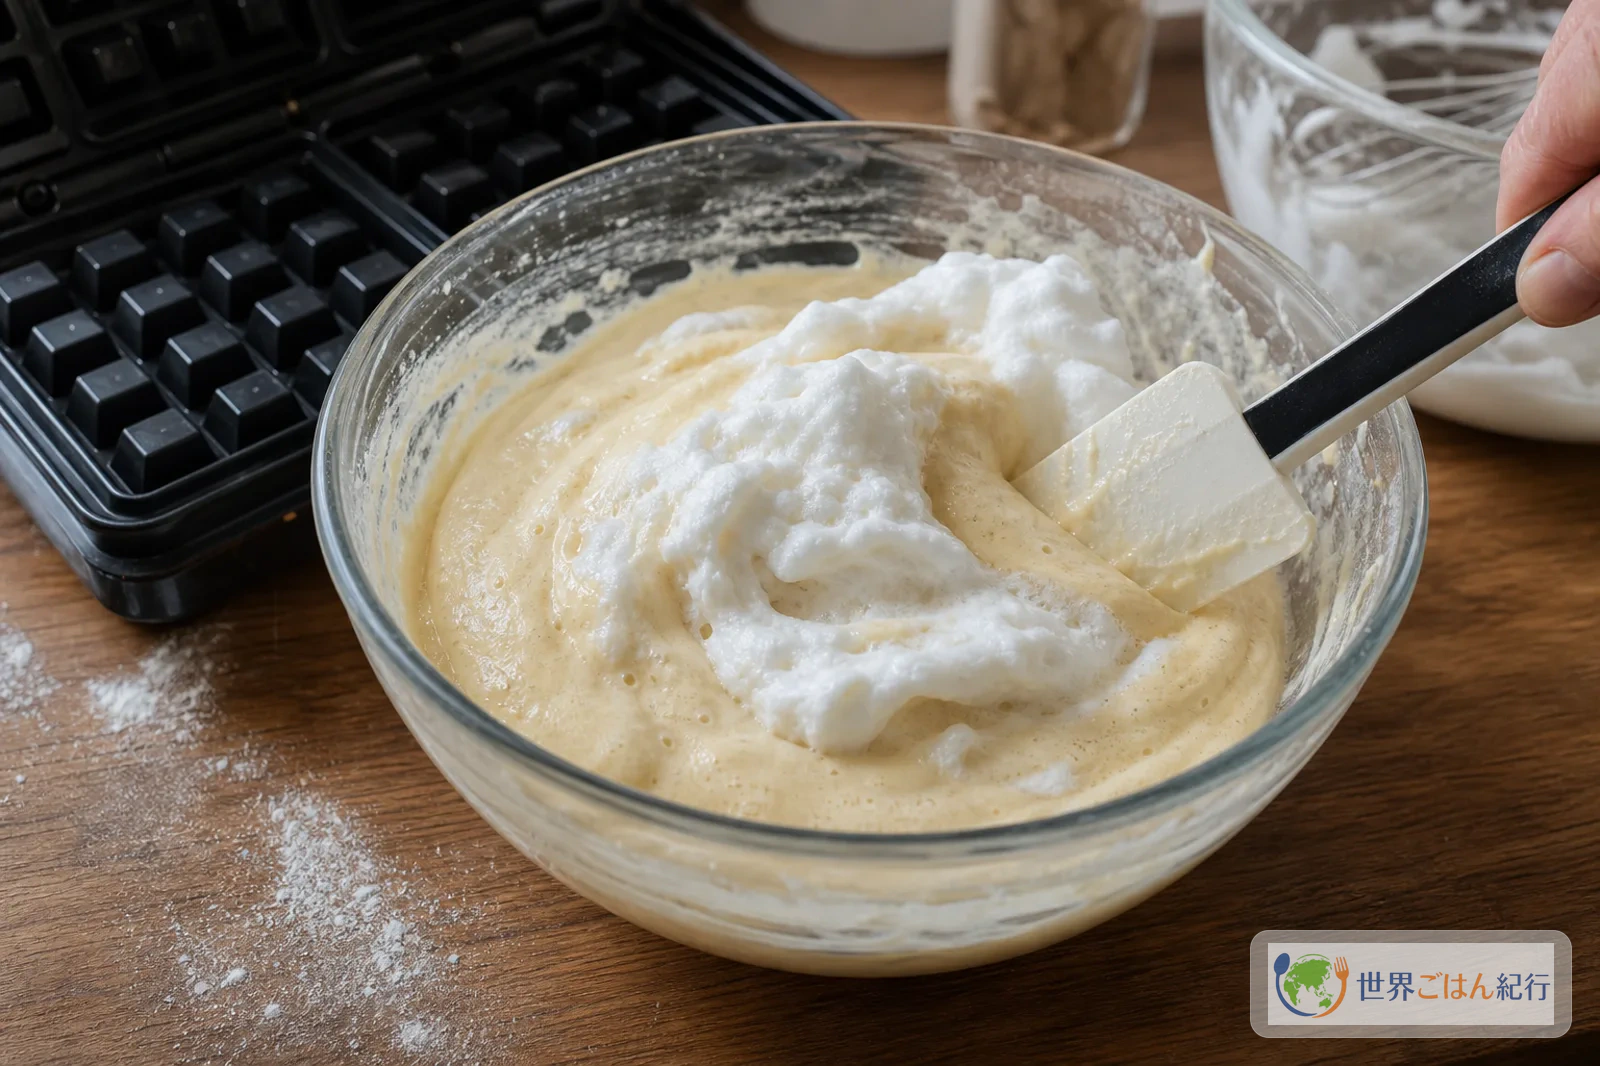
If you want to make the Brussels style, do not thin out the Liège dough above; make a separate batter from the start. Baking a yeasted dough with pearl sugar in a square iron does not give a Brussels waffle. The sugar scorches on the bottom of the plate and the lightness does not come either.
| Ingredient | Guide for 4 servings |
|---|---|
| Cake flour | 220 g |
| Bread flour | 40 g |
| Milk | 260 ml |
| Egg yolks | 2 |
| Egg whites | 2 |
| Melted butter | 70 g |
| Dry yeast | 4 g |
| Sugar | 25 g |
| Salt | 3 g |
| Vanilla extract | 1 ml |
To make it, wake the yeast in the milk, mix in the flour, egg yolks and melted butter and rest 30 minutes. In a separate bowl whip the egg whites to soft-firm peaks and fold them in at the end without crushing the foam. Preheat the waffle iron well to 190–200°C, pour in the batter and bake for 3–4 minutes. It is a success if the outside is light golden brown and, when lifted, it is light enough that the corners stand.
If you sprinkle powdered sugar, do it 30 seconds after the steam from the fresh waffle has settled. Put it on while still too hot and the sugar melts and the surface turns damp. If you add fruit or cream, do not warm the plate and serve the waffle itself hot, and the crisp time lasts a little longer.
Color and causes of failure
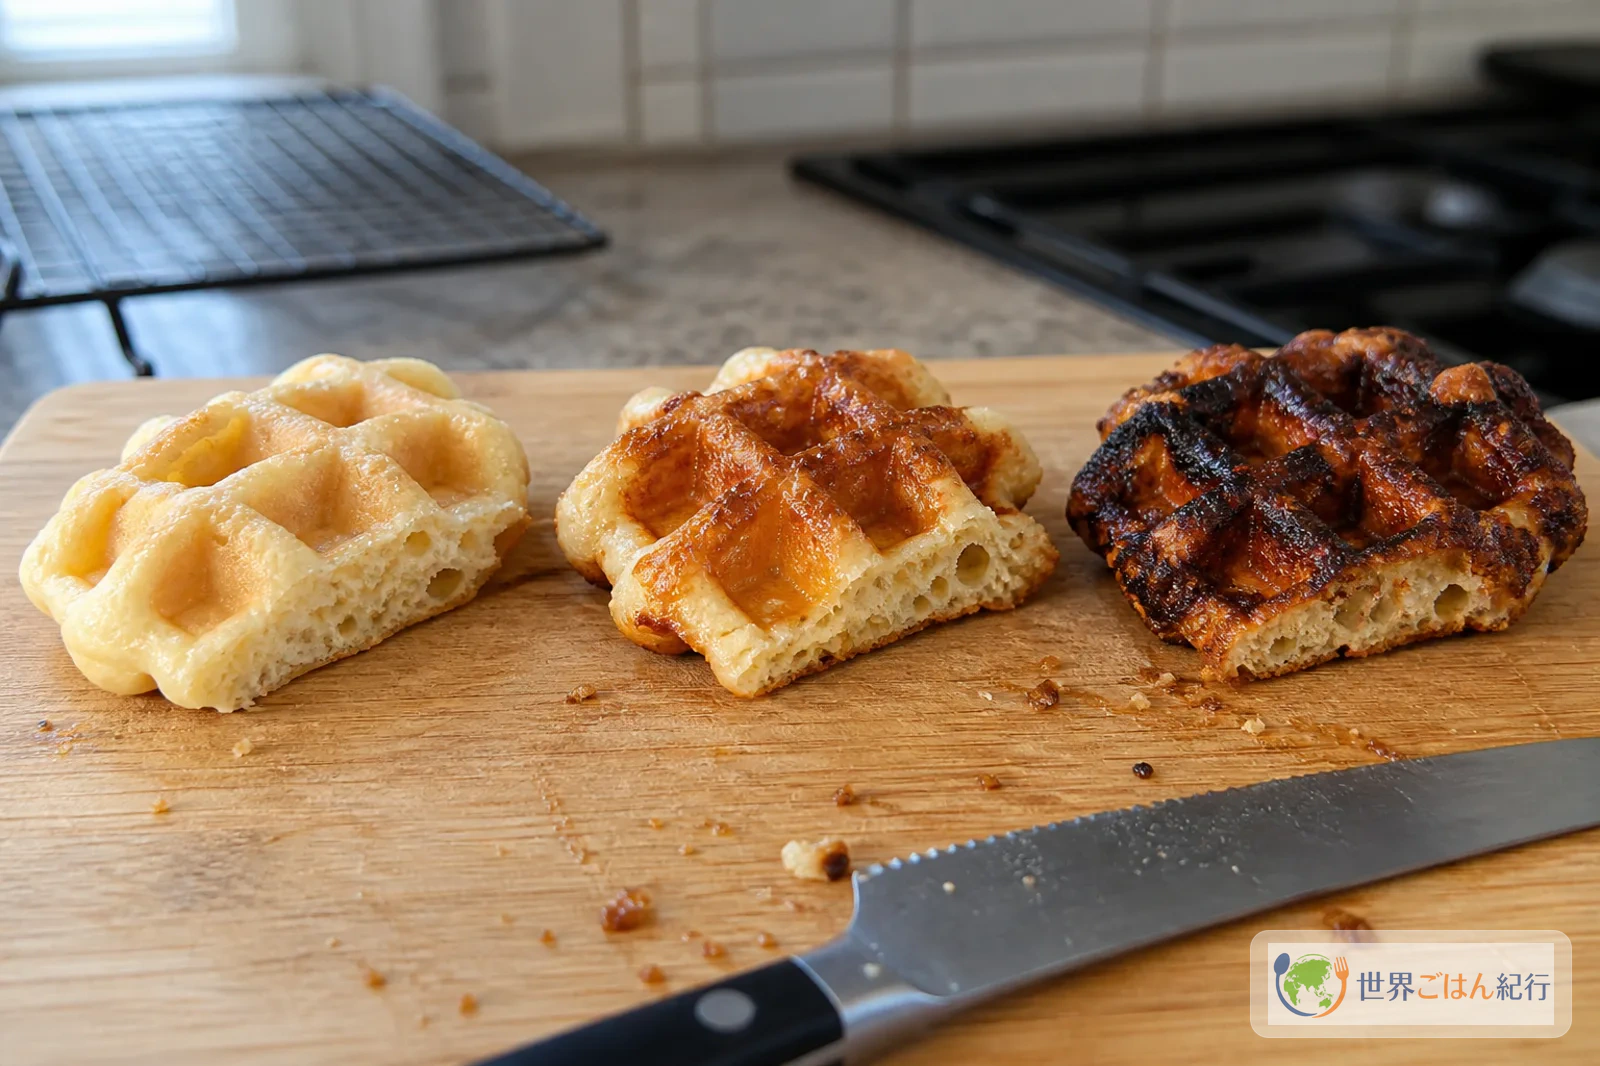
Failures with the Liège style usually come from the relationship between sugar and temperature. Pearl sugar partly stays undissolved to create the texture, while grains touching the iron caramelize. The good range is narrow: pale and the aroma is weak, black and it turns bitter.
It is fine to use the first waffle as a thermometer rather than as a finished product. Open it at 2 1/2 minutes from the start and, if the surface is still white, add 30 seconds at a time. If the peaks of the grid are dark brown at 3 1/2 minutes, lower the temperature one step from the next dough. On a home electric model, the center of the plate can be hotter than the displayed temperature and the edges weaker, so put the dough in the center and do not spread it too far with the lid.
| Symptom | Cause | Fix |
|---|---|---|
| White surface, weak aroma | Not enough preheating, bake too short | Wait until at least 180°C and bake 30 seconds more at a time |
| Black, bitter sugar | Temperature too high, sugar left on the iron | Wipe the iron with a damp cloth before the next dough and lower the temperature by 10°C |
| Raw inside | Dough too large, baking surface too shallow | Divide to about 80 g and bake 4 minutes to let the steam out of the center |
| Hard and heavy | Underproofed, too much flour added | Wait for 1.7 times or more in the first rise and add flour in 10 g steps |
| Sticky and will not release | Butter melted out, sugar too fine | Keep proofing at 28°C or below, and cut coarse sugar crystals to 90 g |
The guide for doneness is the smell as well as the color. When the sweet smell changes to a caramel smell with just a little bitterness, stop there. Waiting until it smells burnt is too late, so on a home waffle iron it is fine to open the lid for the last minute to check.
If you bake the next one with sugar still in the grooves, only the second and later waffles turn suddenly bitter. After moving a baked waffle to the rack, open the lid without switching off, and lightly touch a damp cloth, held with chopsticks, to the grooves. Wring the cloth out firmly, because too many drops make the steam spatter. Wipe off only the black grains and put the next dough on before the plate temperature has dropped fully, and the color comes out more even.
How it is eaten locally, and how to land it in a home kitchen
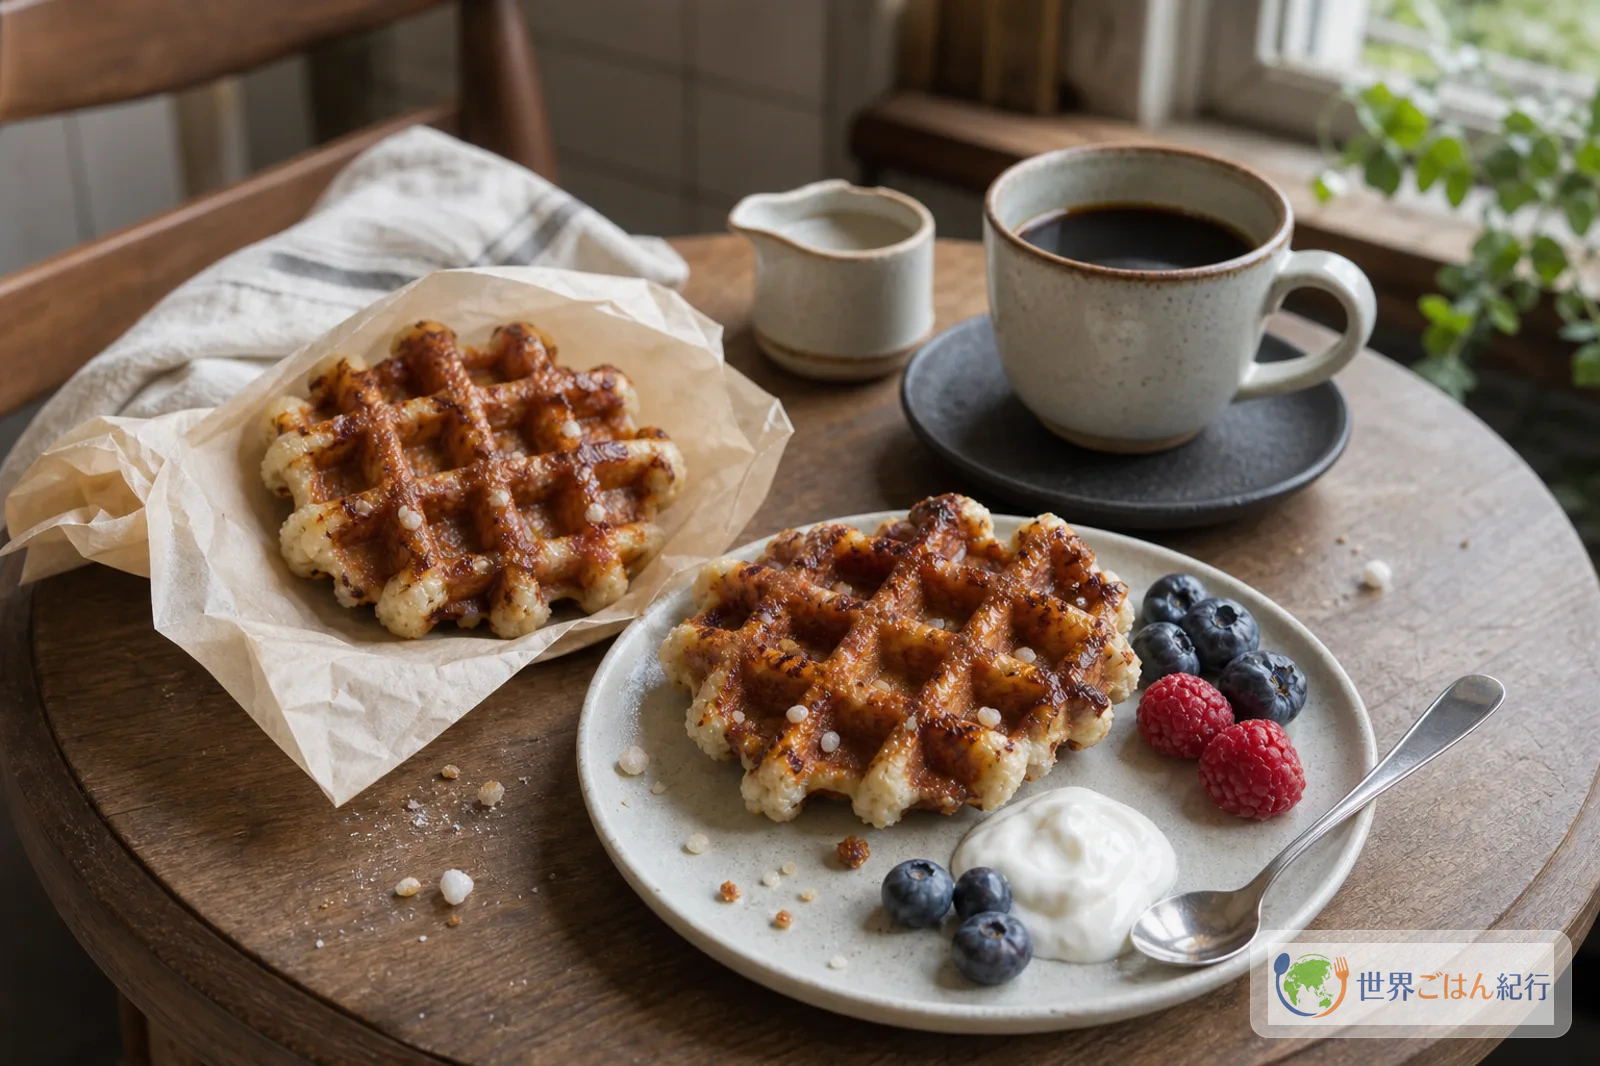
The Liège tourist office presents the Liège waffle as something to enjoy without too much decoration. In town it is often eaten on the move, wrapped in paper, closer to a snack you buy for the aroma than a sweet dressed up with fork and knife.
On a day you bake Liège waffles at home, eat one by hand before you plate anything, and the direction becomes clear. Leave a fresh waffle on the rack for 2 minutes, and when you break it at the point the sugar on the surface has set a little, the outside is hard and the inside still holds steam. It is sweet enough at this moment, so layering chocolate sauce or whipped cream from the start buries the pearl sugar spots.
The Brussels style, on the other hand, is a light batter baked large with room to take powdered sugar and fruit. Even under the same name "Belgian waffle," the Liège style holds sweetness within the dough, while the Brussels style is a dish where sweetness is added after baking. If you plate a Liège waffle with the sensibility of a café waffle, it turns heavy, so at home it is less error-prone to separate the occasions.
| Occasion | Suitable way to serve | What to keep in mind at home |
|---|---|---|
| Nibbling fresh from the iron in the kitchen | Nothing on top, break it by hand | Leave on a rack for only 2 minutes, until it cools enough that the hot sugar will not burn you |
| Afternoon snack | Coffee, tea, a few berries | Make the cream unsweetened or lightly sweetened, up to 40 g per waffle |
| Dessert after a meal | Thin powdered sugar and a tart fruit | If adding chocolate sauce, about 2 tsp so the whole is not too sweet |
| Eating with children | Bake small, with a lighter color | Cut the pearl sugar to 90 g to have fewer hard caramel spots |
If you serve it at home, an afternoon snack with coffee or strong tea comes together better than breakfast. Unsweetened yogurt, berries and a little powdered sugar pile up less sweetness on the pearl sugar than a heap of whipped cream. To lean toward a Belgian meal, a natural sequence is to make carbonnade flamande in the evening and serve waffles the next afternoon with the leftover Belgian beer or coffee.
For children, cut the pearl sugar to 90 g and bake small, 65 g each. Bake for 2 1/2–3 minutes. Make the color a little lighter than for adults and have less of the hard outer caramel, and they are easier to eat.
Belgian and European tables to cook next
If you bake only Belgian waffles, the story ends as "a sweet snack." But think of the Belgian table and beer, stews, creamy fish and chicken dishes and fried street food all stand in the same town. It is more natural for browsing within the site to take a reader who came in through the waffle onward, after the sweet aroma, to Belgium's salty dishes and stews.
| How to build a table | Recipe to pair | Connection |
|---|---|---|
| Make the dinner more Belgian | Carbonnade flamande | After beef braised in beer, baking waffles the next day's snack gives the feel of a Belgian stroll |
| Slip in a gentle creamy dish | Waterzooi (in Japanese) | A dish that brings chicken or fish together with cream, so you can compare how dairy is handled with the sweet waffle |
| Move from the sweet stroll to savory | Frikandel | A fried sausage eaten at Dutch snack bars. Go as far as the "special" with onion and sauce and it leads to the neighboring country's snack culture |
| Line up cheese and flour dishes | Crozets de Savoie | Close in the idea of baking small flour things, and easy to build into a menu for a cold day in Europe |
| Widen the talk about baking irons and table tools | Raclette | Gives readers hesitating over a dedicated appliance a way to decide before adding more equipment |
| Compare how sugar is handled | Baklava (in Japanese) | A sweet pastry too, but built on soaking in syrup rather than baking in grain sugar, so the difference is clear |
| Move to the plain sweetness of flour dishes | Ballokume (in Japanese) | A pastry baked without an iron, so you can try another European flour dish before buying a waffle iron |
| Move to the sweet meringue family | Pavlova (in Japanese) | Also a baked sweet, but sugar is handled completely differently. You can compare caramel spots with a light meringue |
As work, the Belgian waffle sits between bread and baked sweets. The waiting for fermentation is close to bread, and baking in an iron is close to appliance cooking. So once you bake it well, it is easy to move on to other European flour dishes and cheese dishes. On days you cannot decide what to cook next, slipping in a savory stew or a dish that melts cheese, rather than continuing with sweet plates, keeps the whole table from getting too heavy.
Storage and frequently asked questions
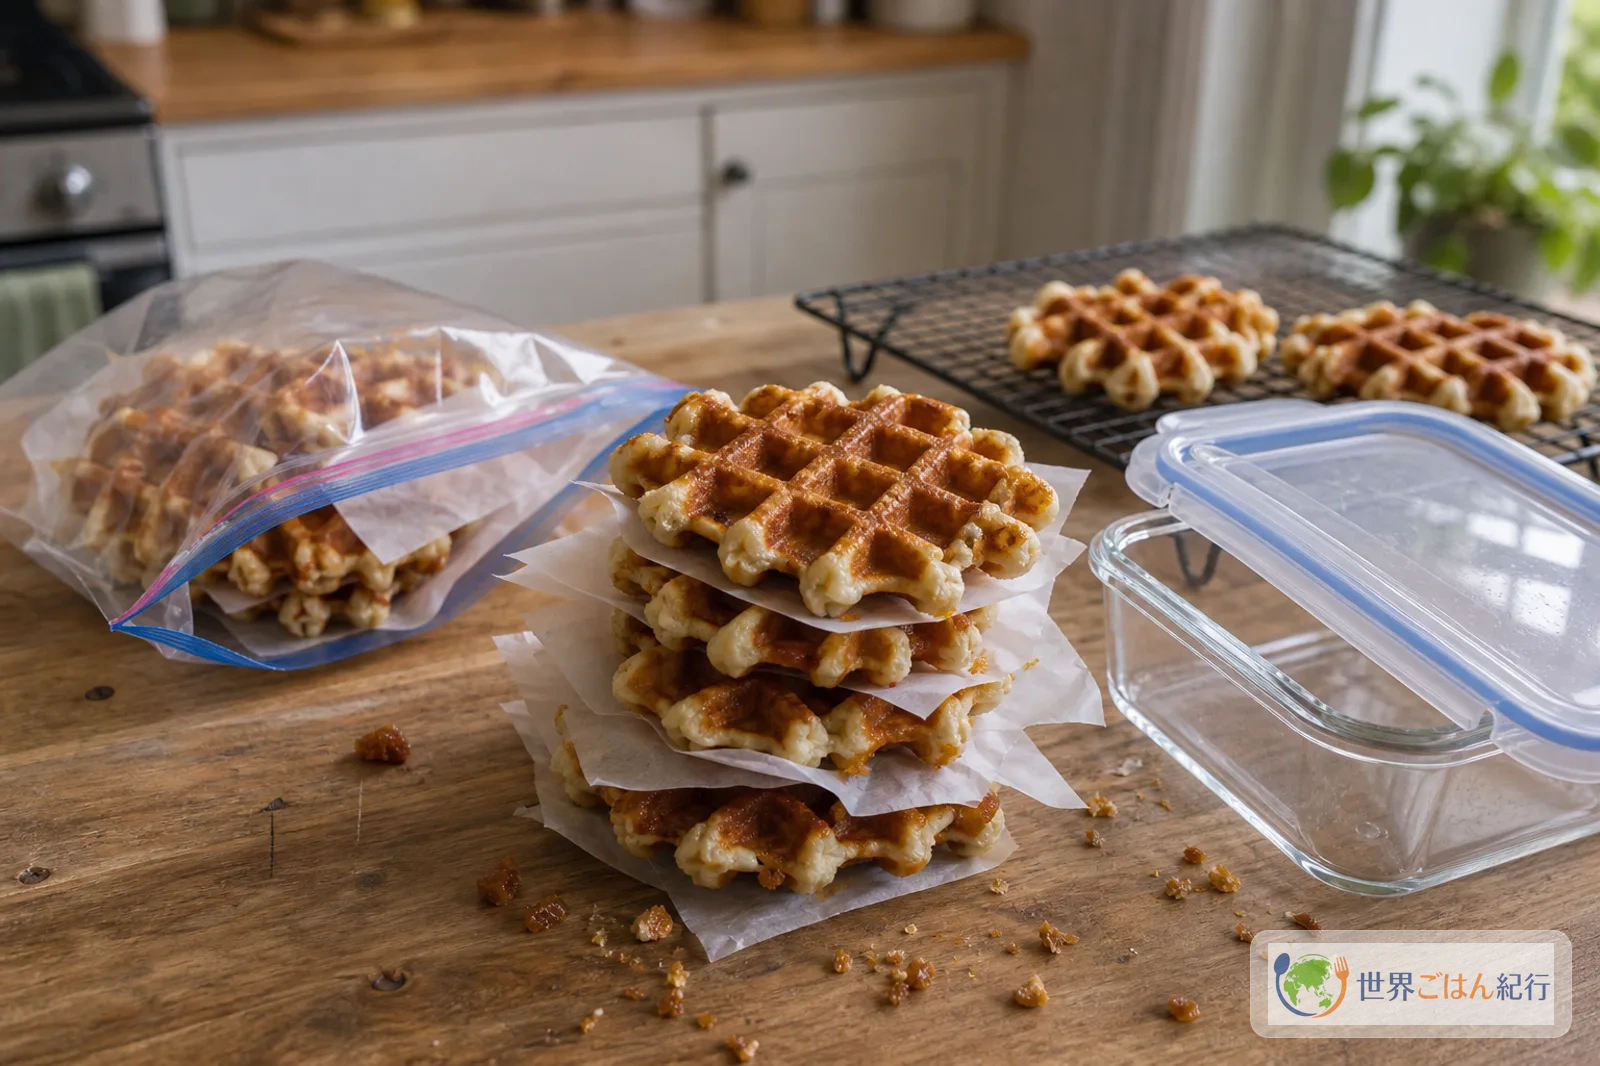
Can I make them ahead?
They taste best the day they are baked. To store, cool them completely on a rack, wrap in paper and put in an airtight container. As a guide, 12 hours at room temperature, 2 days in the refrigerator, 3 weeks in the freezer. Freeze each one wrapped in plastic wrap in a storage bag.
How do I reheat them?
After refrigeration or freezing, warm the center for just 20 seconds in a 600 W microwave, then bake 2 minutes in a toaster oven at 180°C. With the microwave only, the sugar on the surface turns damp. With the toaster only, the outside tends to scorch while the center stays cold, so combine a short microwave with a short toaster.
Can I make the dough the day before?
Up to step 4 you can prepare it the day before. Do not finish the first rise completely; put it in the refrigerator after about 30 minutes at room temperature, and the next morning bring it back to room temperature for about 30 minutes before folding in the pearl sugar. If you leave the dough overnight with sugar mixed in, the grains turn damp and stick to the iron, so it is less error-prone to add the pearl sugar right before baking.
Can I make it without pearl sugar?
You can, but the Liège character is weaker. With nib sugar use the same 110 g, and with fine coarse sugar crystals use 90 g. If you make it with granulated sugar only, add 40 g to the dough and consider that no grainy sugar texture will show on the surface. If you want caramel spots, pressing 10 g of coarse sugar crystals into the dough surface just before baking gets closer.
Can waffle sugar and nib sugar be used the same way?
In home cooking, waffle sugar, nib sugar and pearl sugar can be used for the same purpose. The difference is in the grain size. Large grains tend to leave crisp spots, while small grains scatter into the dough more but scorch faster on the bottom of the plate. The first time, mix in 110 g, and if the color comes out too dark, cut it to 100 g next time. Folding it into the dough gives a more Liège-like texture than sprinkling extra on the surface.
What should I look at on a pearl sugar product page?
First look at the photo of the grains and the description of its use. Even when the product name says pearl sugar, a fine powdery type dissolves into the dough before baking, and the hard spots of the Liège style do not remain. Choose one where the photo shows white, angular grains and the description mentions "waffle," "baking in" or "baking supplies" and you are unlikely to go wrong.
A size from about 250 g is easier to use. This recipe uses 110 g at a time, so a 100 g bag ends with the test bake. If you buy a big bag, the grains clump when damp, so after opening move it to an airtight bag and set the next baking day, and less will go to waste. If you only have a shallow iron, avoid products with oversized grains and bake with 100 g the first time to see how it scorches.
Is a cooking thermometer essential?
Not essential, but it reduces failures if this is your first Liège waffle. Warming milk by finger feel alone can leave it too lukewarm in winter and slow the fermentation, and hurrying to rewarm it can make it too hot. Checking 35–38°C once with a thermometer makes it easier to remember what that lukewarm feel is from the next time.
Even on a home waffle iron whose surface temperature you cannot measure directly, it helps manage the dough side. Just being able to see the milk, the proofing place and the chill of dough taken out of the fridge makes it easier to sort out whether the cause is scorched sugar, slack dough or underproofing.
Can I bake it in a sandwich press?
You can bake it in a shallow-grid sandwich press, but the thickness of the Liège style is hard to get. Reduce to 60 g each and bake 2 1/2 minutes per side over medium-low heat. A stovetop iron scorches quickly, so treat the first waffle as a test bake and lower the heat one notch if the color is strong.
What should I check before buying a waffle iron?
First look at the depth of the grids, temperature or browning control, and ease of cleaning. With the Liège style, the pearl sugar melts and stays in the grooves, so a model with removable plates, or at least a shape that lets a cloth into the grooves, is easier to keep using. You can taste-test with a shallow iron, but the thickness of the center and the irregular roundness are hard to get.
If you also want to make the Brussels style, choose a deep one that bakes large and square. If it is just the Liège style, put a clear preheat signal and a weight that is easy to take in and out of the kitchen ahead of professional size. For a monthly treat, you will not keep at it if it is a hassle every time.
Which is better, electric or stovetop?
For a first time, electric suits you. The temperature is steady and there are fewer failures of scorching only one side. A stovetop iron lets you watch the color finely, but with strong heat the sugar blackens quickly. If you use a stovetop one, start with 2 minutes on the first side over medium-low heat, and add 30 seconds at a time once the peaks of the grid are a light golden brown. With either type, let the hot sugar cool before cleaning after you finish baking.
Which is better for a beginner, Liège or Brussels?
At home the Liège style is easier to start with. It is a yeasted dough so there is waiting time, but the dough is firm, the amount going into the iron is easy to adjust, and the flavor does not drop much once cool after baking. The Brussels style is charming for its lightness, but it needs the routine of eating it fresh, the whipped egg whites and the heat of a deep square iron. First get the feel of the sugar and the color with the Liège style, then move to the Brussels style once you are used to it, and you will fail less.
Can I put the same toppings on as with the Brussels style?
A small amount is fine, but the Liège dough itself is sweet, so sweet sauce or cream on top makes it heavy. With fruit, about 80 g berries, and with cream, about 40 g unsweetened or lightly sweetened. The upper limit of what to add is different from the Brussels style, which is eaten with powdered sugar alone.
Sources
- Focus on Belgium, "Did you know there is a difference between the Liege waffle and the Brussels waffle?"
- Visit Brussels, "Everything you need to know about waffles in Brussels"
- Visitez Liège, "L'Authentique Gaufre de Liège"
- Ampi, "The differences between Brussels waffle and Liege waffle"
- Ampi, "Recipe: Home-made Liege waffles"